3. GetPublii Multi-Language
This guide helps you assign different menus to different pages or posts.
You can choose which menu to use for each specific page or post on your website.
In this guide, you’ll learn how to create a multi-language menu on your Publii website Publii (https://getpublii.com).
For this example, I used the paid Carla template, but these steps also work with free templates.
Step 1: Create a Language Selection Field in the "Other Options" Area
To begin, add a custom field for selecting the language of your posts and pages:
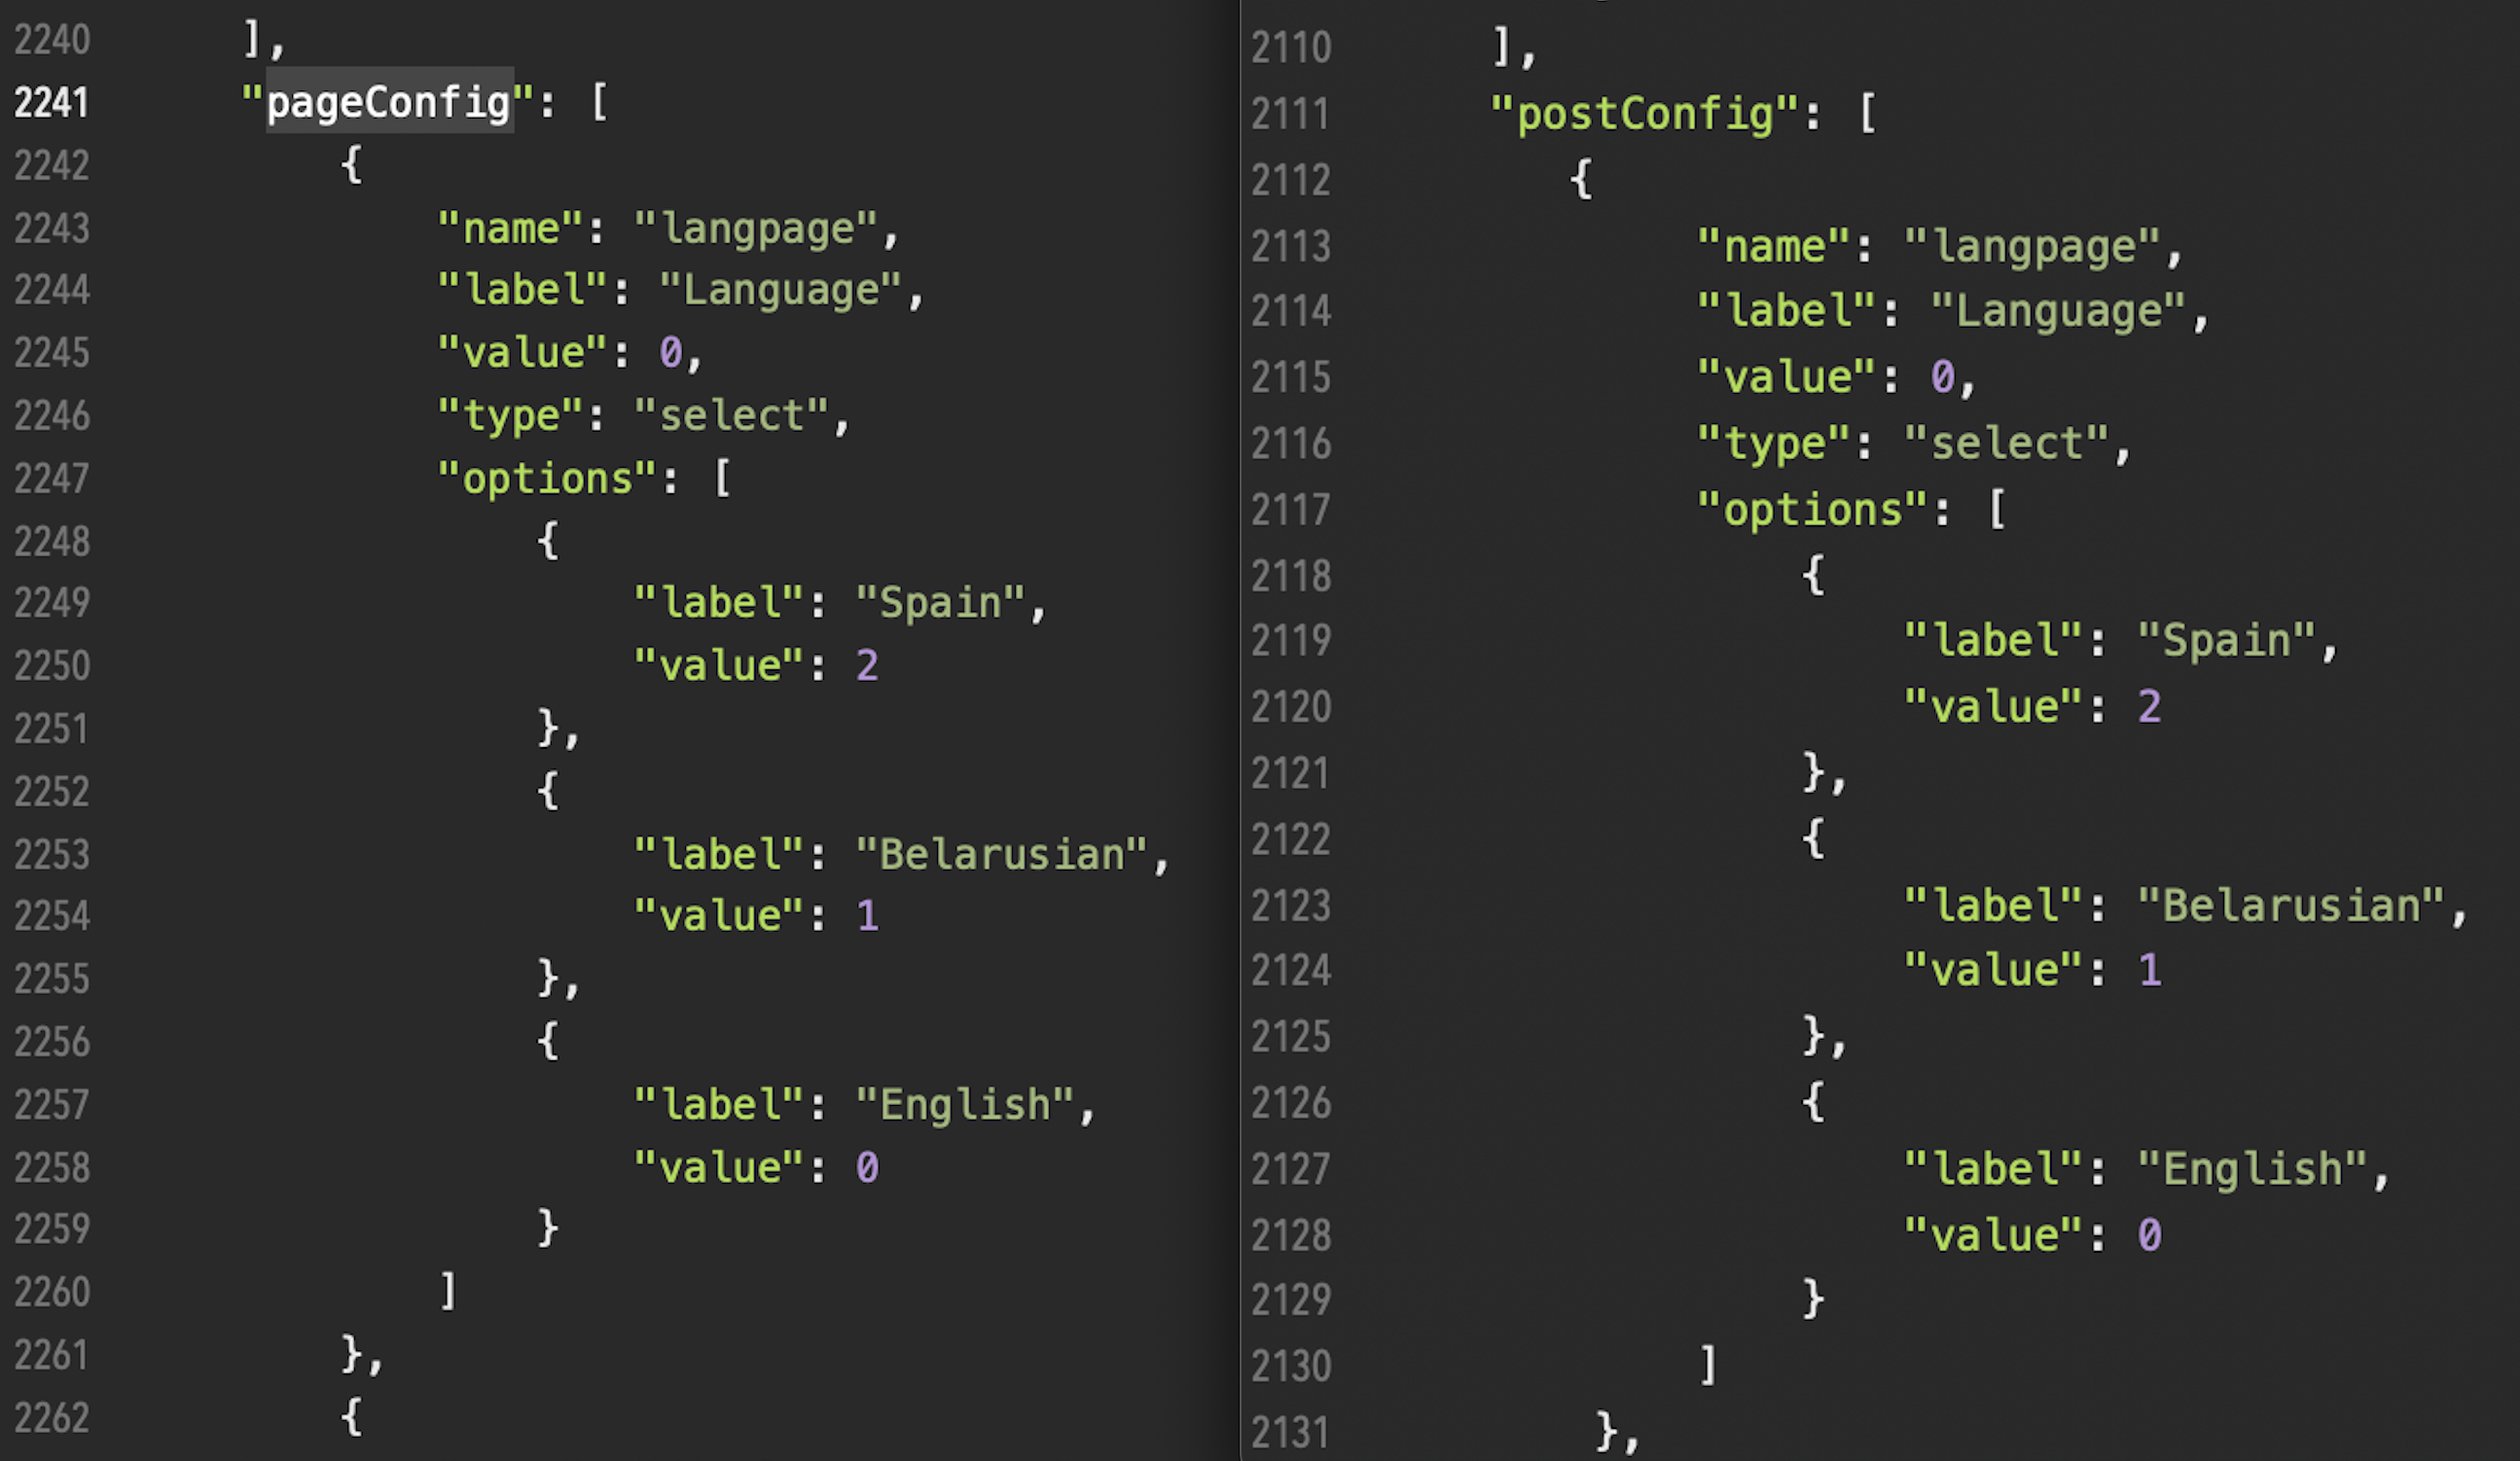
- Open the
config.jsonfile located in:/Publii/sites/YOUR_WEBSITE/input/themes/THEME_NAME/config.json - In the
postConfigandpageConfigblocks, add the following code:
{
	"name": "langpage",
	"label": "Language",
	"value": 0,
	"type": "select",
	"options": [
		{
			"label": "Spanish",
			"value": 2
		},
		{
			"label": "Belarusian",
			"value": 1
		},
		{
			"label": "English",
			"value": 0
		}
	]
},
-
Look like this.
-
Save the file, close Publii, and then reopen it to check if the Language field appears in the "Other Options" area.

Step 2: Add New Menu Slots for Each Language
-
Open the
config.jsonfile located in:/Publii/sites/YOUR_WEBSITE/input/themes/THEME_NAME/config.json -
In the
menusblock, duplicatemainMenucode and change it:
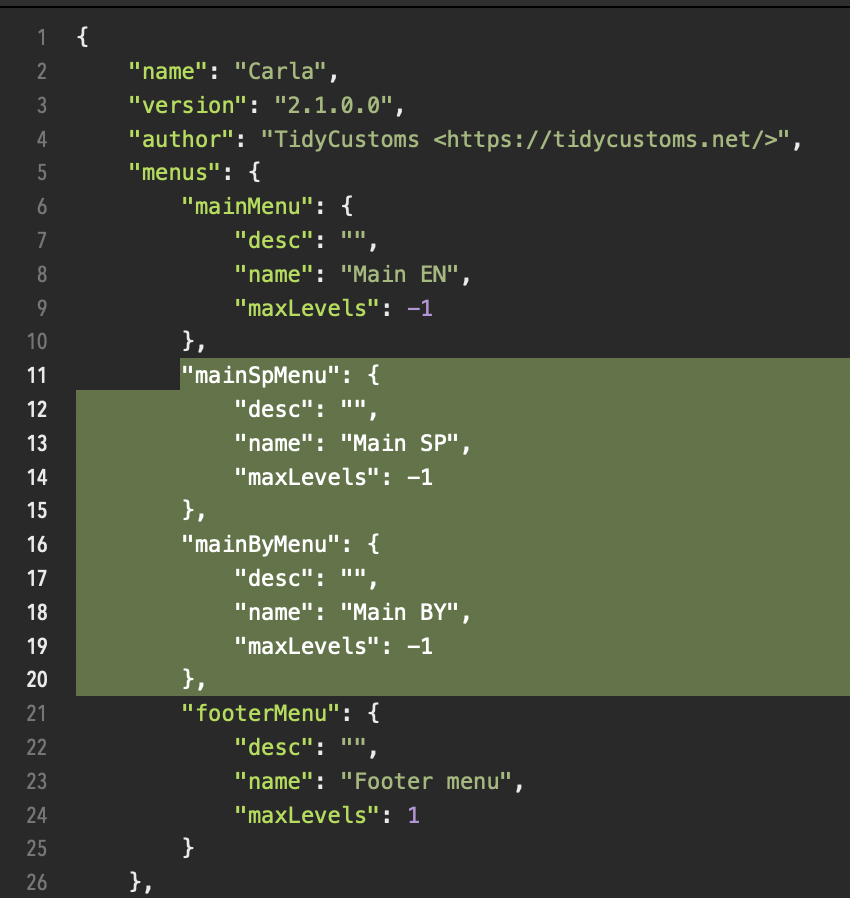
-
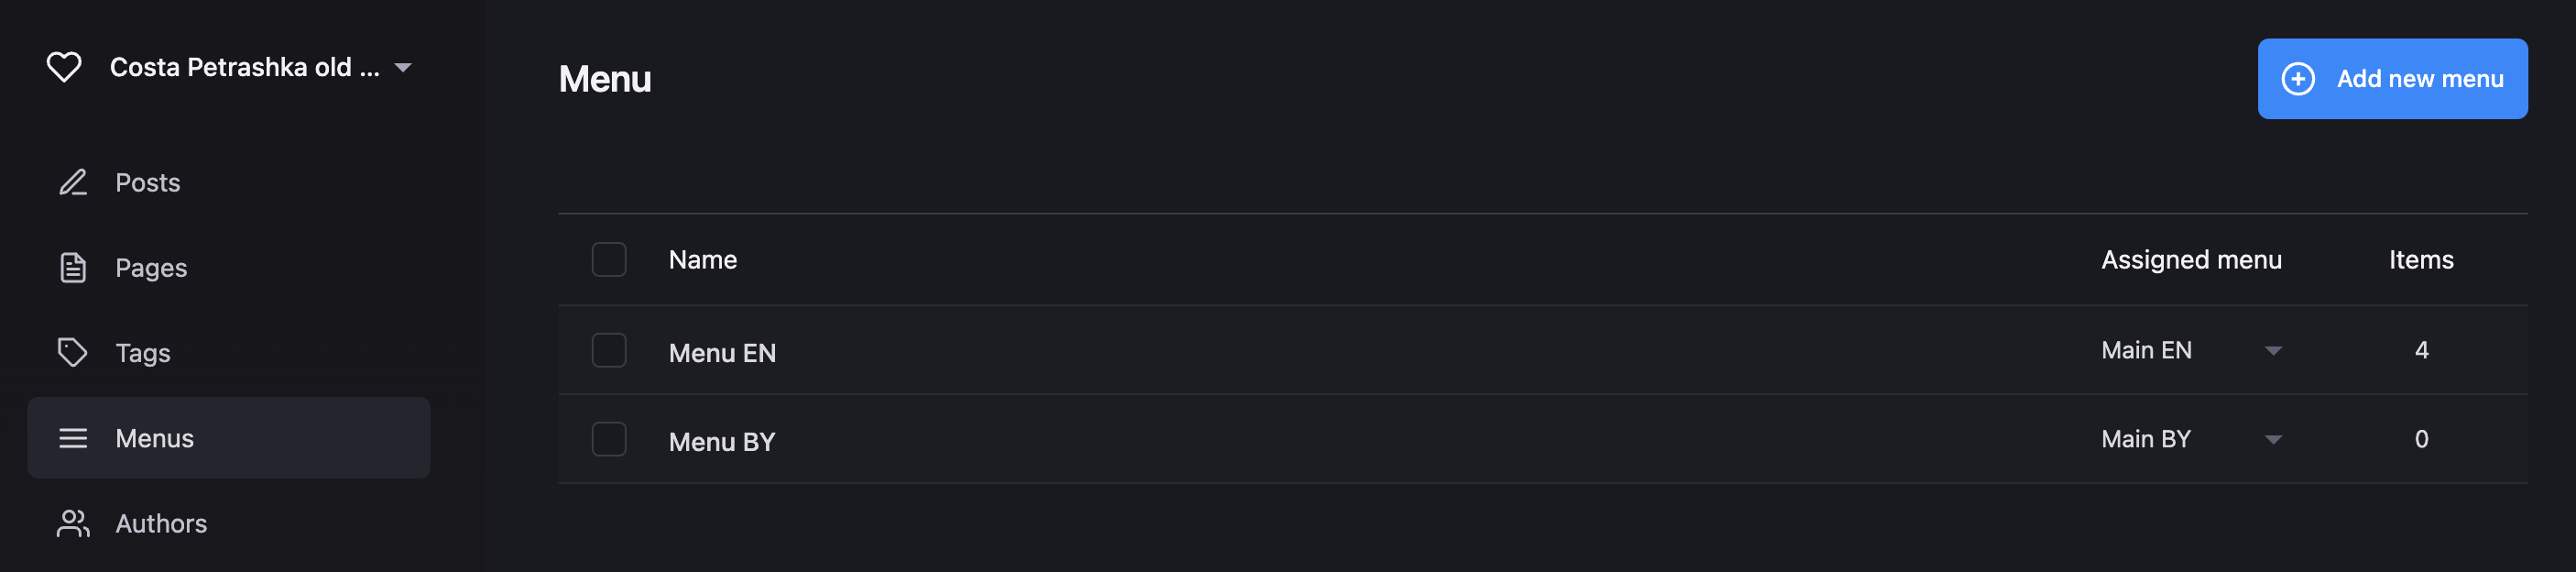
Assign the corresponding menus to the respective language slots.
Step 3: Update the File with {{> menu menus.mainMenu}} block
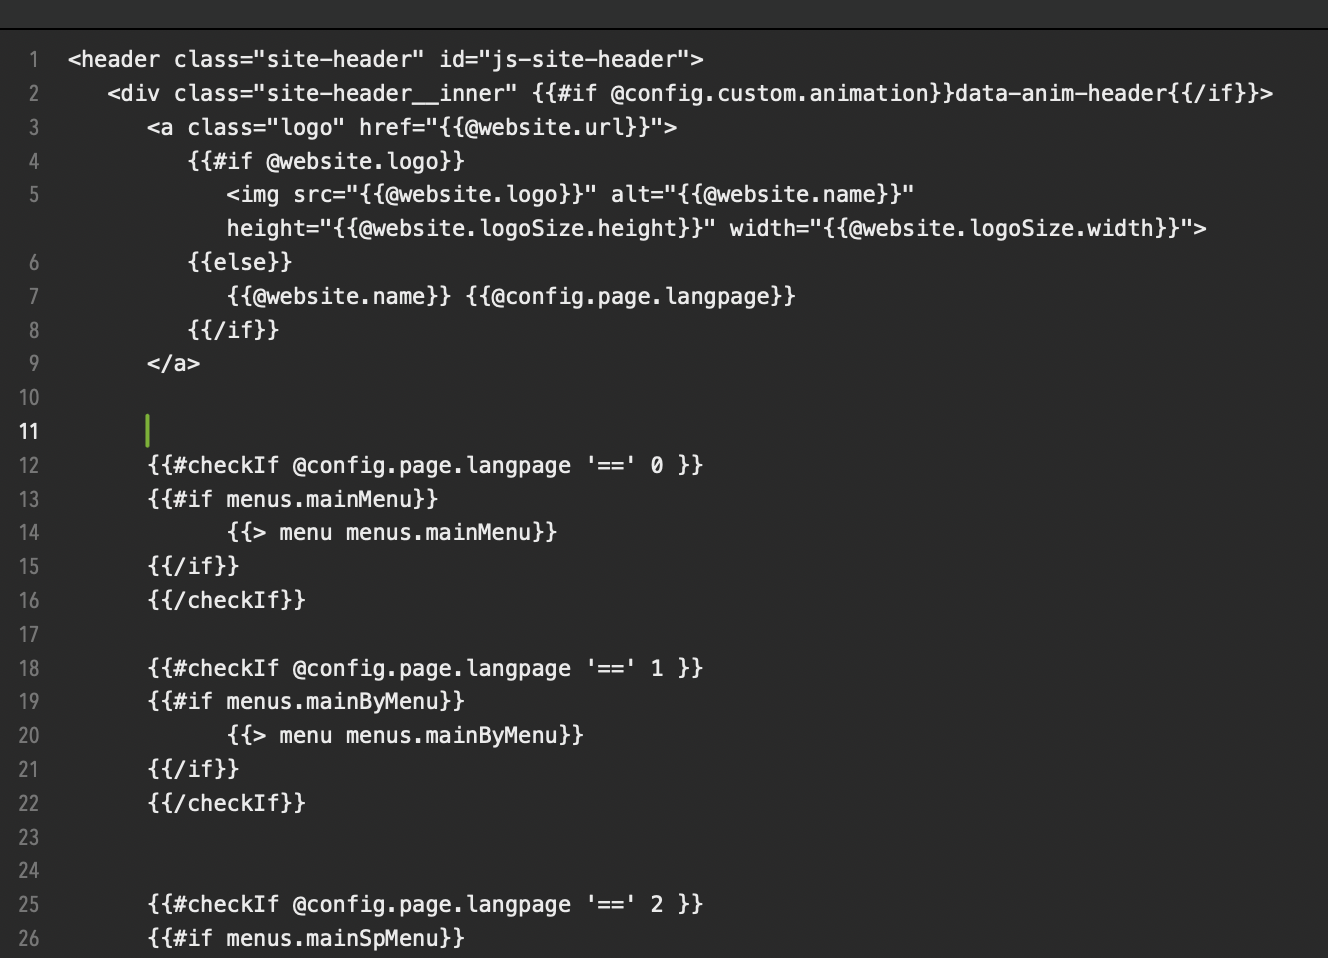
To display the appropriate menu based on the selected language, you can change use conditions to show used language menu and hide unused menu:
- Open the
navbar.hbs(in Massively and Tattoo this file has nametop.hbs)
file located at:/Publii/sites/YOUR_WEBSITE/input/themes/THEME_NAME/partials/ - Add
#checkIfconditions for@config.page.langpageand@config.post.langpagevariables - You can use this code:
      {{#checkIf @config.page.langpage '==' 0 }}
      {{#if menus.mainMenu}}
            {{> menu menus.mainMenu}}
      {{/if}}
      {{/checkIf}}

      {{#checkIf @config.page.langpage '==' 1 }}
      {{#if menus.mainByMenu}}
            {{> menu menus.mainByMenu}}
      {{/if}}
      {{/checkIf}}


      {{#checkIf @config.page.langpage '==' 2 }}
      {{#if menus.mainSpMenu}}
            {{> menu menus.mainSpMenu}}
      {{/if}}
      {{/checkIf}}


      {{#checkIf @config.post.langpage '==' 0 }}
      {{#if menus.mainMenu}}
            {{> menu menus.mainMenu}}
      {{/if}}
      {{/checkIf}}

      {{#checkIf @config.post.langpage '==' 1 }}
      {{#if menus.mainByMenu}}
            {{> menu menus.mainByMenu}}
      {{/if}}
      {{/checkIf}}


      {{#checkIf @config.post.langpage '==' 2 }}
      {{#if menus.mainSpMenu}}
            {{> menu menus.mainSpMenu}}
      {{/if}}
      {{/checkIf}}
4. Save your changes.
Step 4: Dynamic update (html lang="en-gb")
- Open the
nead.hbsfile located at:/Publii/sites/YOUR_WEBSITE/input/themes/THEME_NAME/partials/ - Find row
<html lang="{{ @website.language }}"> - Add
#checkIfconditions for@config.page.langpageand@config.post.langpagevariables - You can use this code:
{{#checkIfAny @config.page @config.post}}
	{{#checkIf @config.page.langpage '==' 0 }}
	    <html lang="en-GB">
	{{/checkIf}}
	{{#checkIf @config.page.langpage '==' 1 }}
	    <html lang="be-BY">
	{{/checkIf}}
	{{#checkIf @config.page.langpage '==' 2 }}
	    <html lang="es-ES">
	{{/checkIf}}
	{{#checkIf @config.post.langpage '==' 0 }}
	    <html lang="en-GB">
	{{/checkIf}}
	{{#checkIf @config.post.langpage '==' 1 }}
	    <html lang="be-BY">
	{{/checkIf}}
	{{#checkIf @config.post.langpage '==' 2 }}
	    <html lang="es-ES">
	{{/checkIf}}
{{else}}
   <html lang="{{@website.language}}">
{{/checkIfAny}}
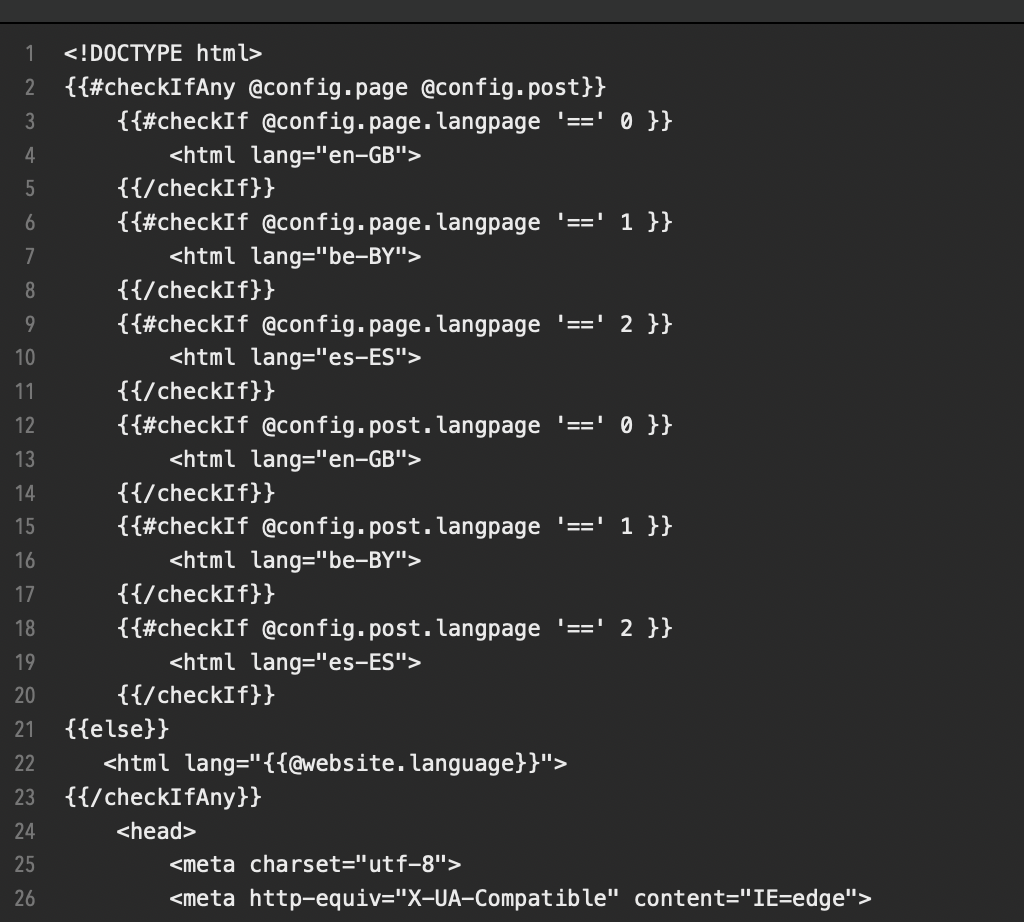
5. Save your changes.
Step 5: Test Your Multi-Language Menu
Once everything is set up, preview your site to ensure that the menus switch correctly based on the selected language.
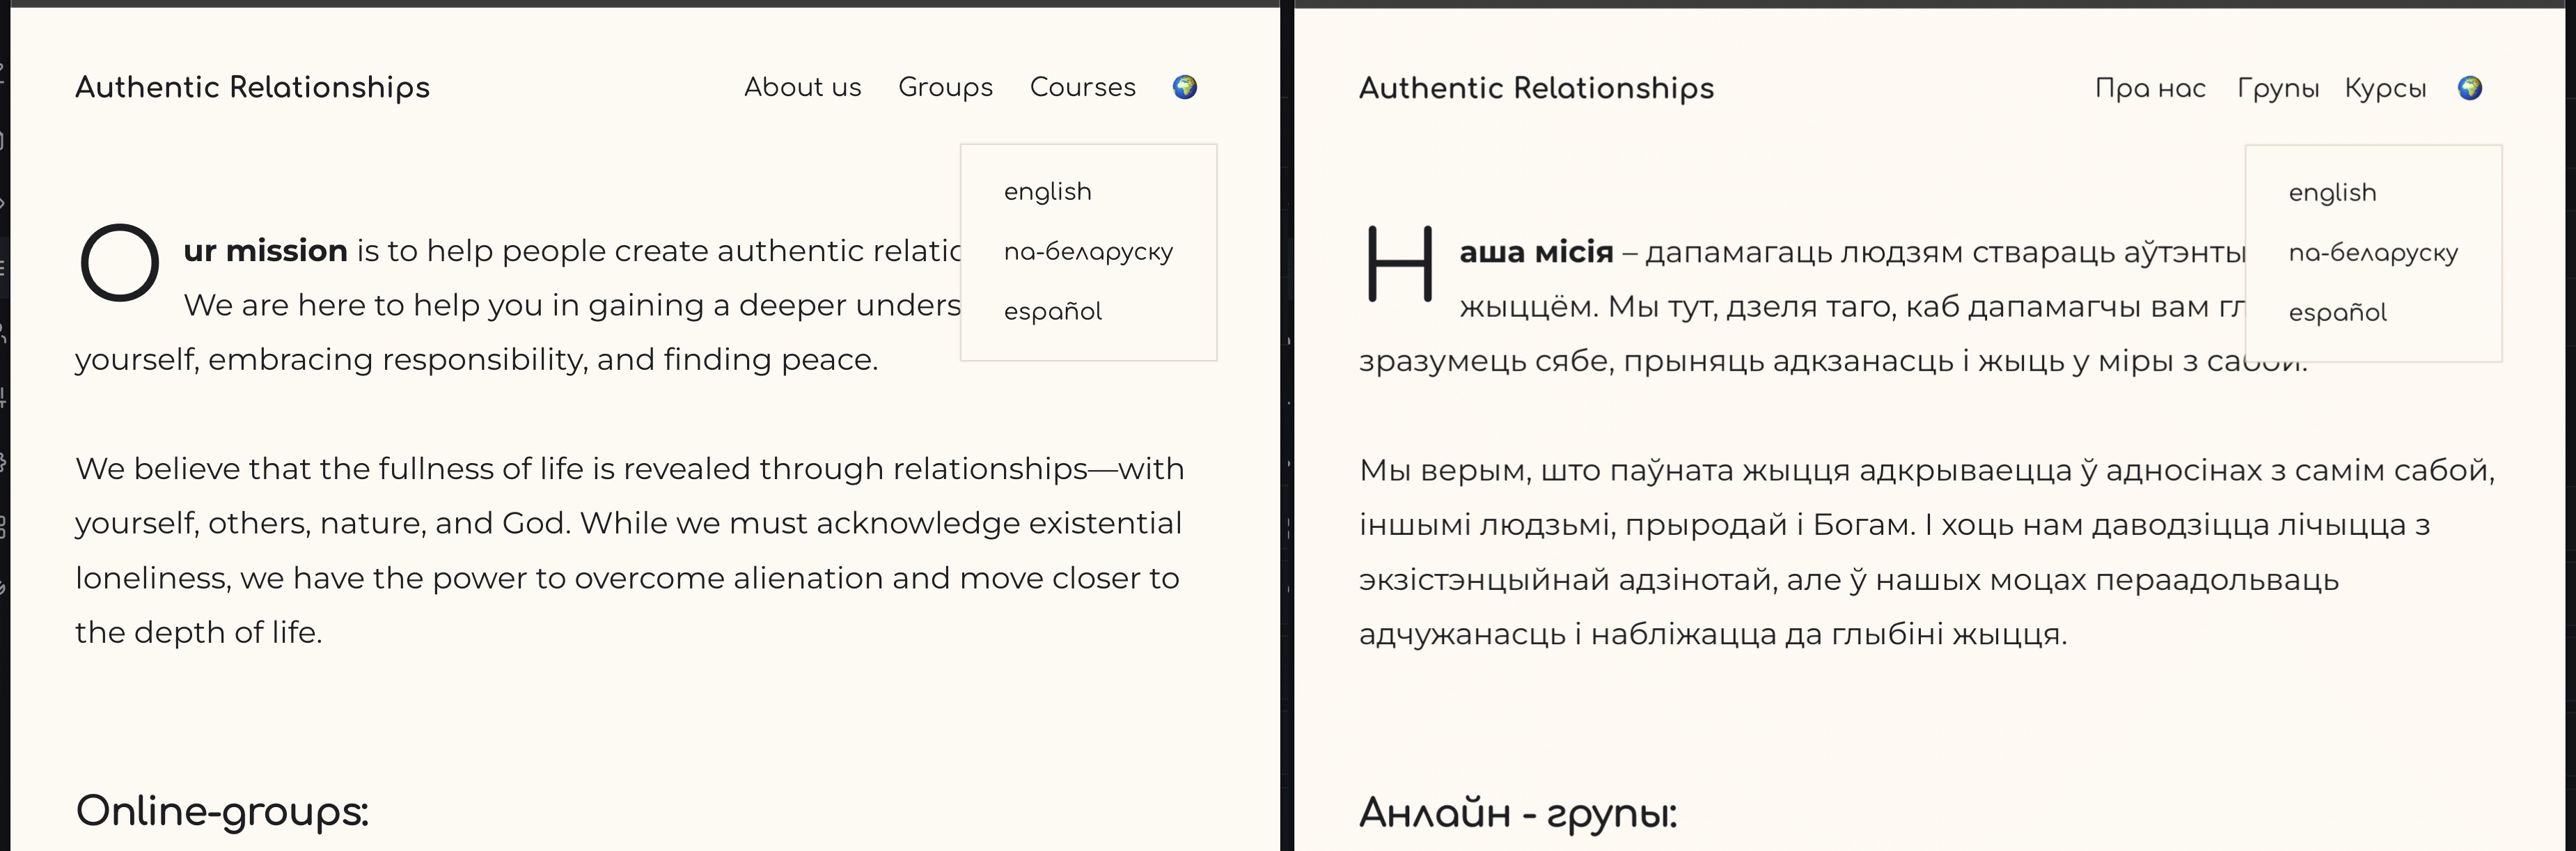
You can see how my website works with the multi-language menu by visiting this link: https://ar.team.