1. AWS S3 - Static Website
1. Registry web-domain.
I propose to use next services: aws.amazon.com (Route 53), Namecheap or GoDaddy.
2. Connect your web-domain
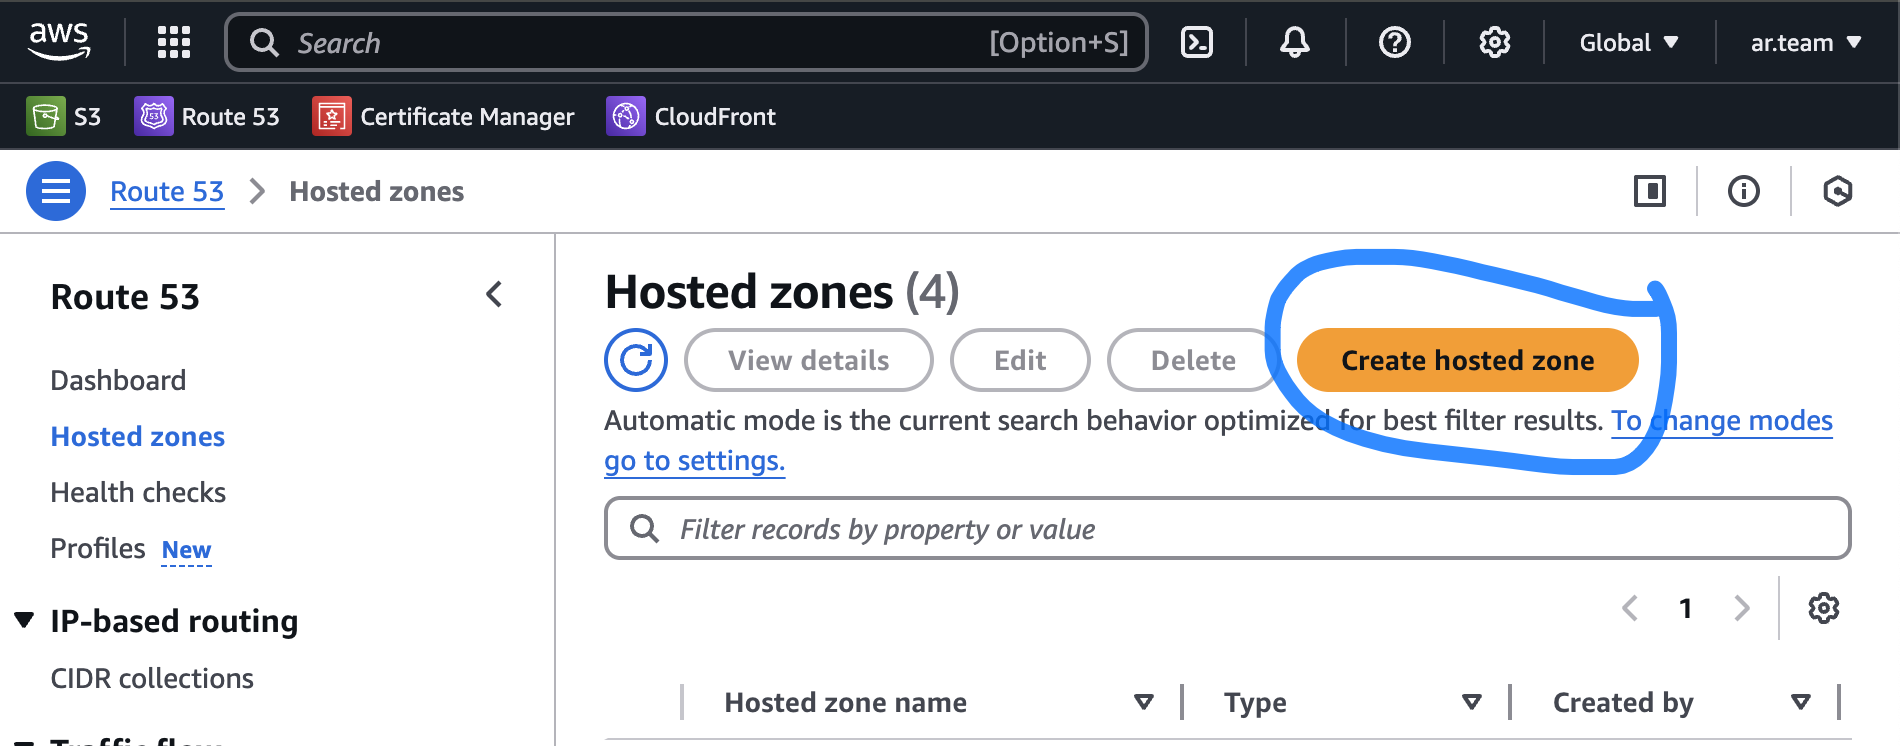
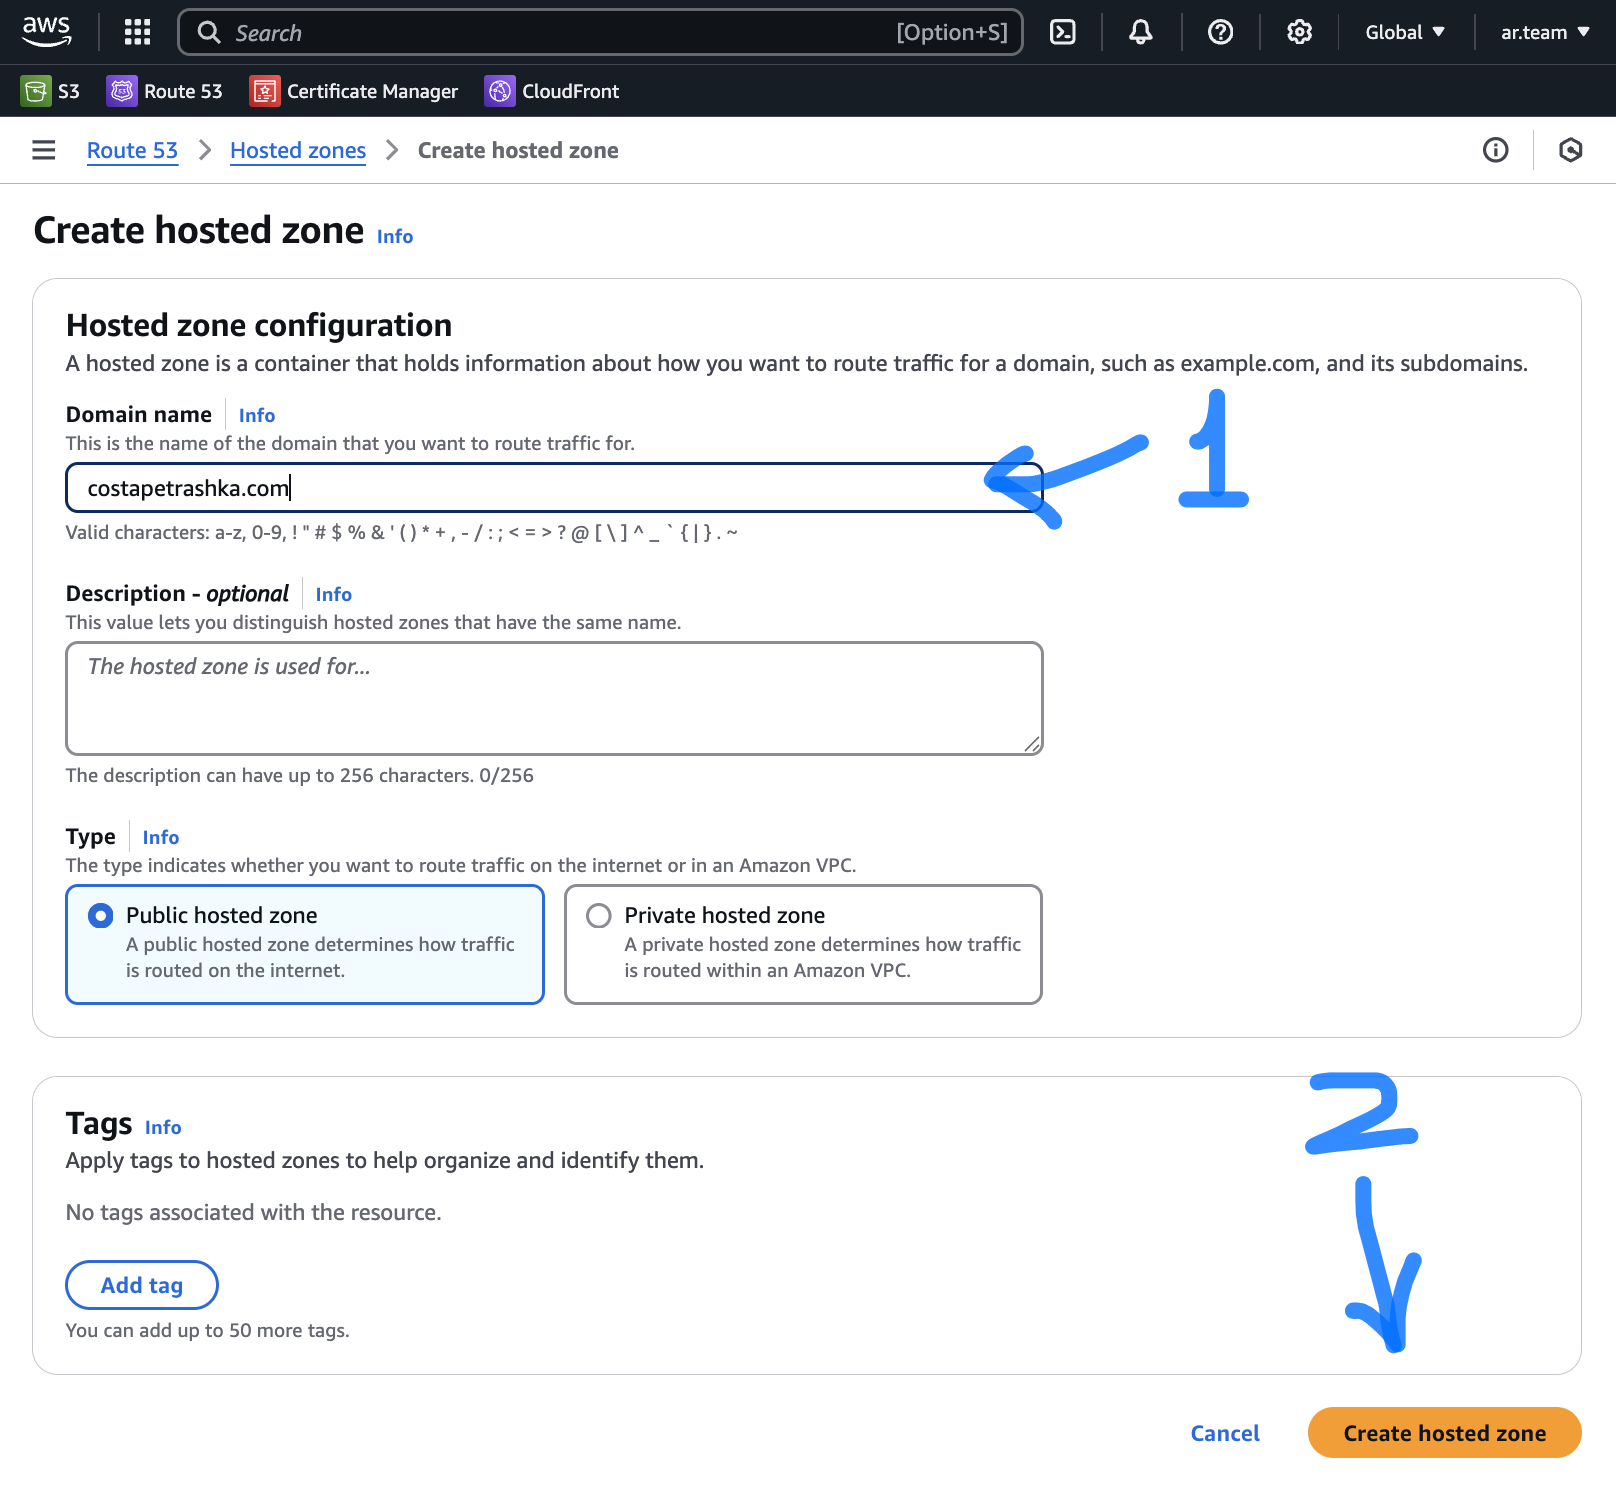
Create Hosted zone on Route 53
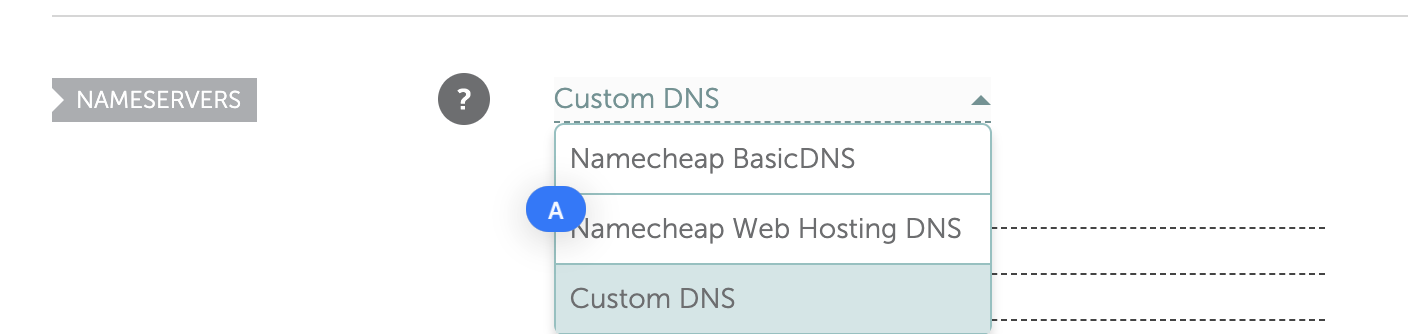
Change Default to Custom DNS
-
Go to Managing panel of your website on platform where you registered web-domain (if it not AWS).
-
Change default DNS to Custom DNS (example Namecheap)
- In AWS come to your Hosted Zone and copy NS records (without last dot)
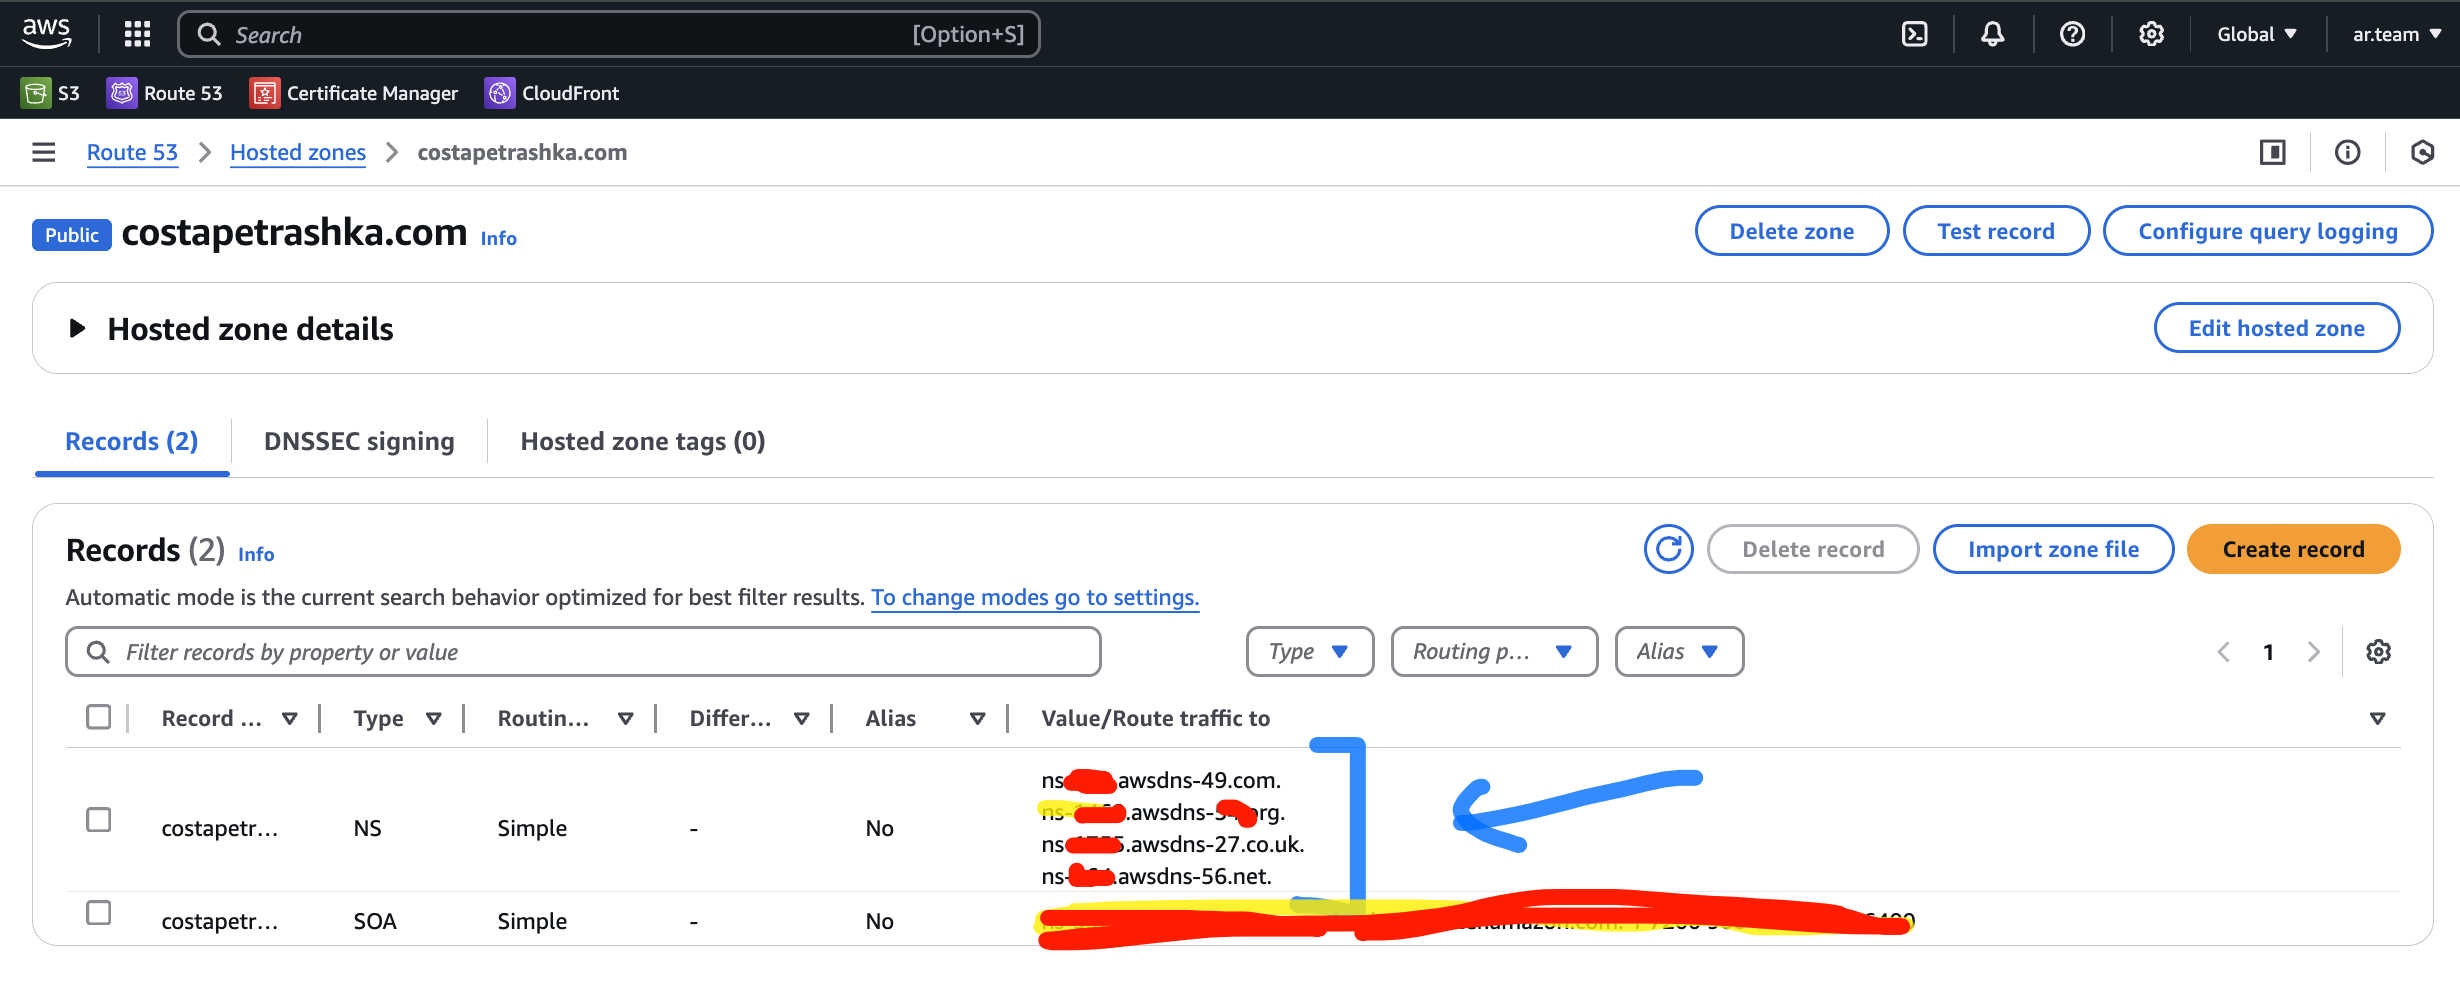
-
Put it in your Custom DNS fields (example Namecheap)
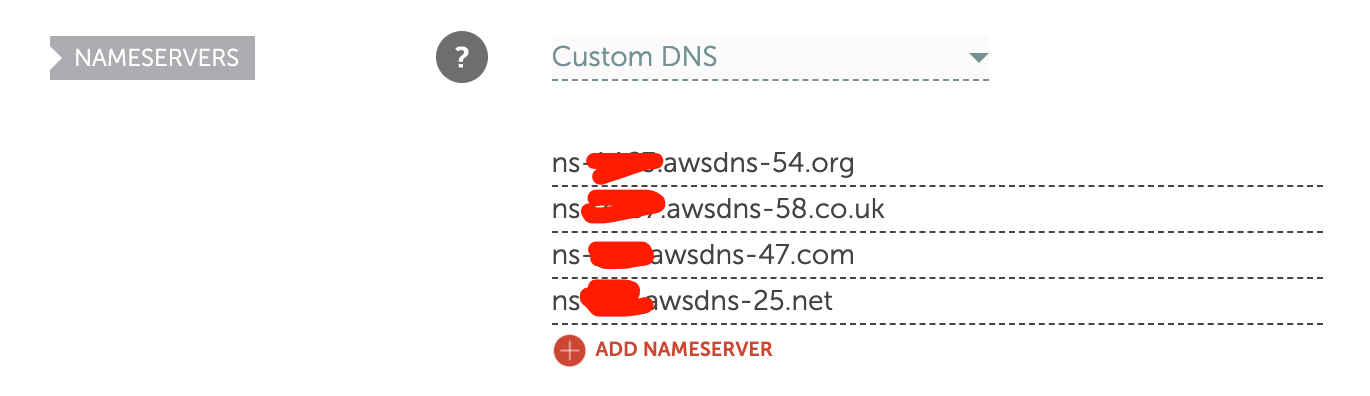
-
Your domain successfully connected with AWS infrastructure
3. AWS S3 bucket
Create AWS S3 bucket
-
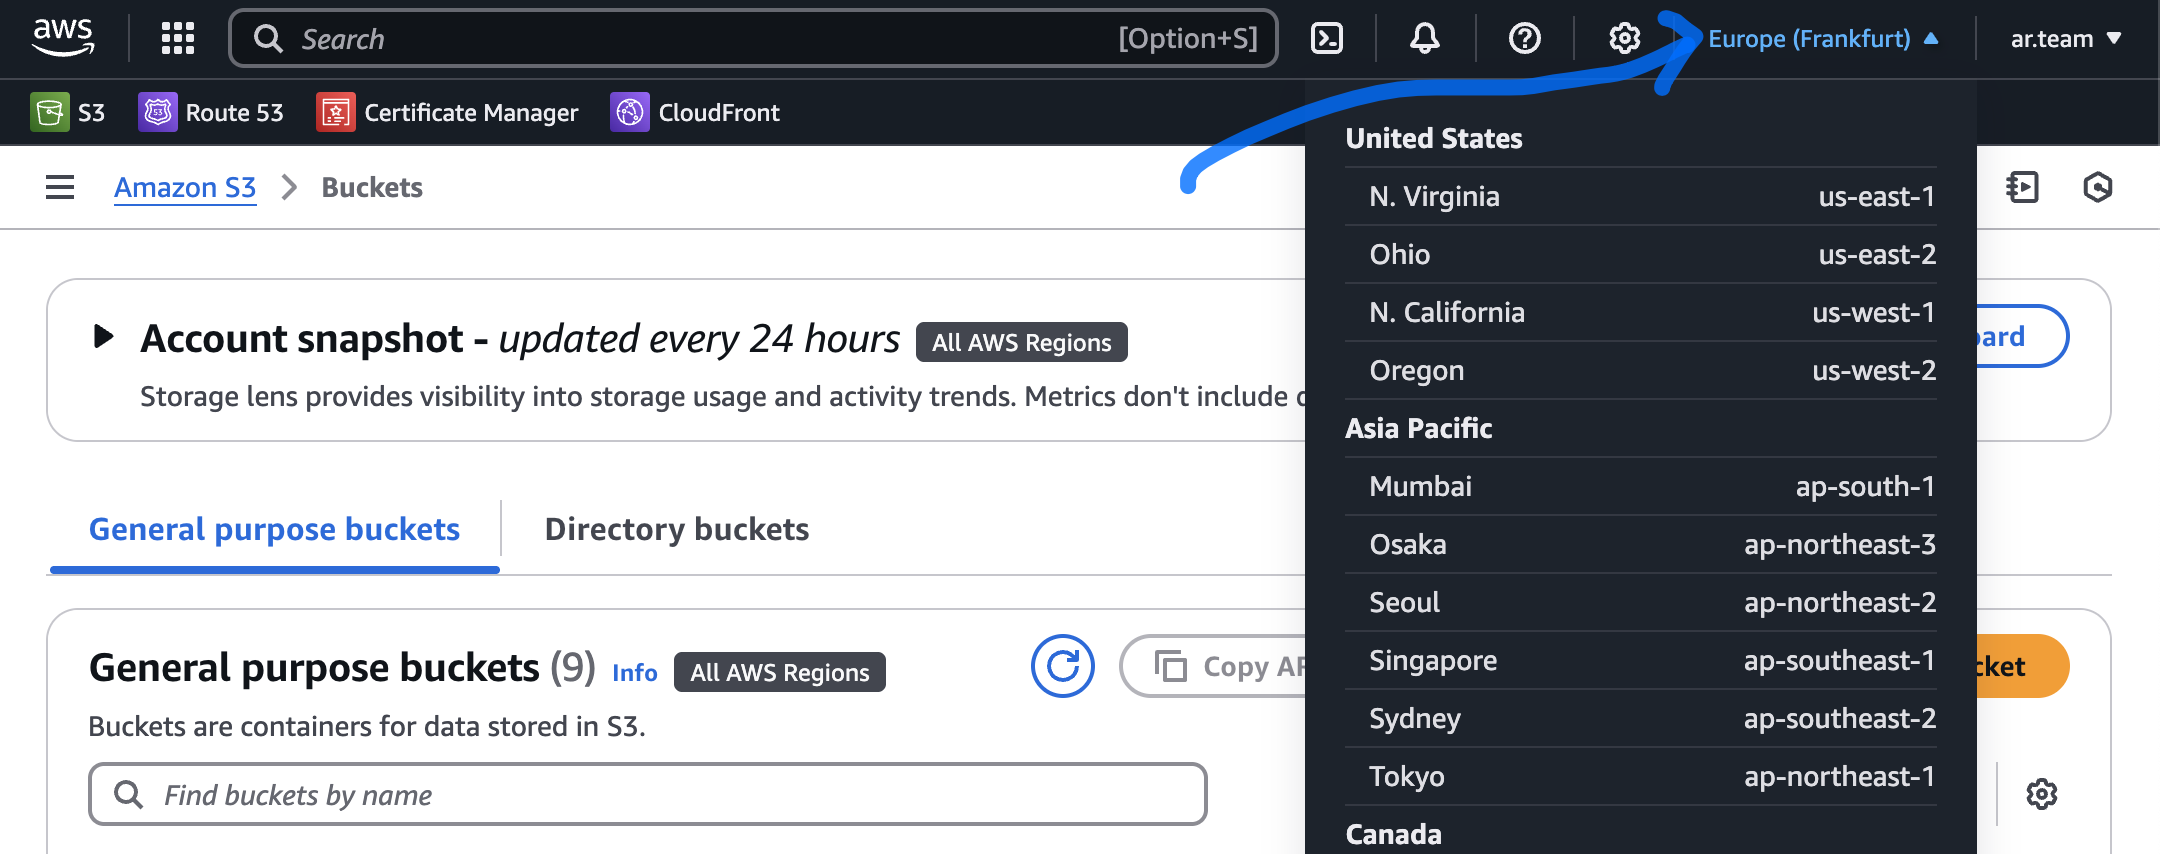
Go to AWS S3
-
Choose relevant Region for your bucket
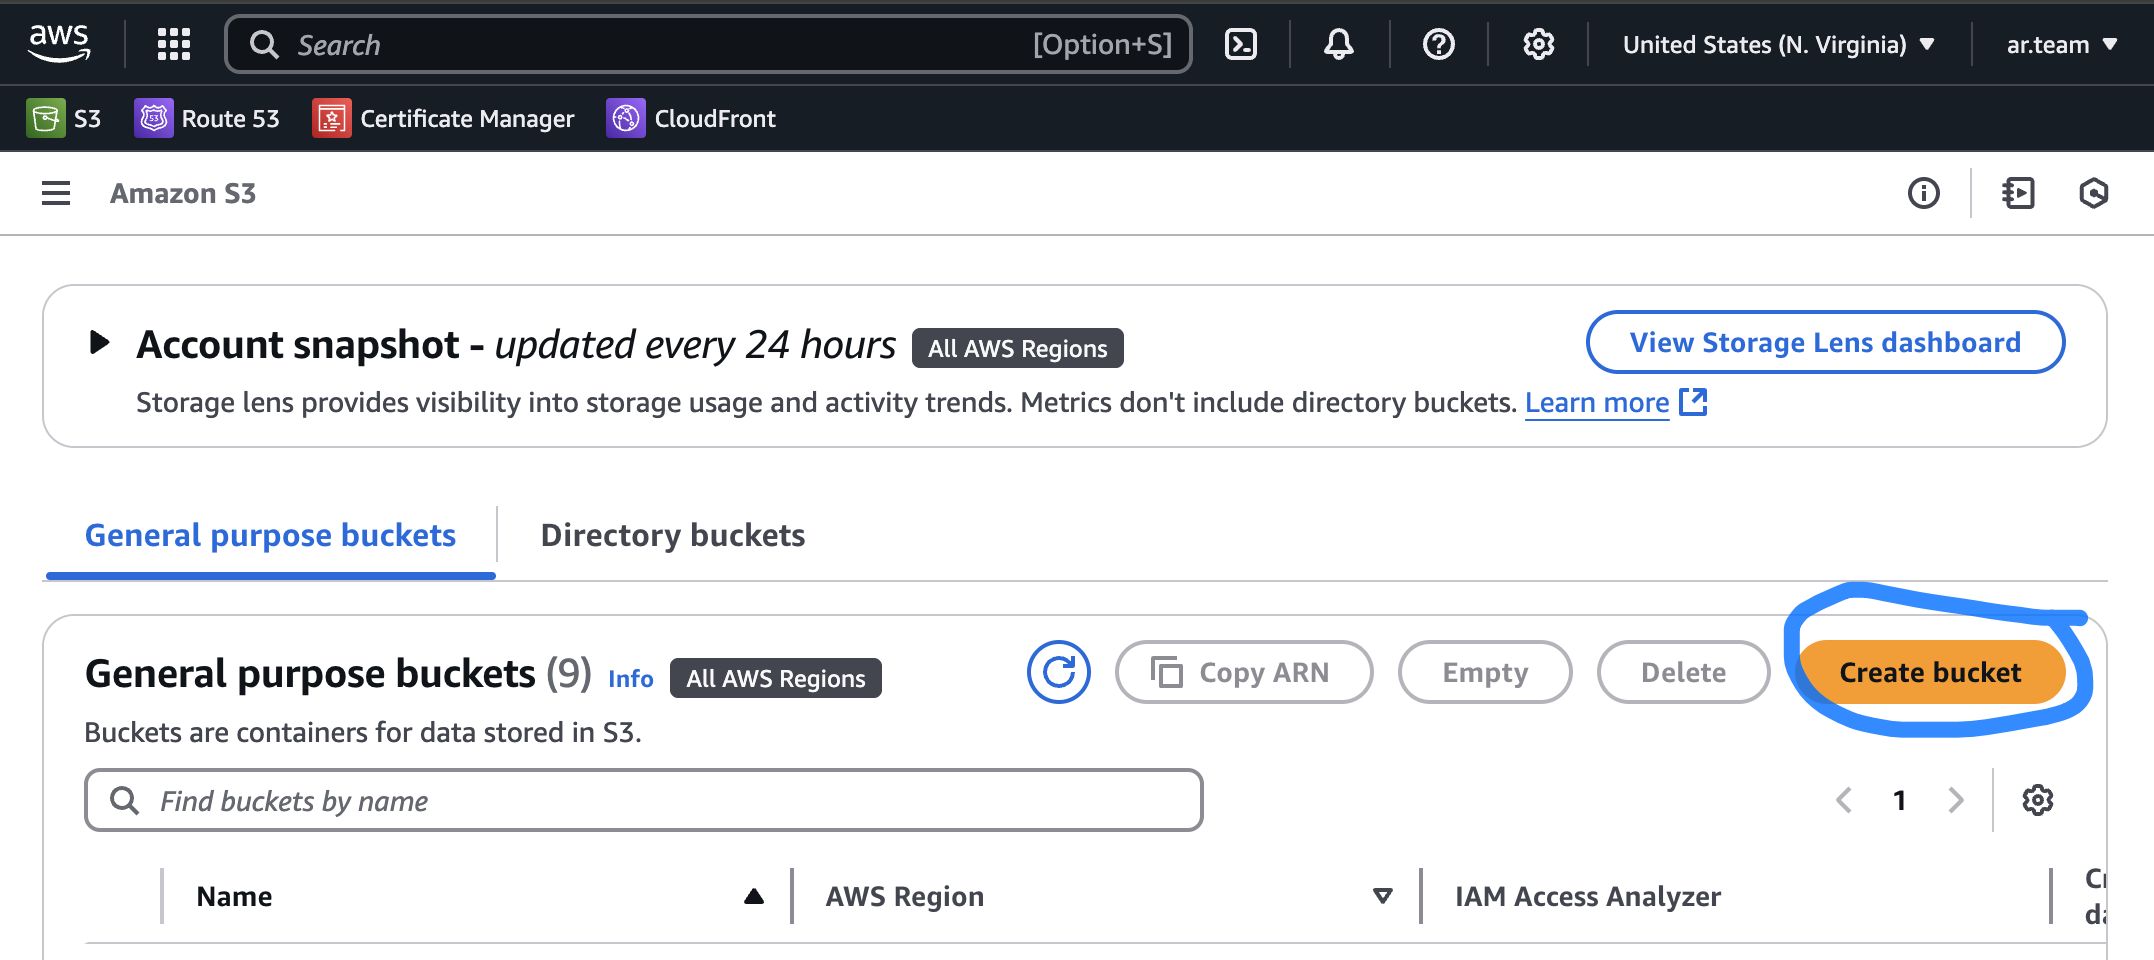
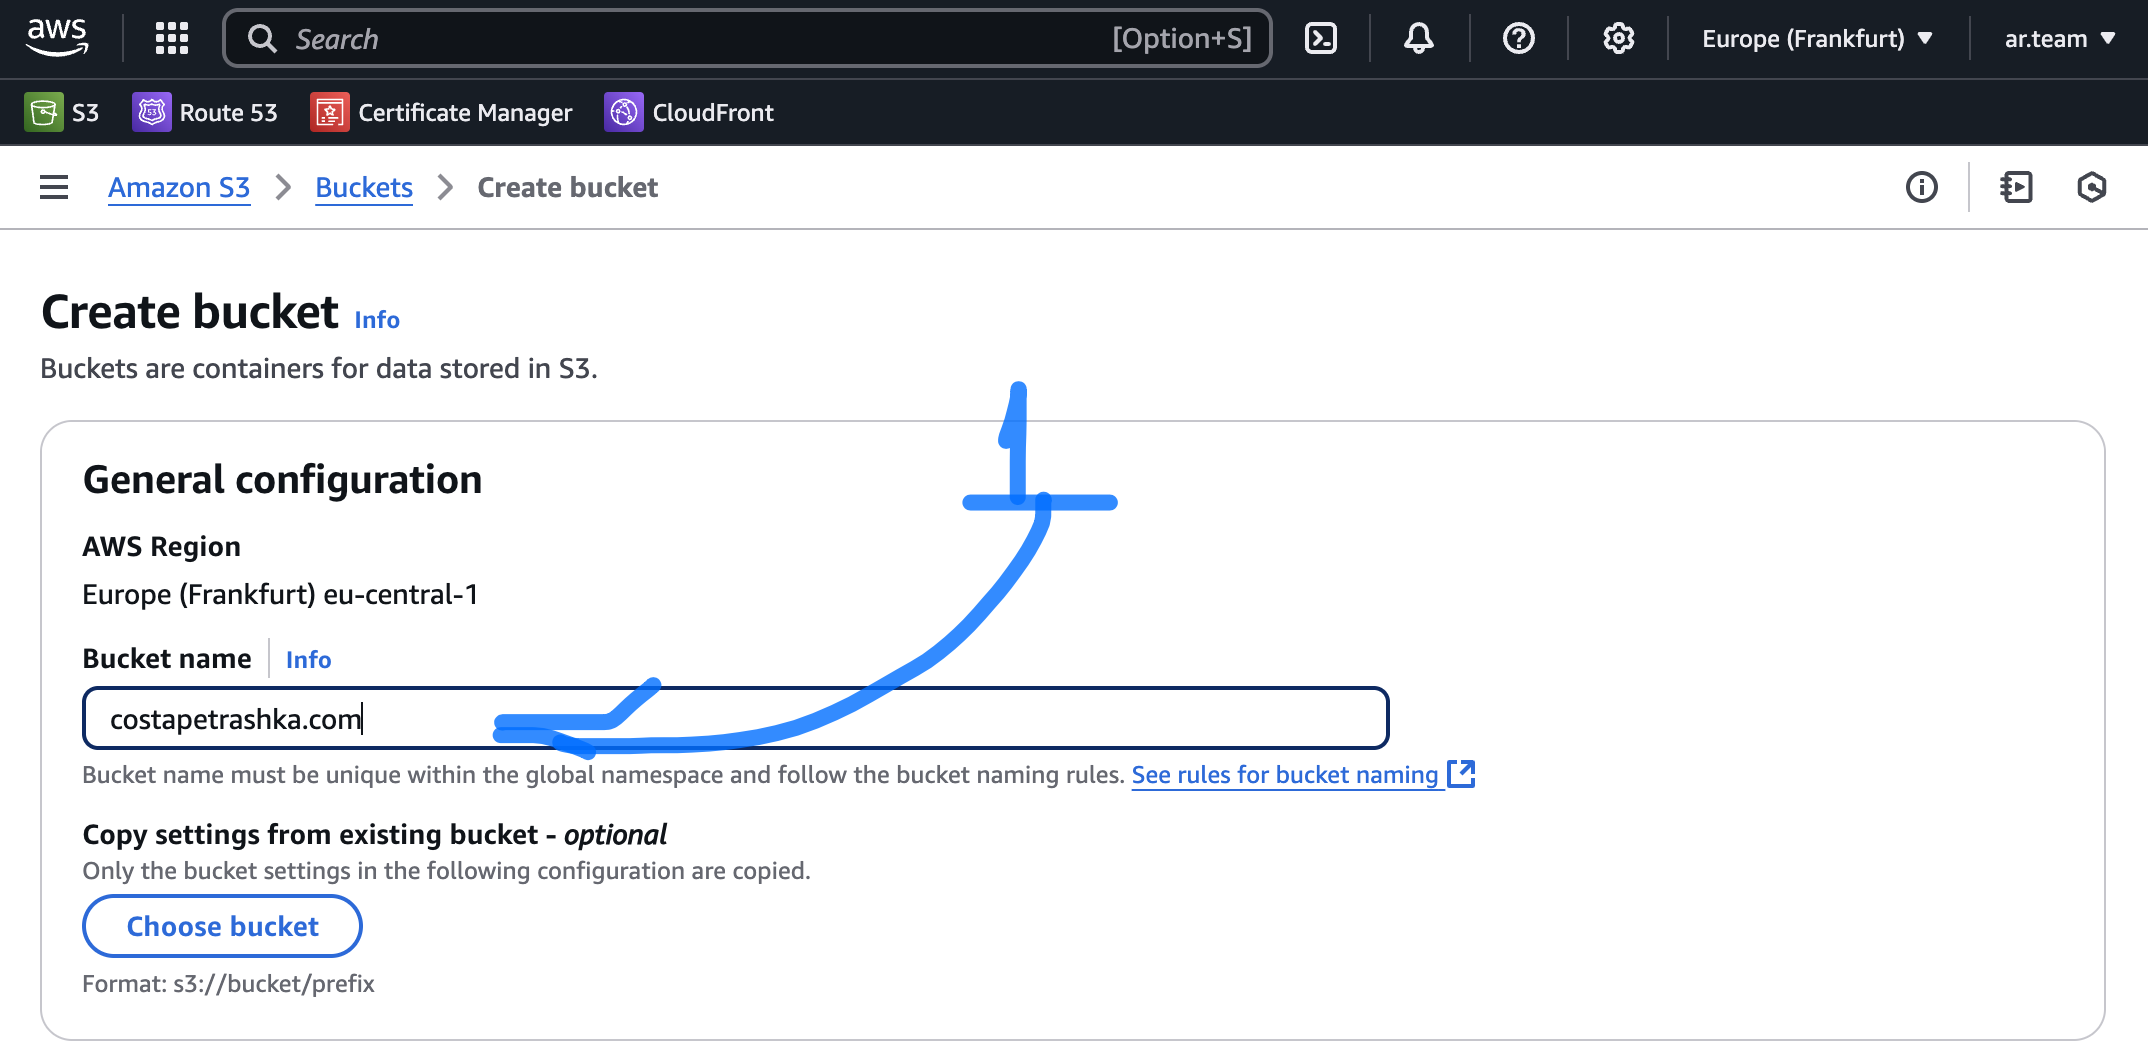
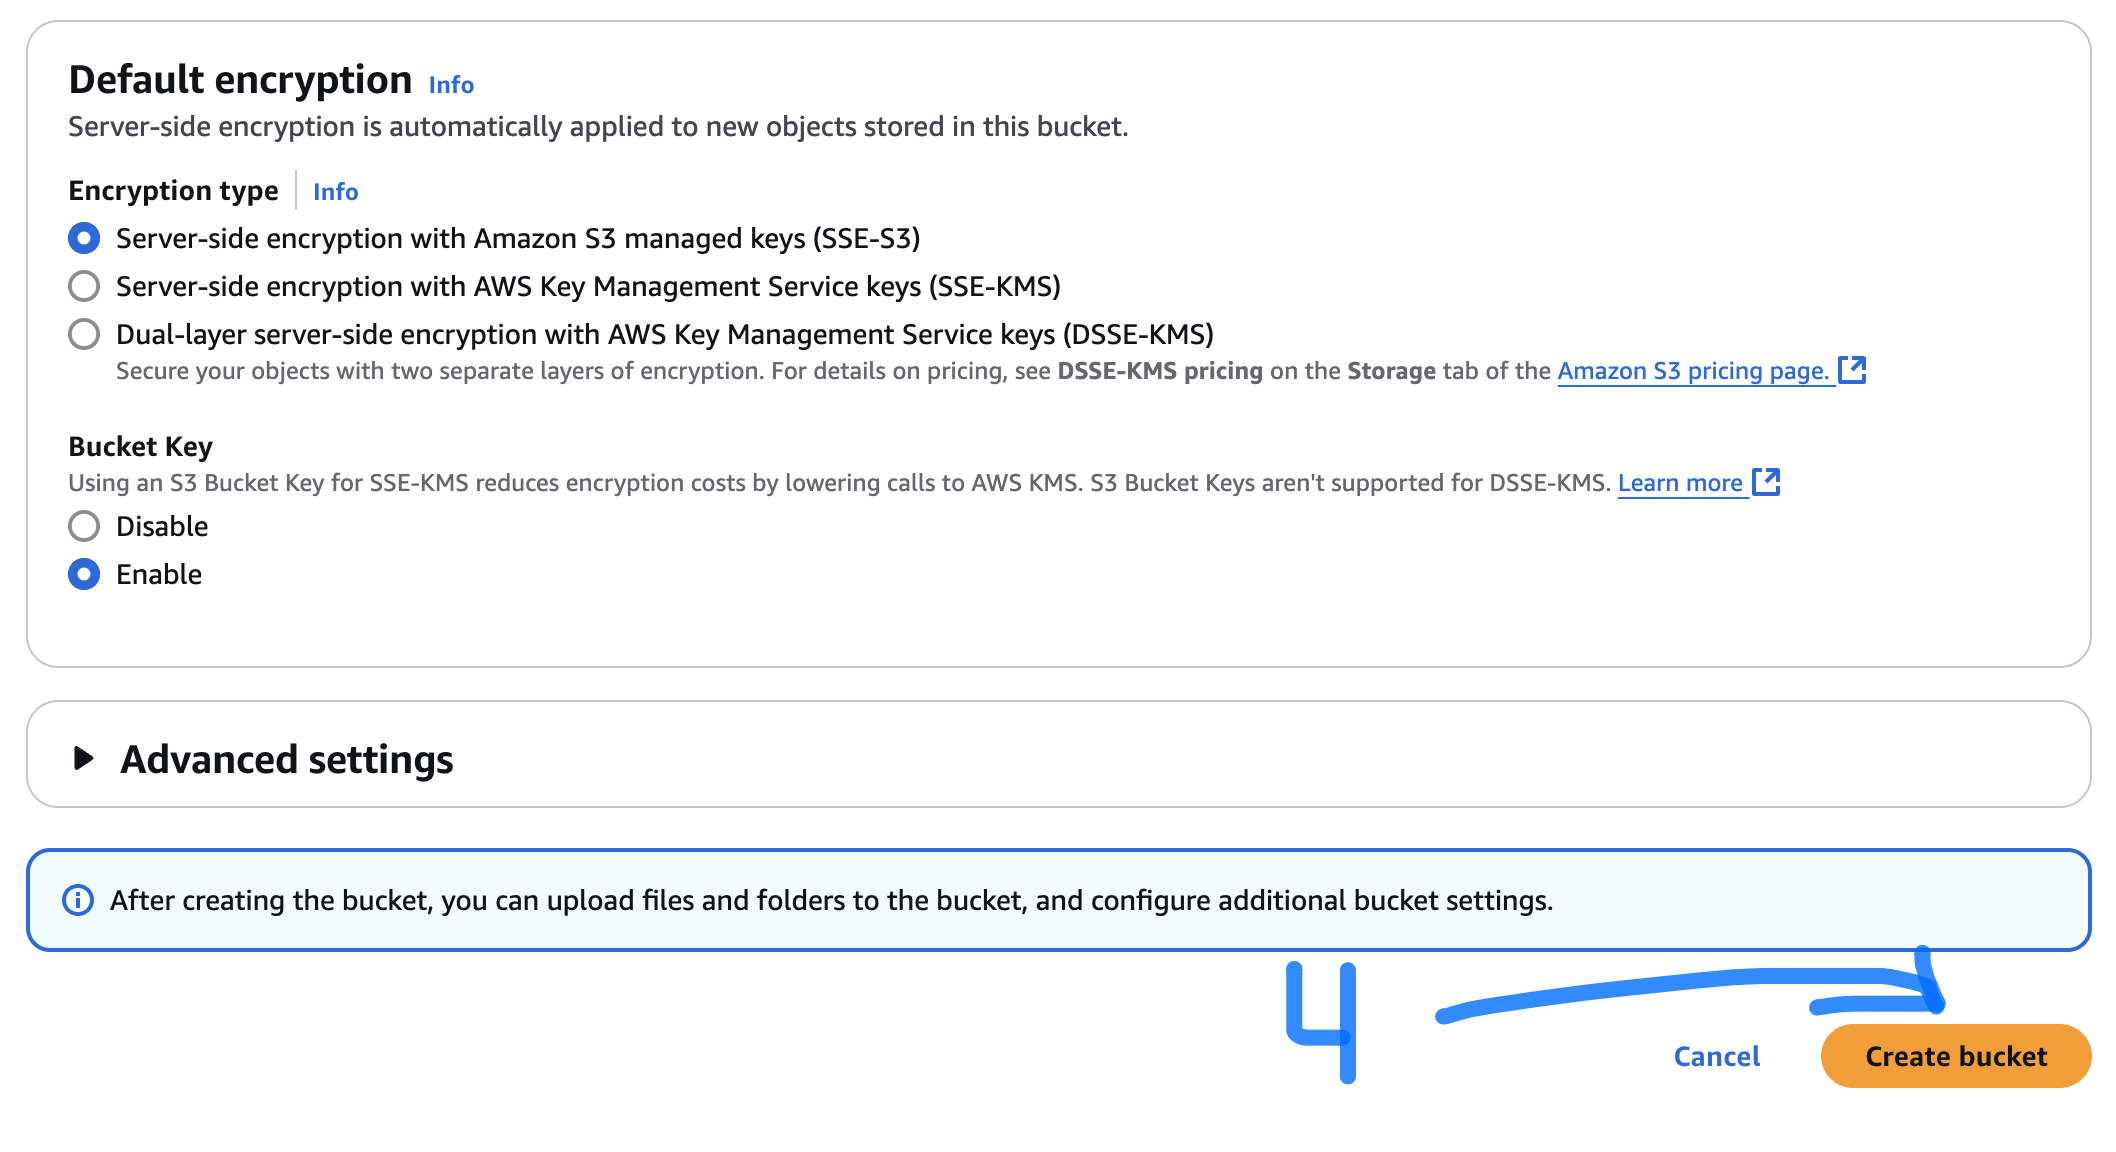
- Press Create bucket.
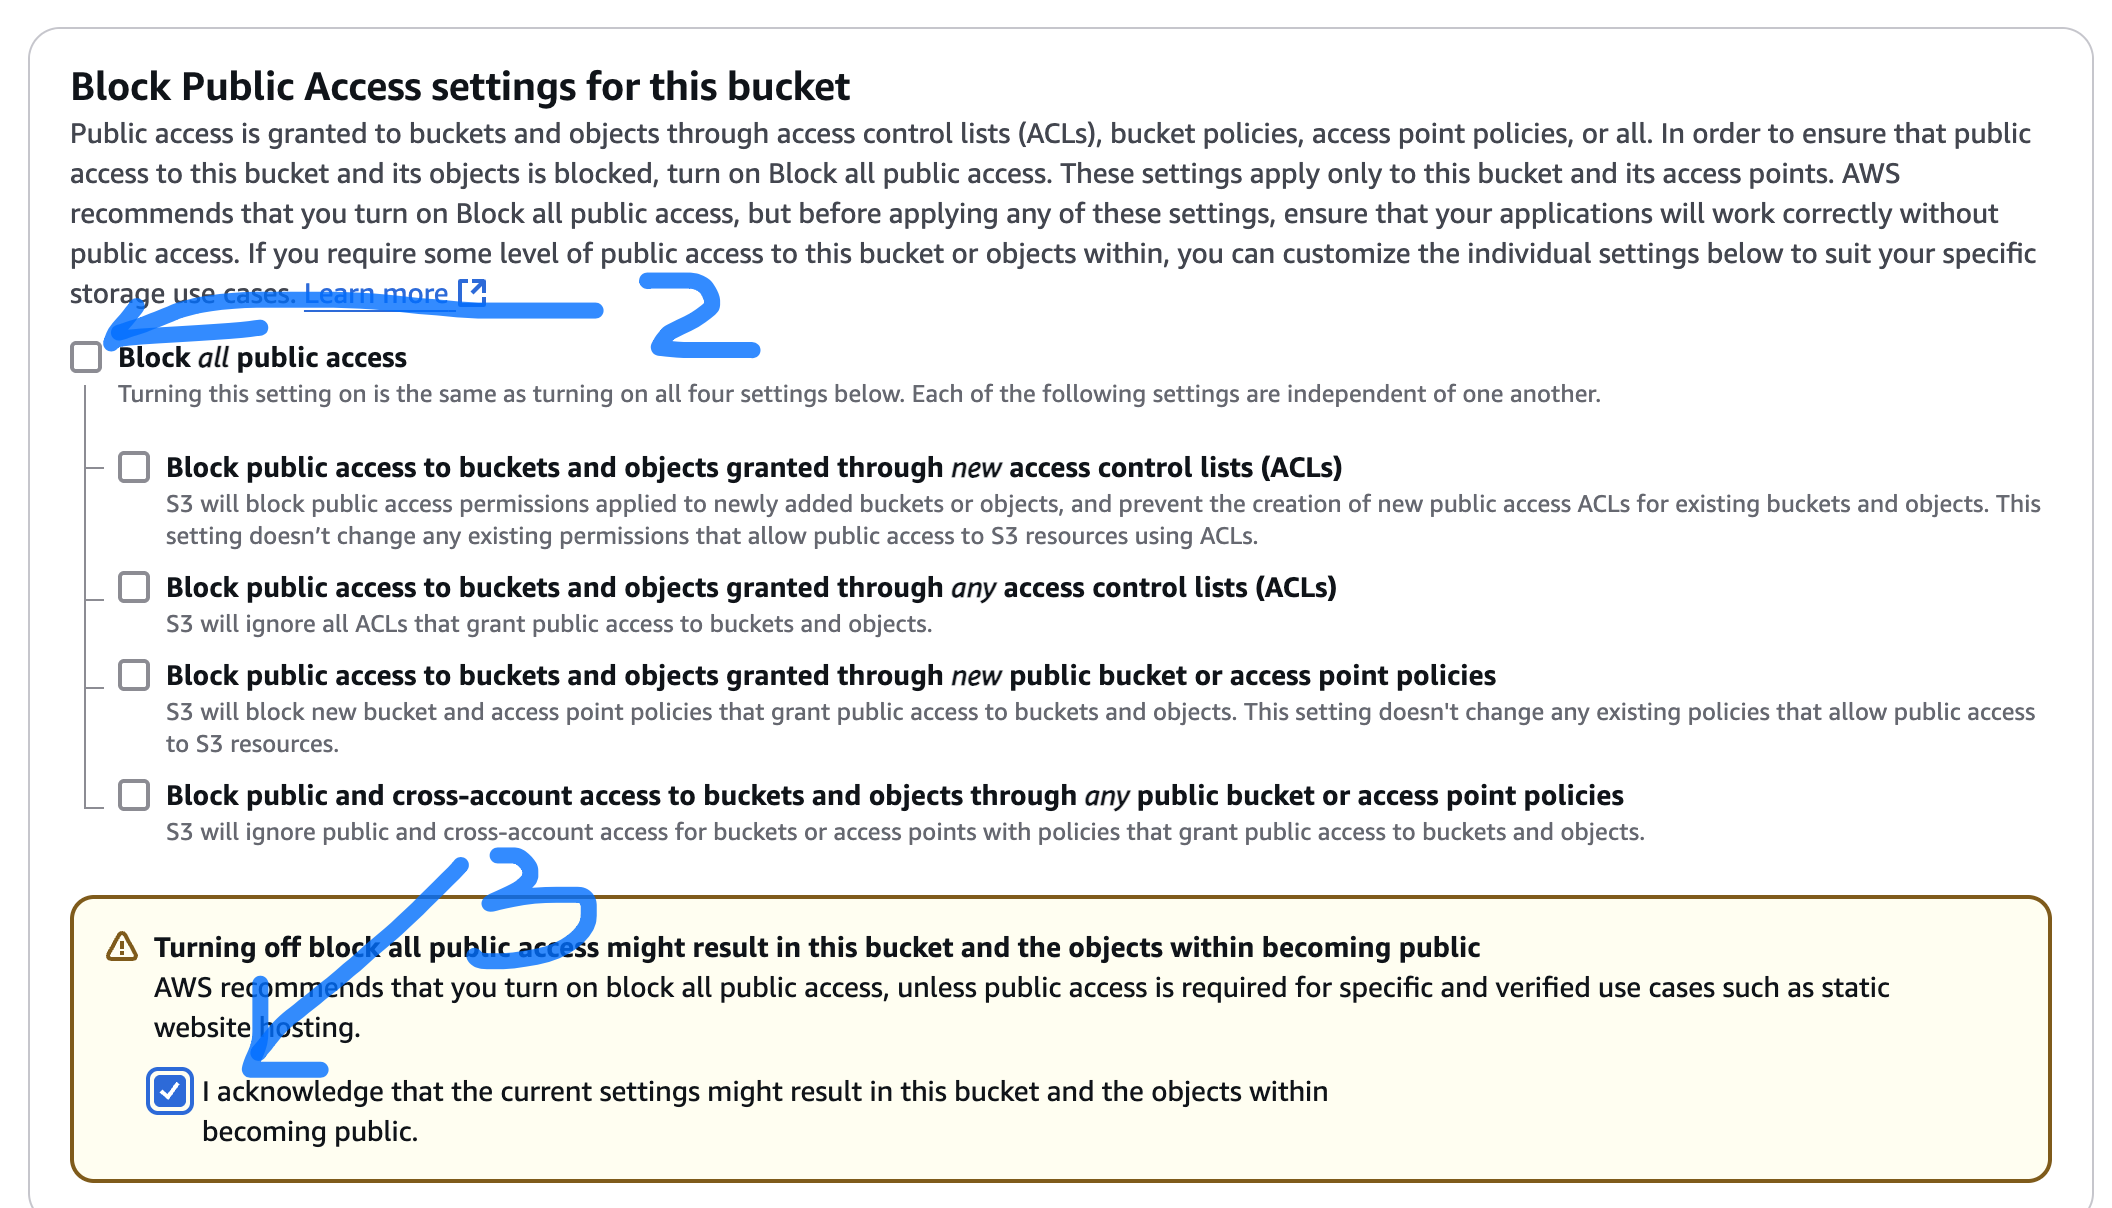
- Type name of your bucket, switch off "Block all public access", and press Create Bucket
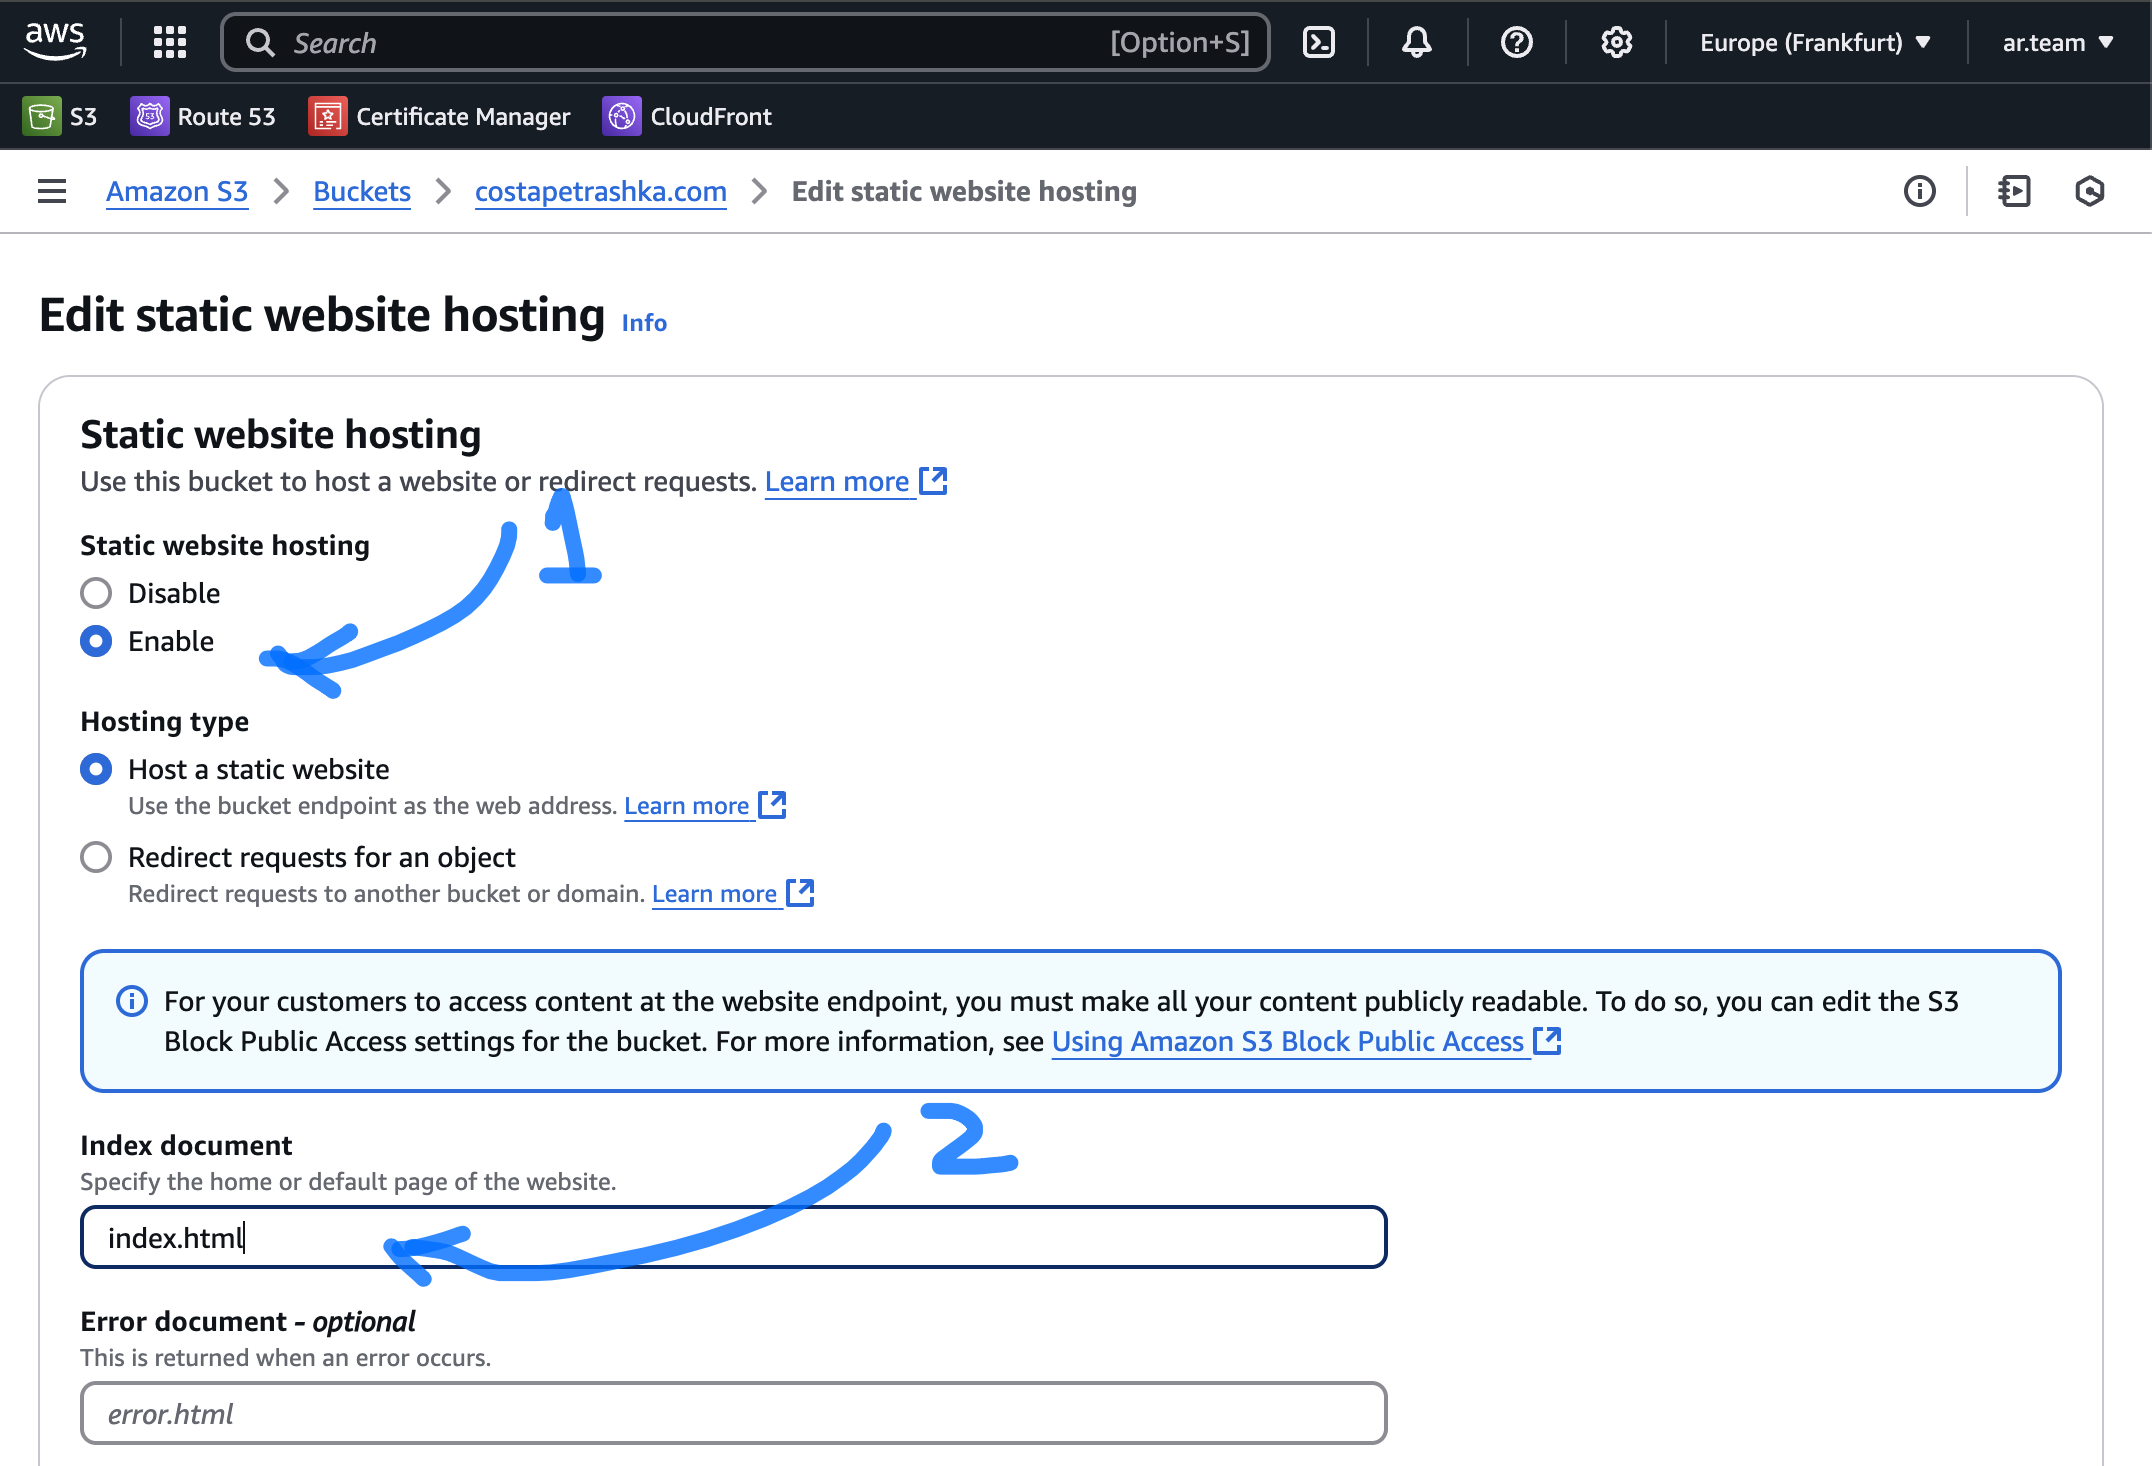
Setup Static Website hosting
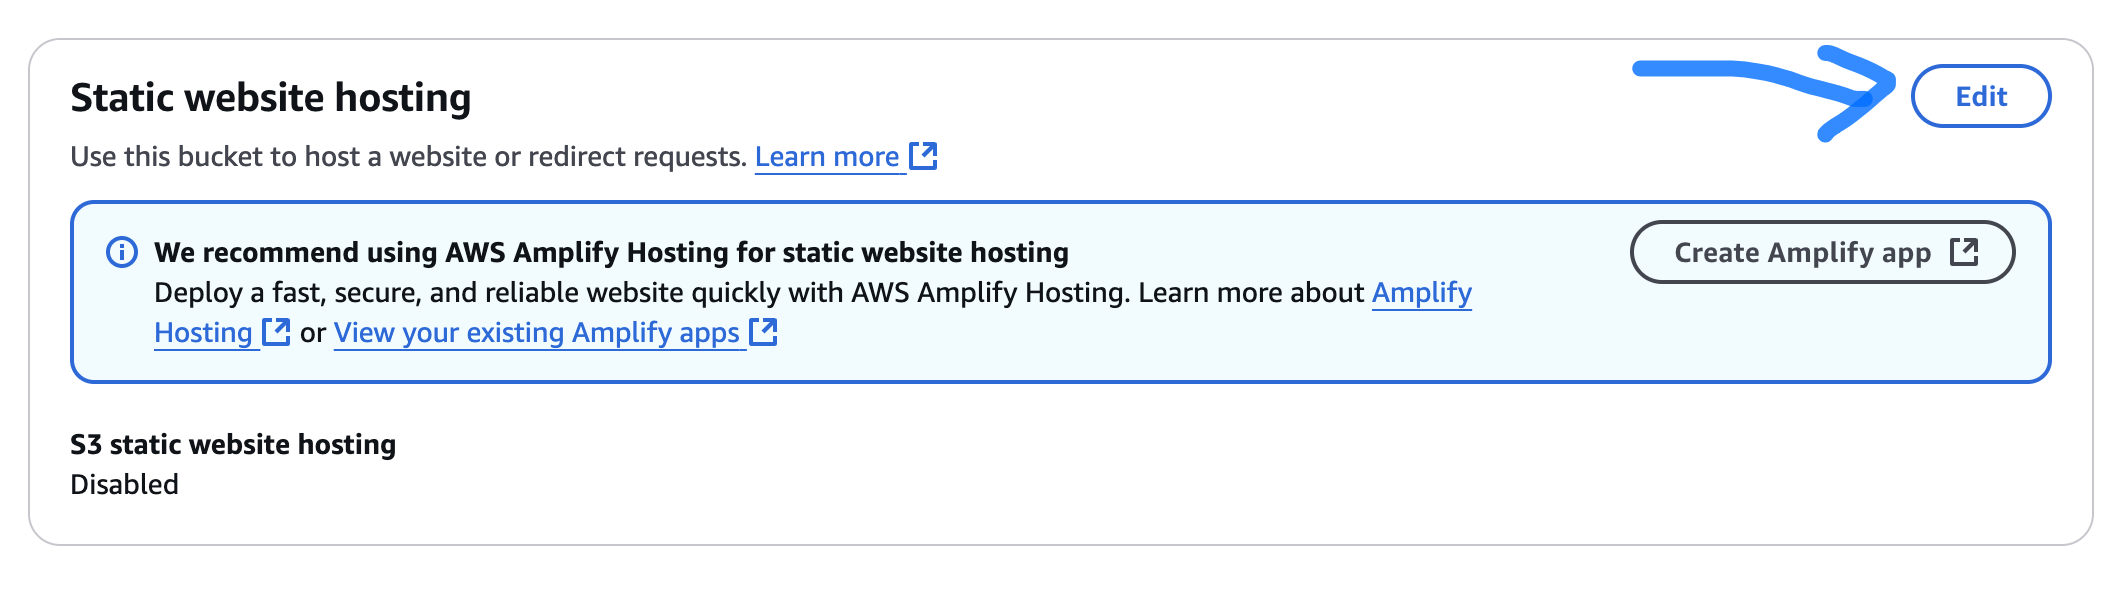
- Enable + add Index.html to Index field

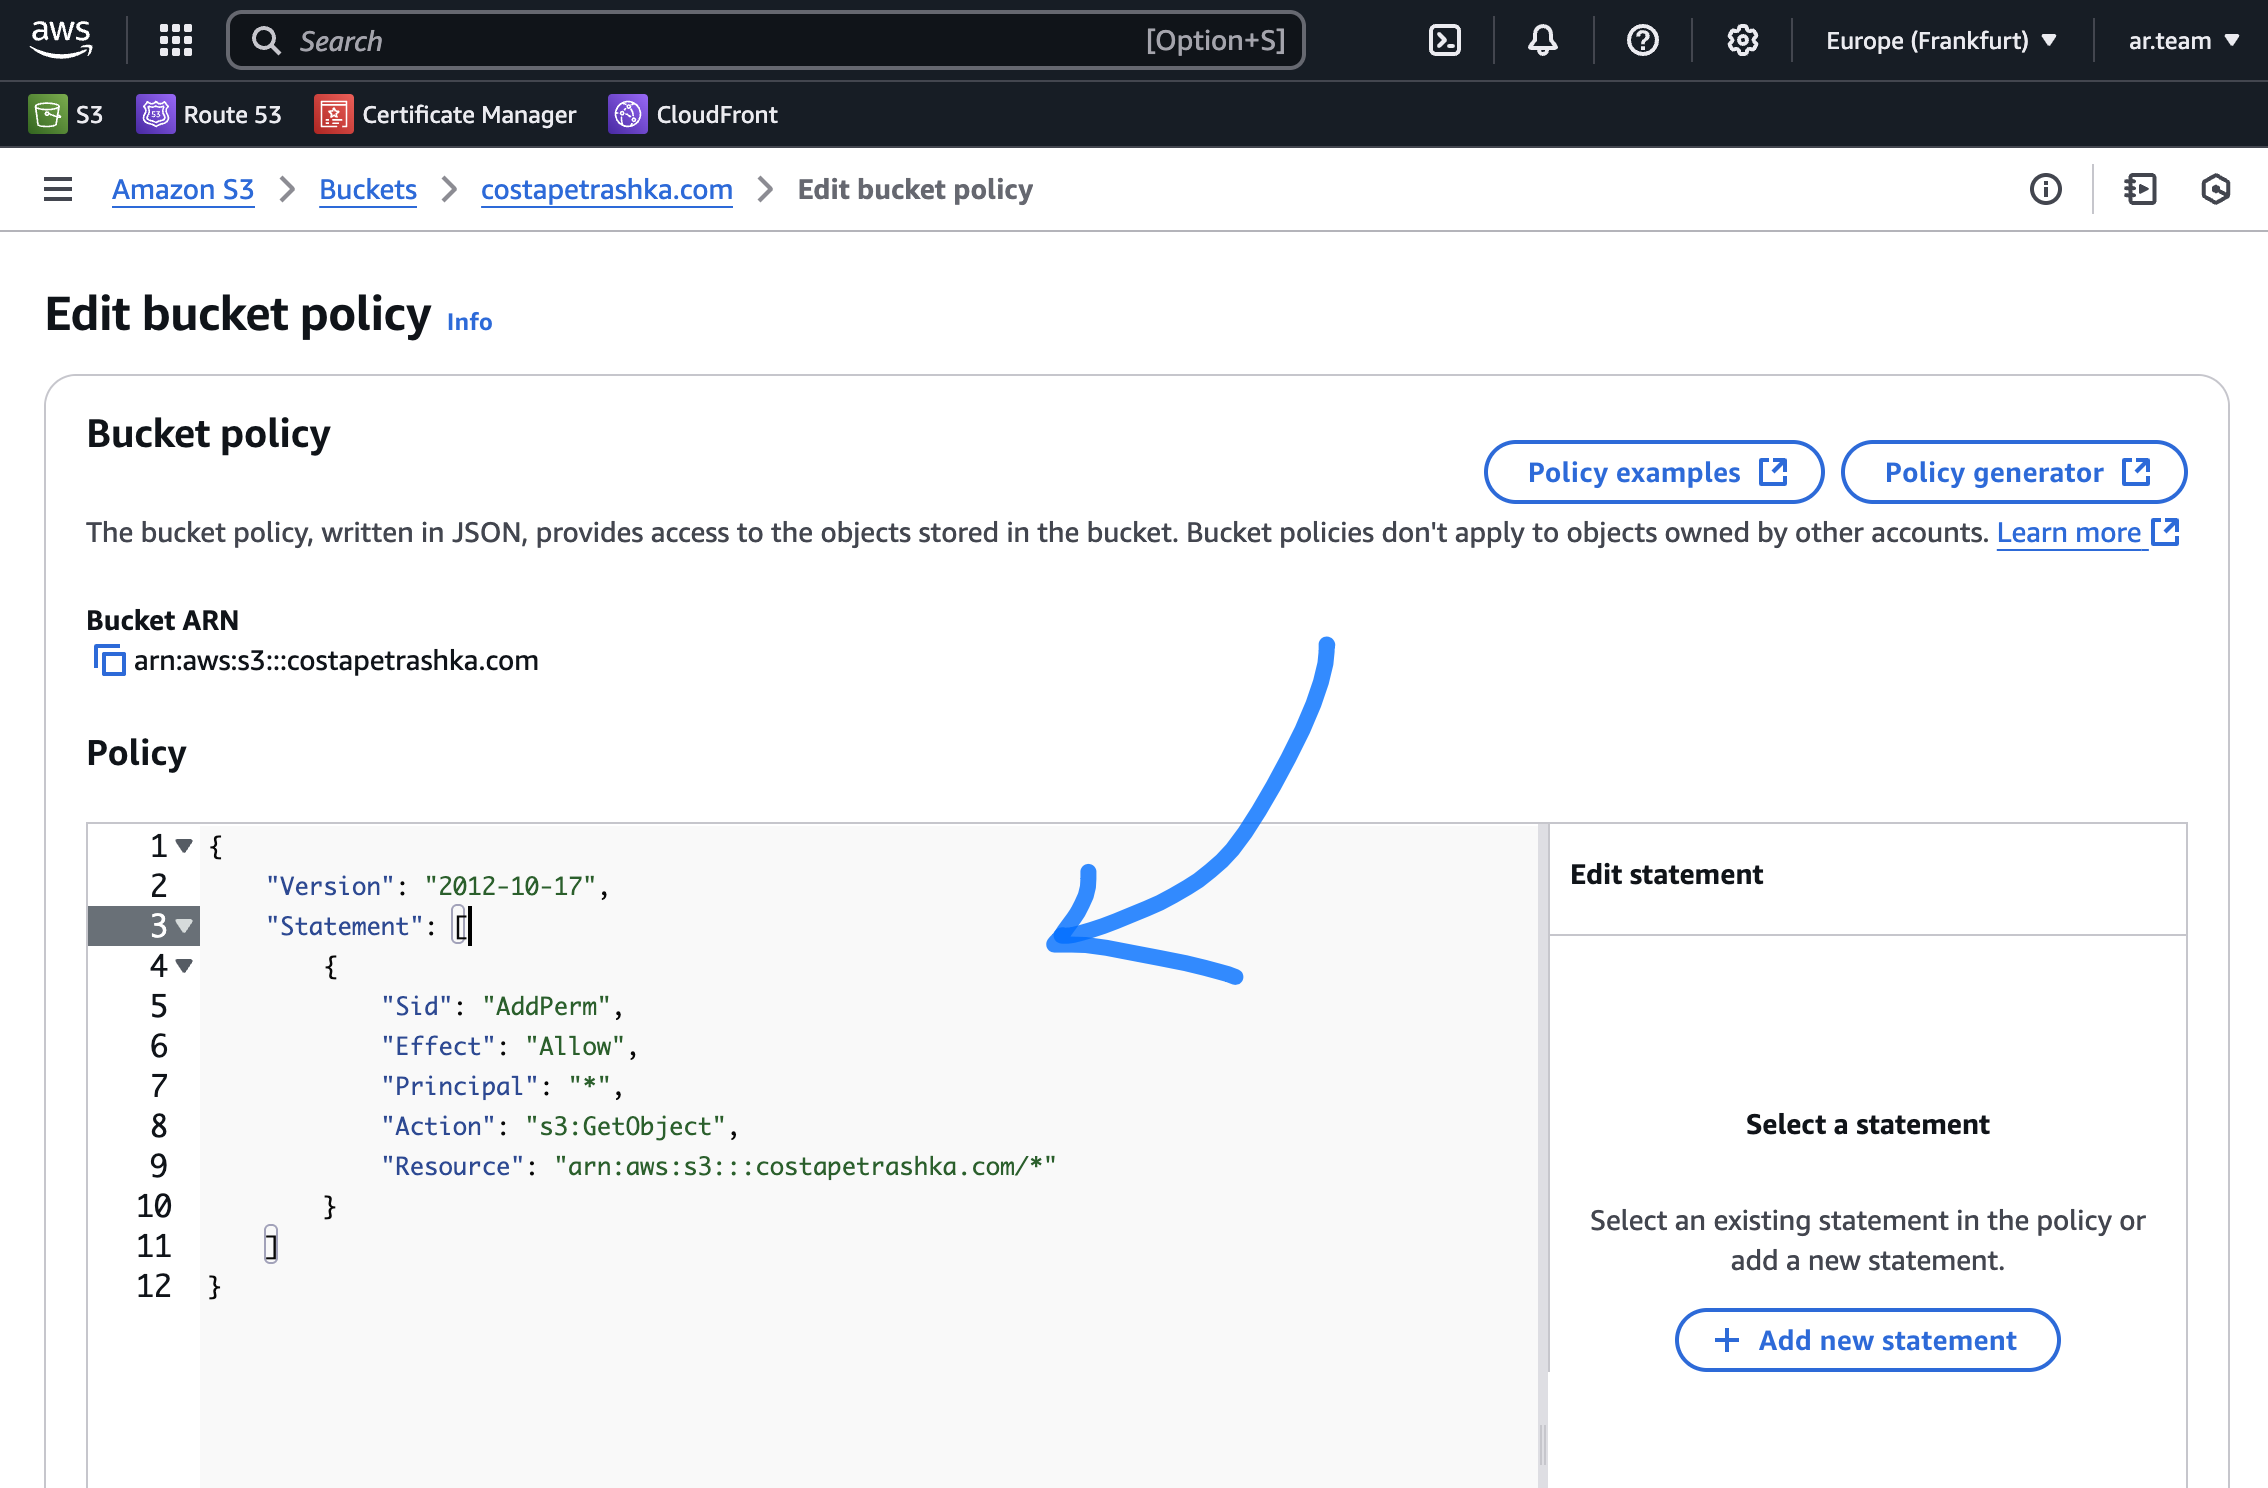
Add bucket Policy

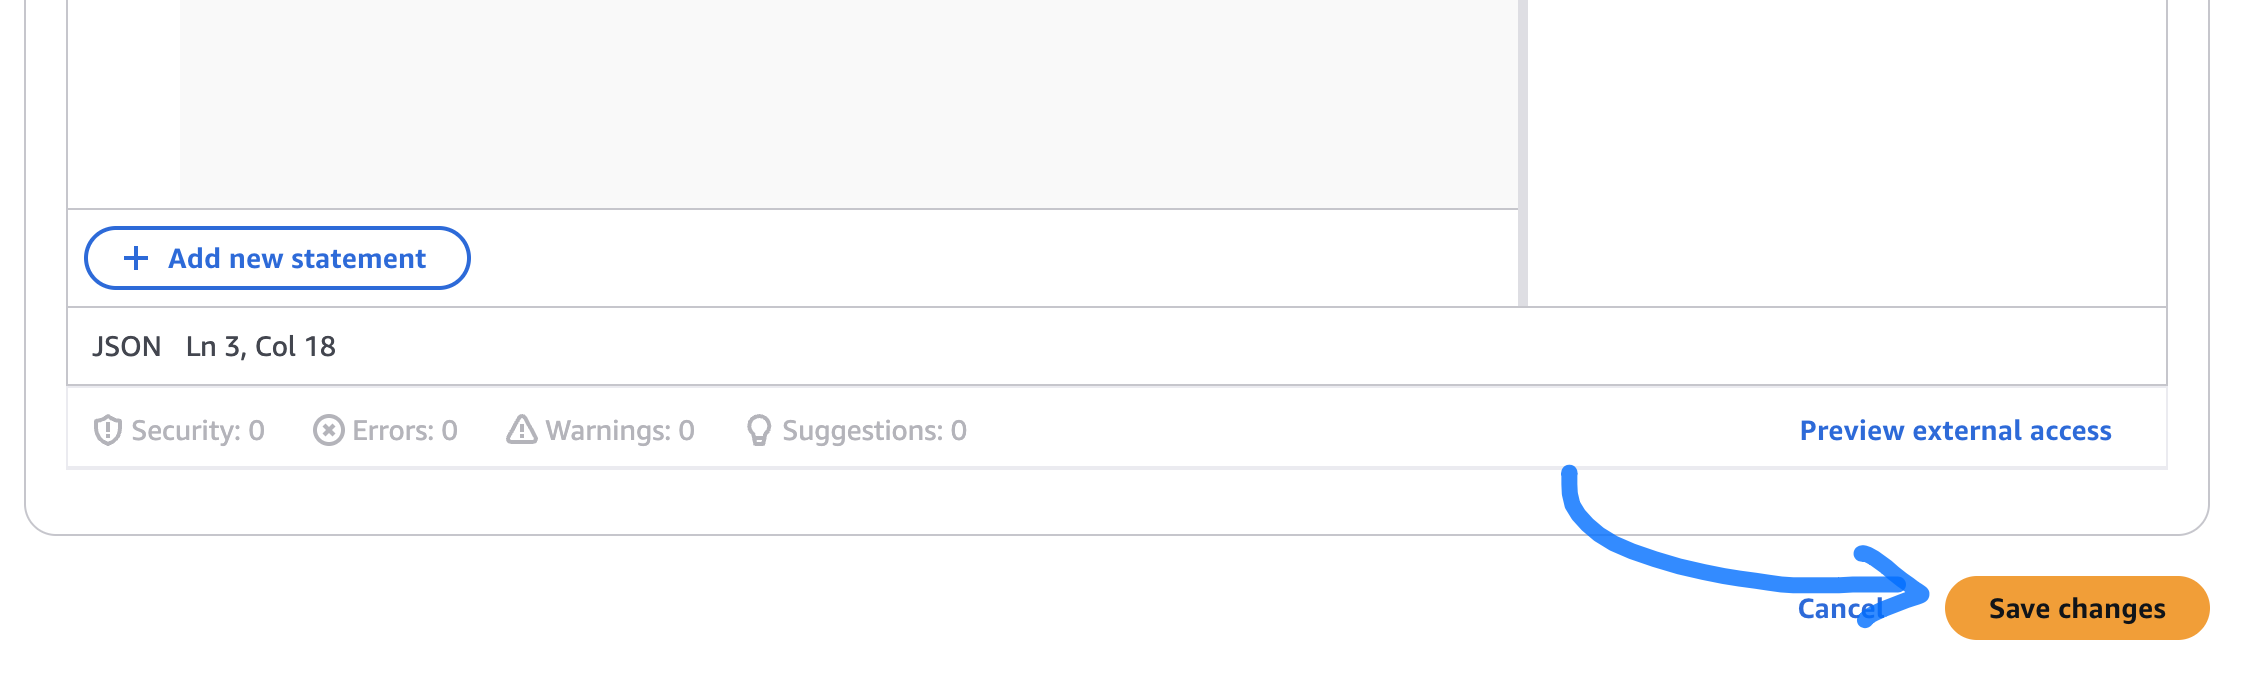
- put this code only change YOUR_BUCKET_NAME and Save it.
{
    "Version": "2012-10-17",
    "Statement": [
        {
            "Sid": "AddPerm",
            "Effect": "Allow",
            "Principal": "*",
            "Action": "s3:GetObject",
            "Resource": "arn:aws:s3:::YOUR_BUCKET_NAME/*"
        }
    ]
}
Test your bucket
- Create index.html file (with text "test") on your computer and upload it on your backet.
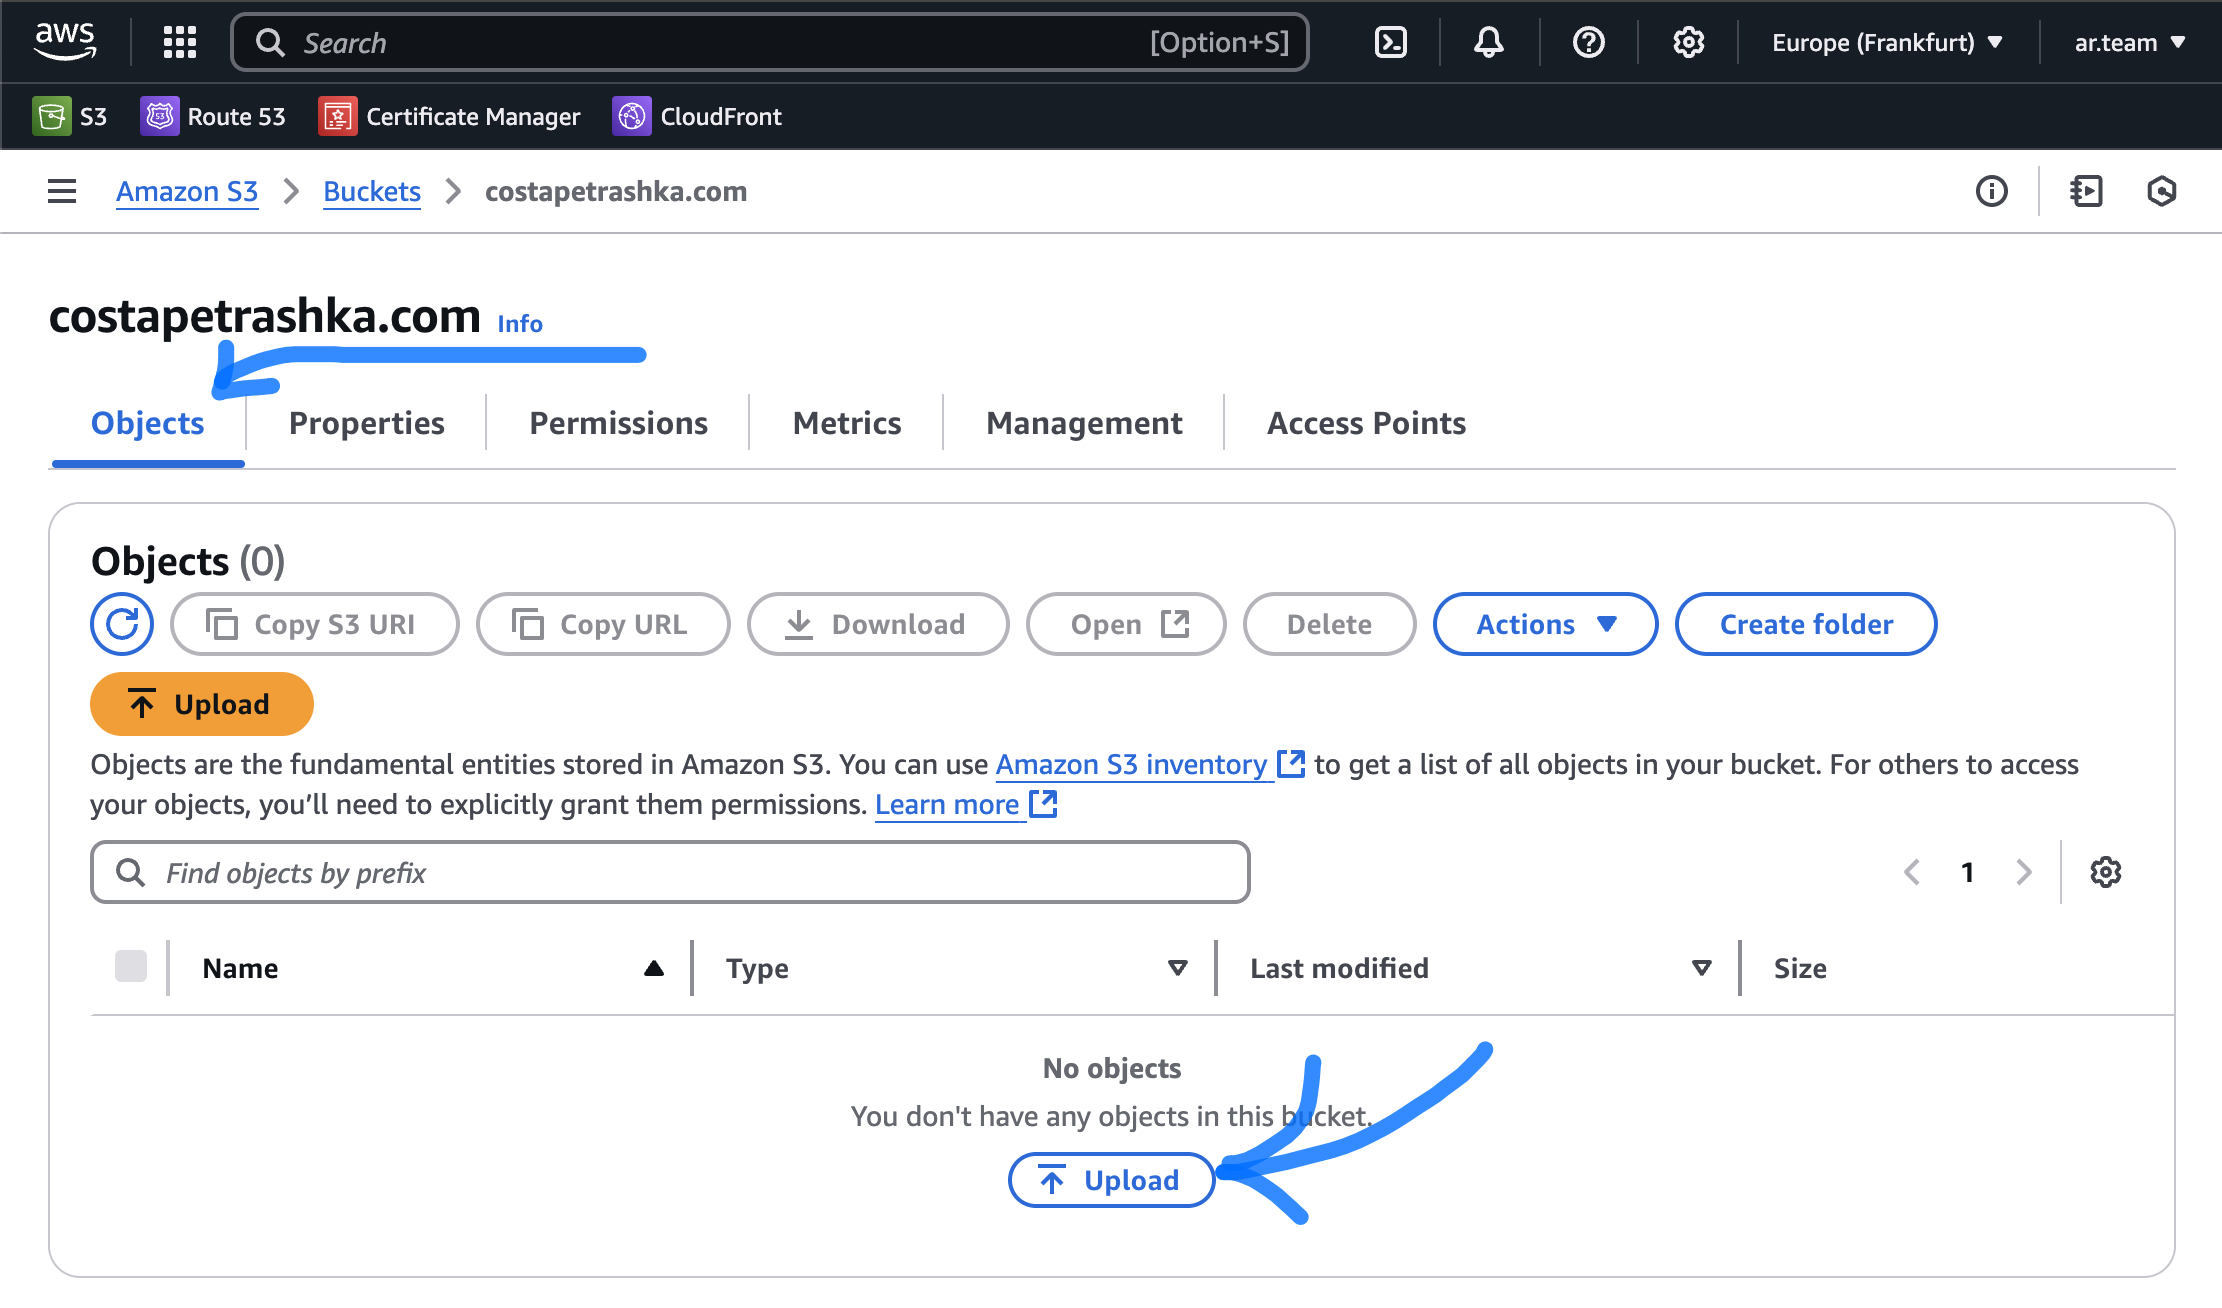
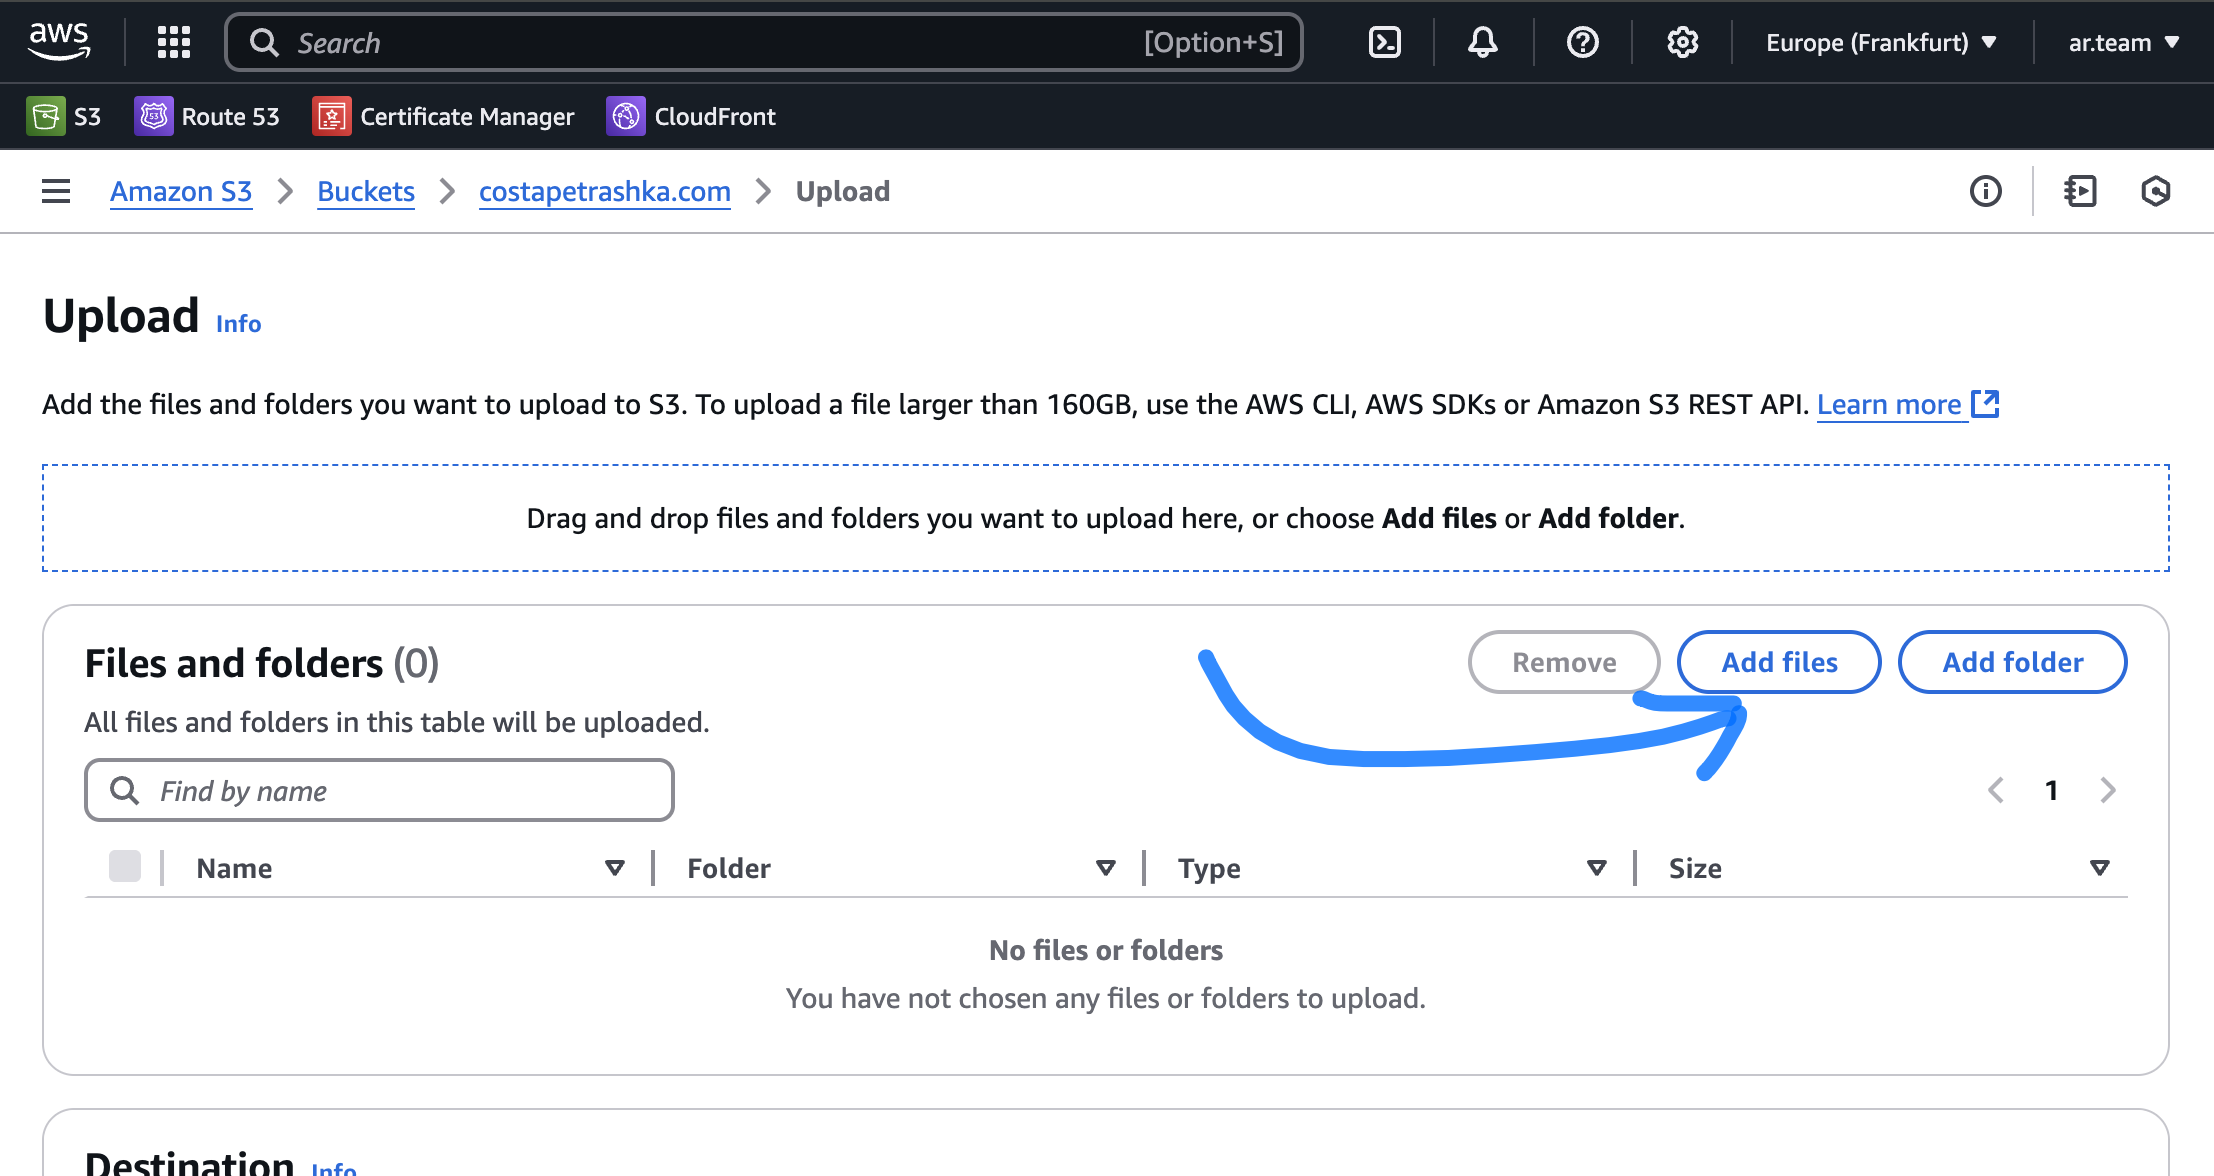
-
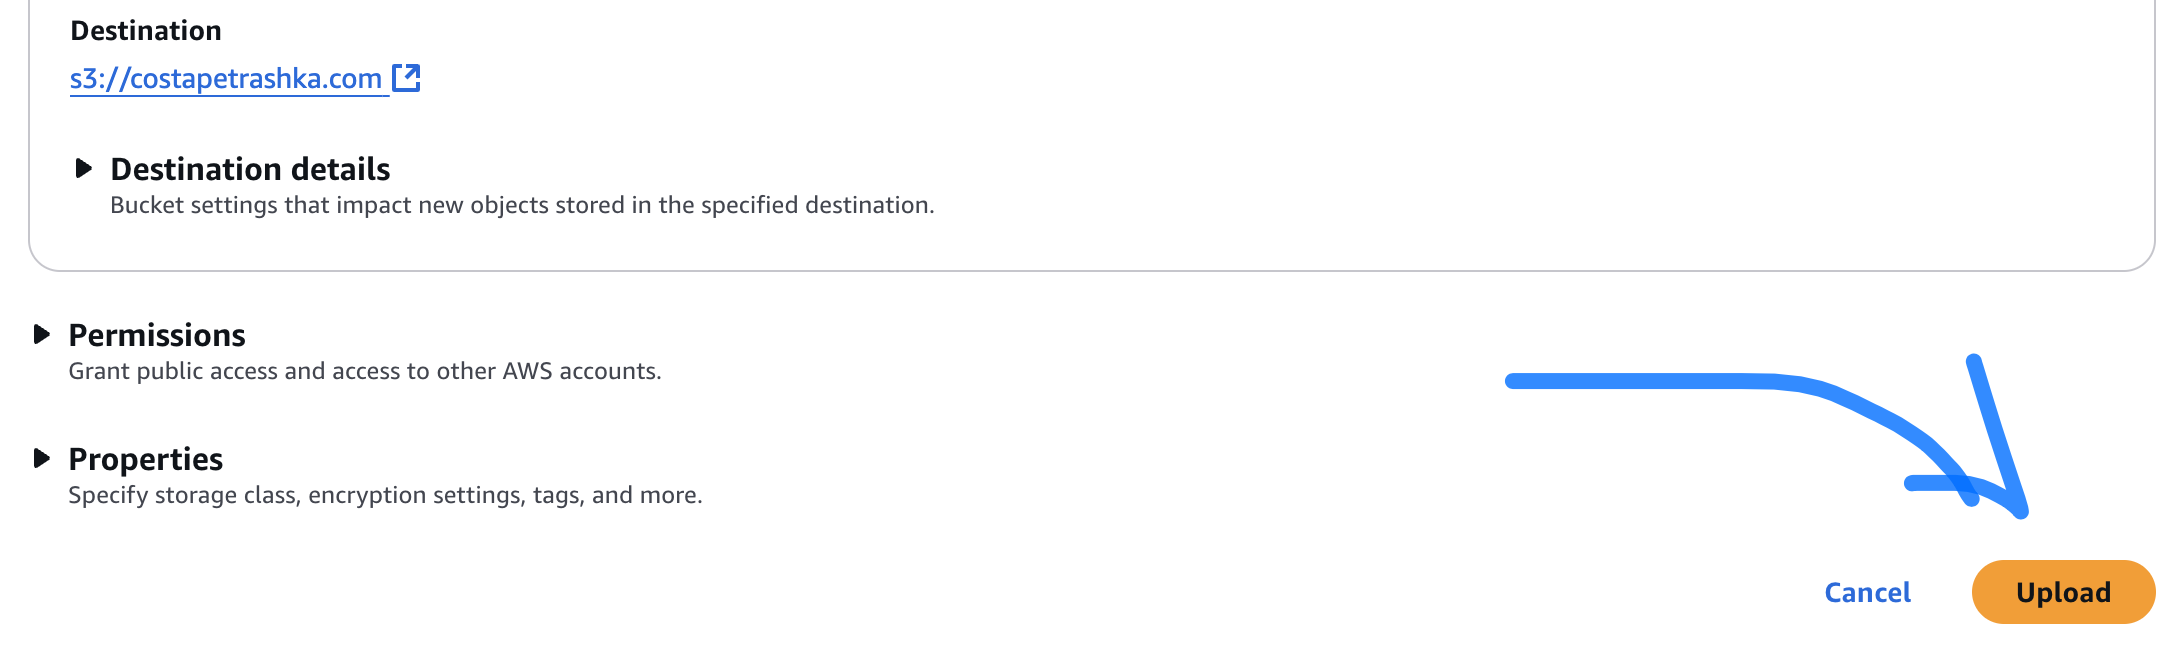
Click add files and choose "index.html" , after that click Upload
-
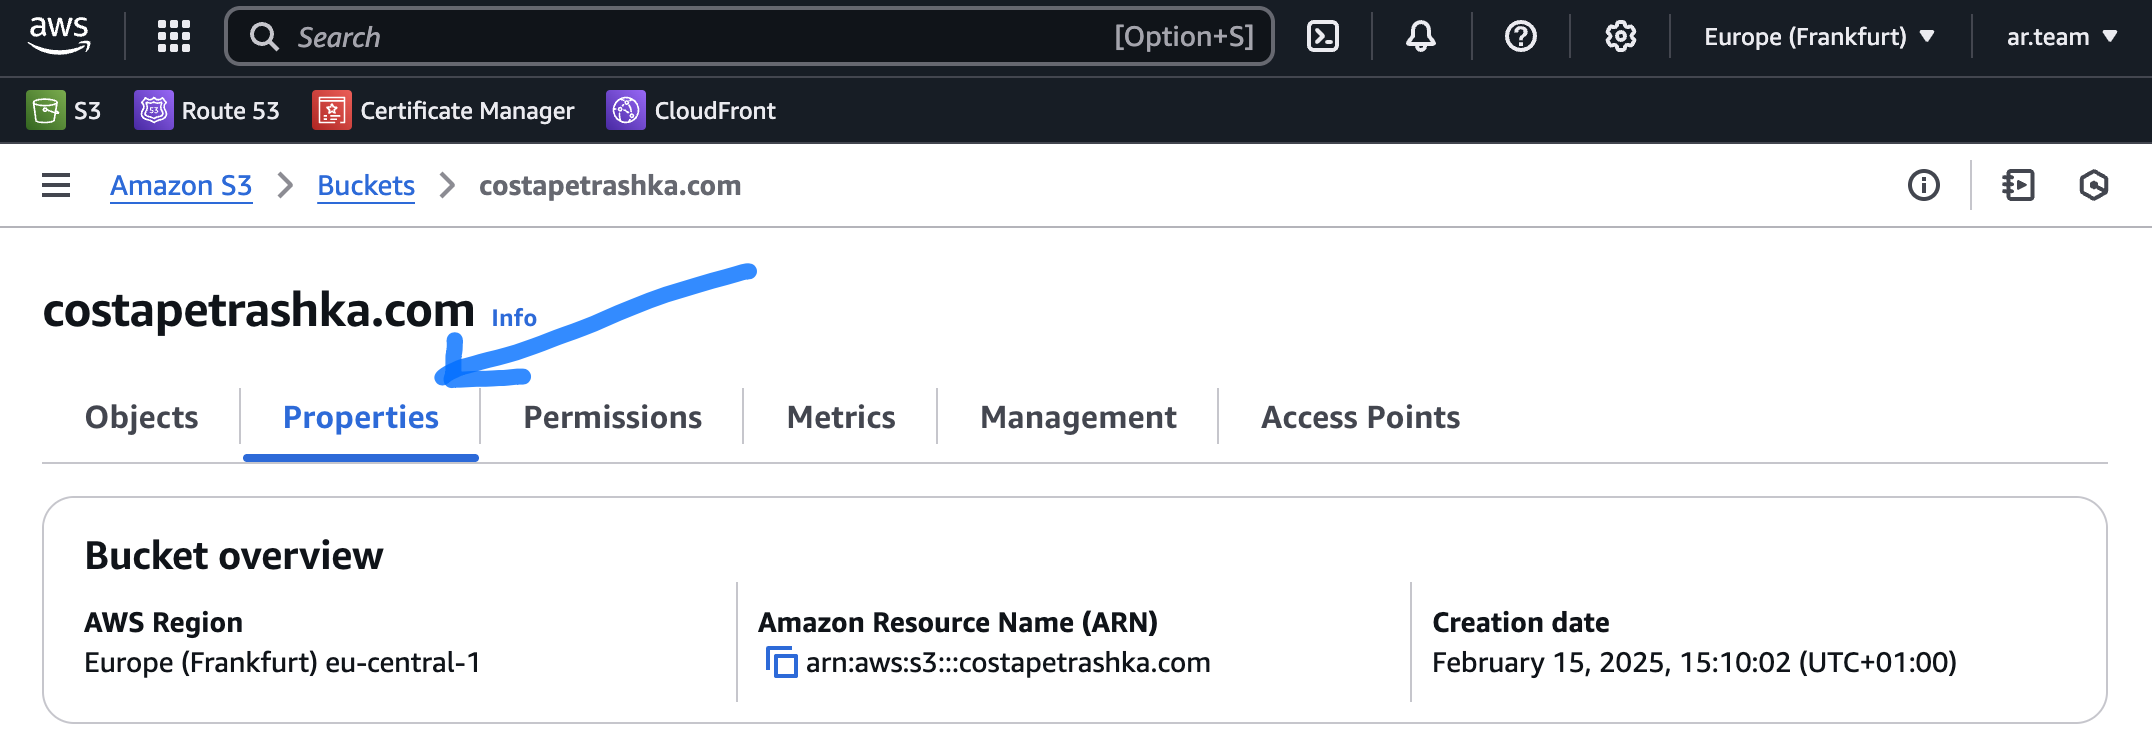
Go to Property tab
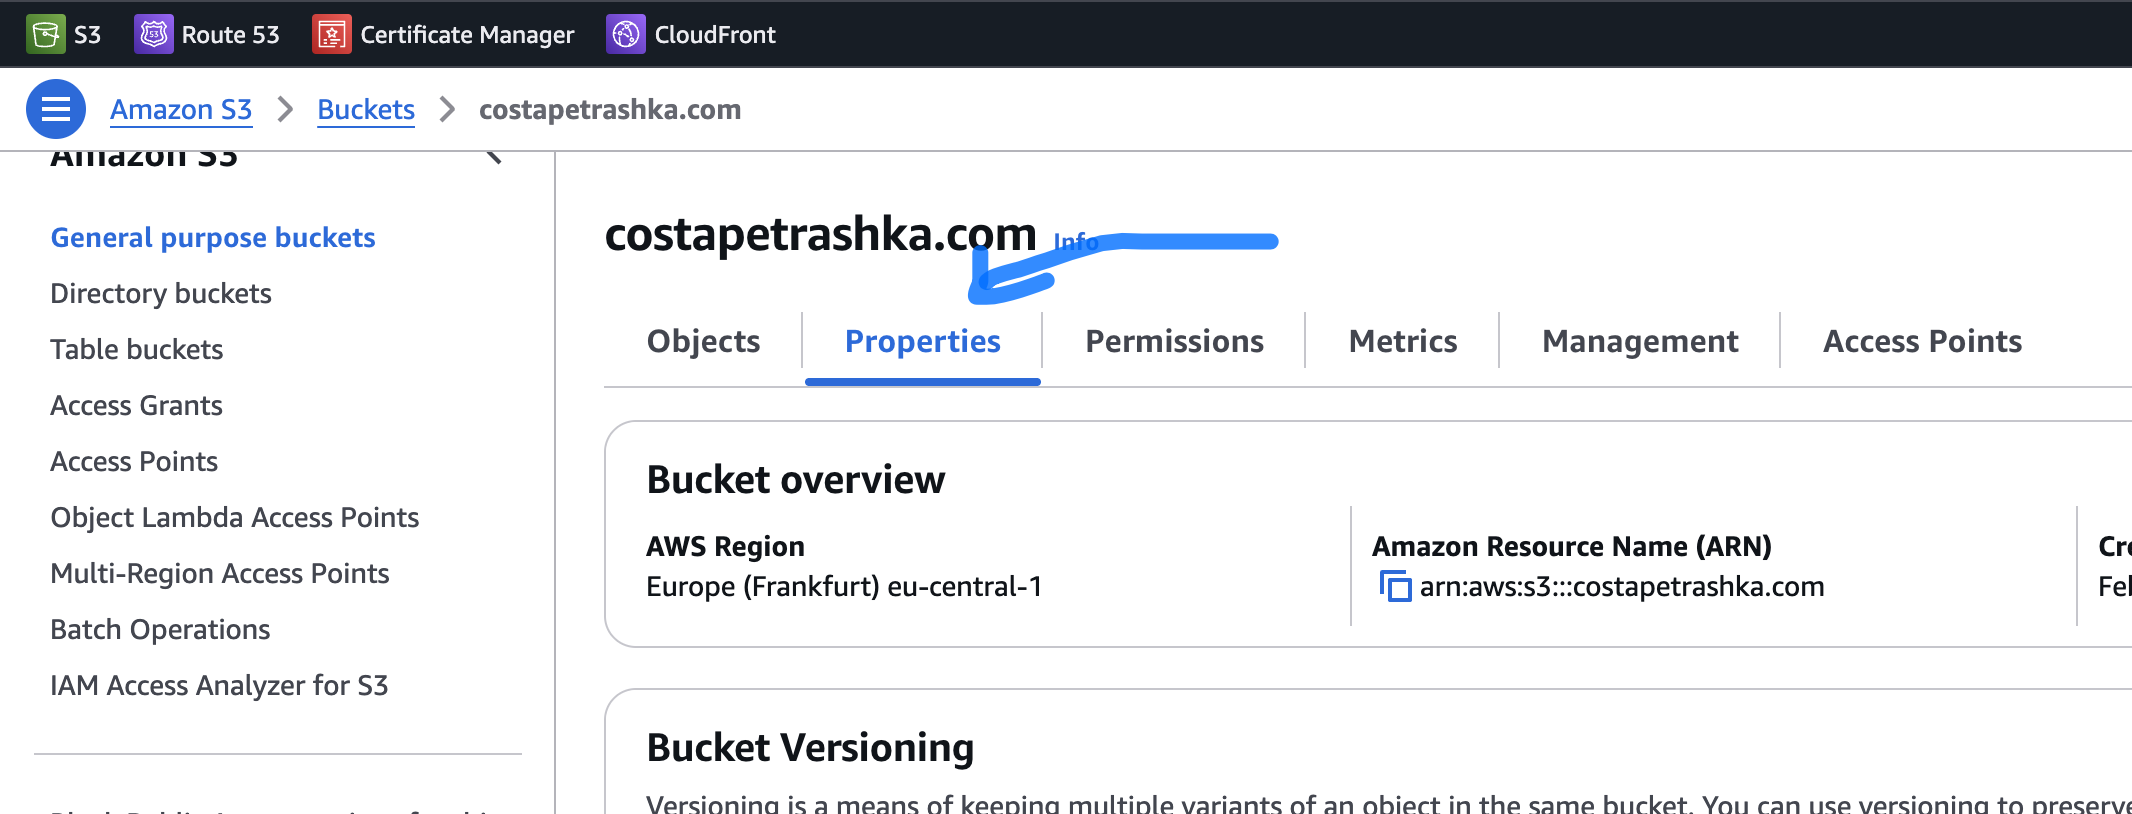
-
List bellow and click on link
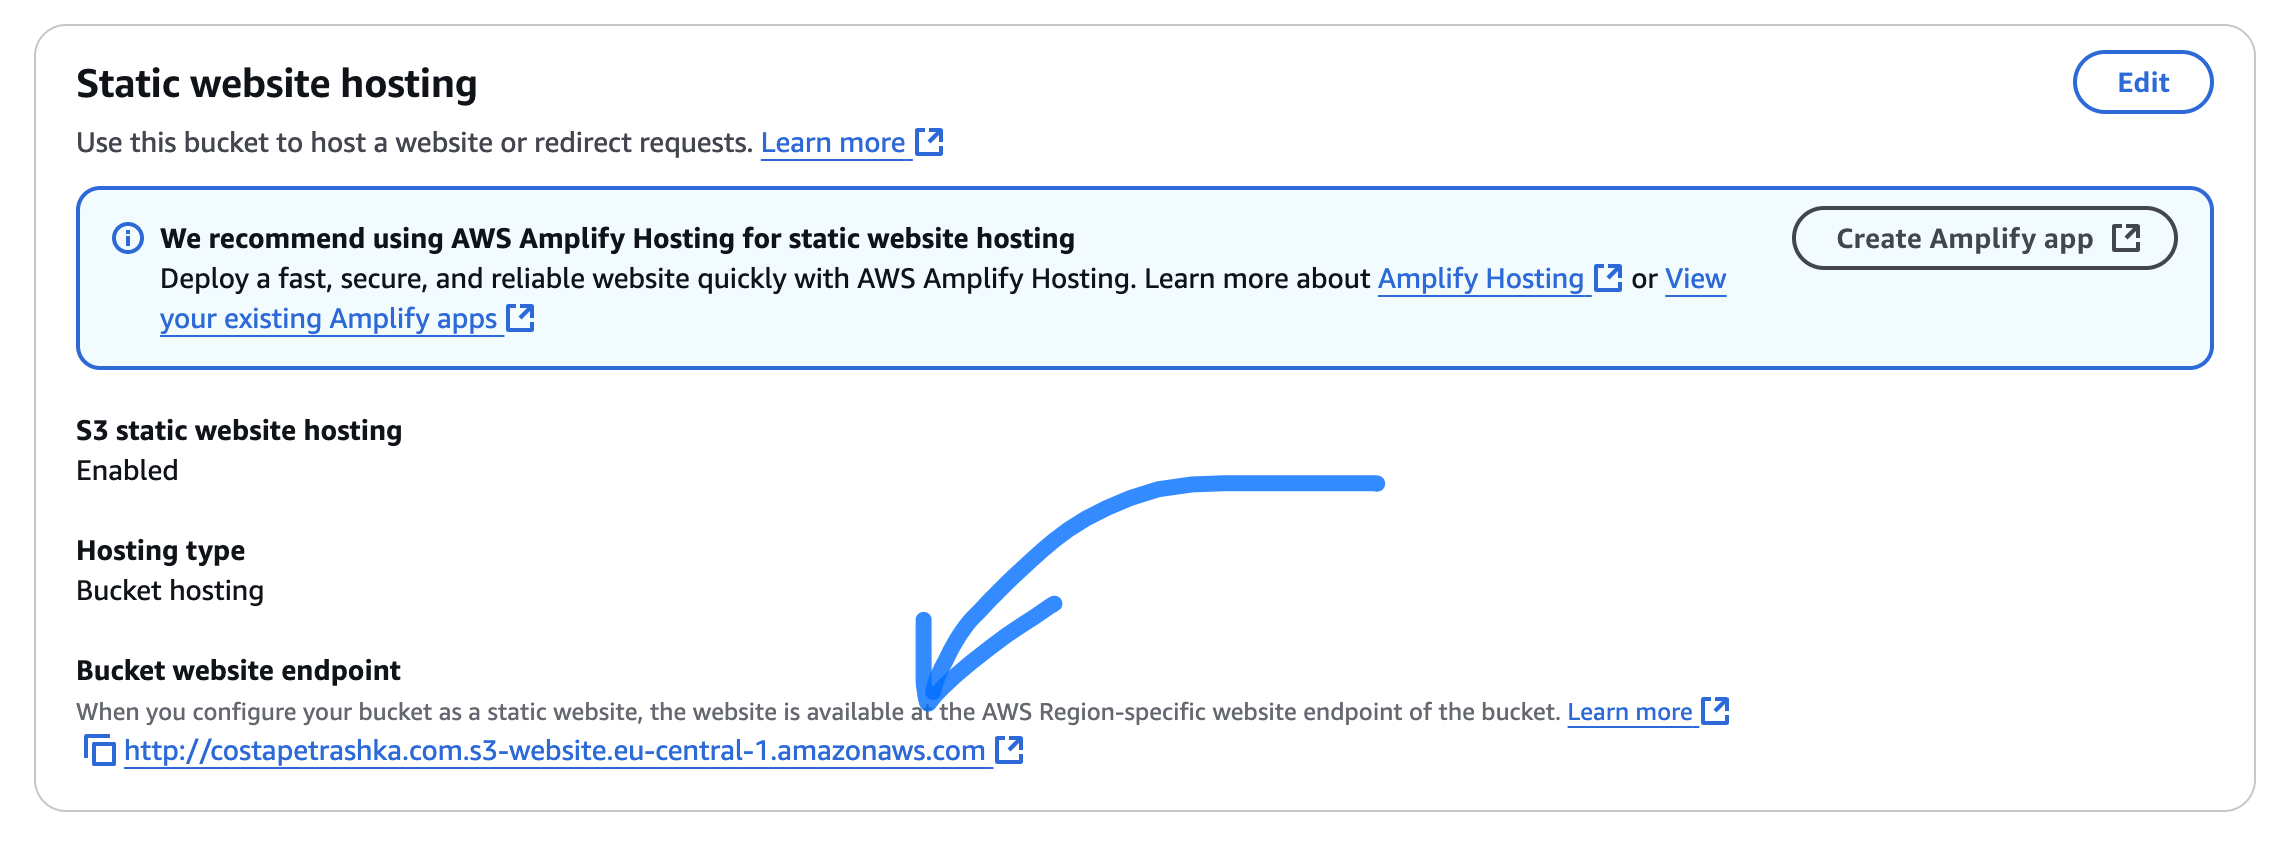
- see that your file was Open correctly

4. Create SSL Certificate
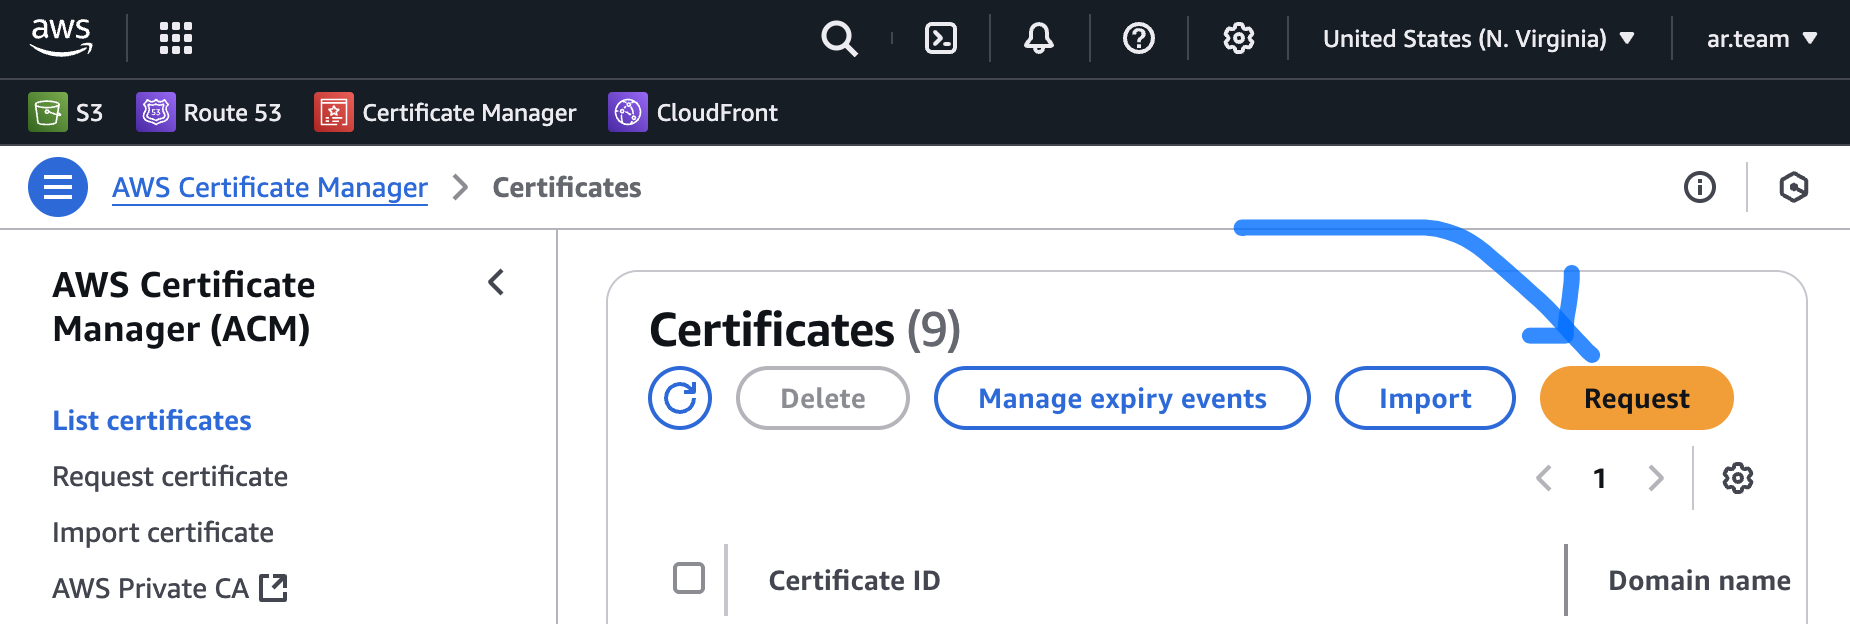
-
Go to AWS Certificates Manager
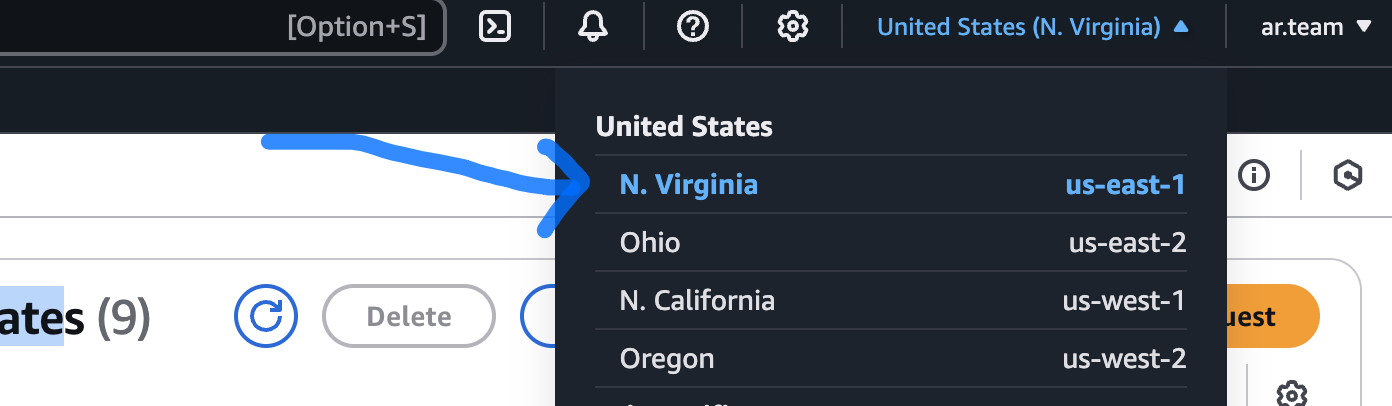
-
Choose N.Verginia (region)
-
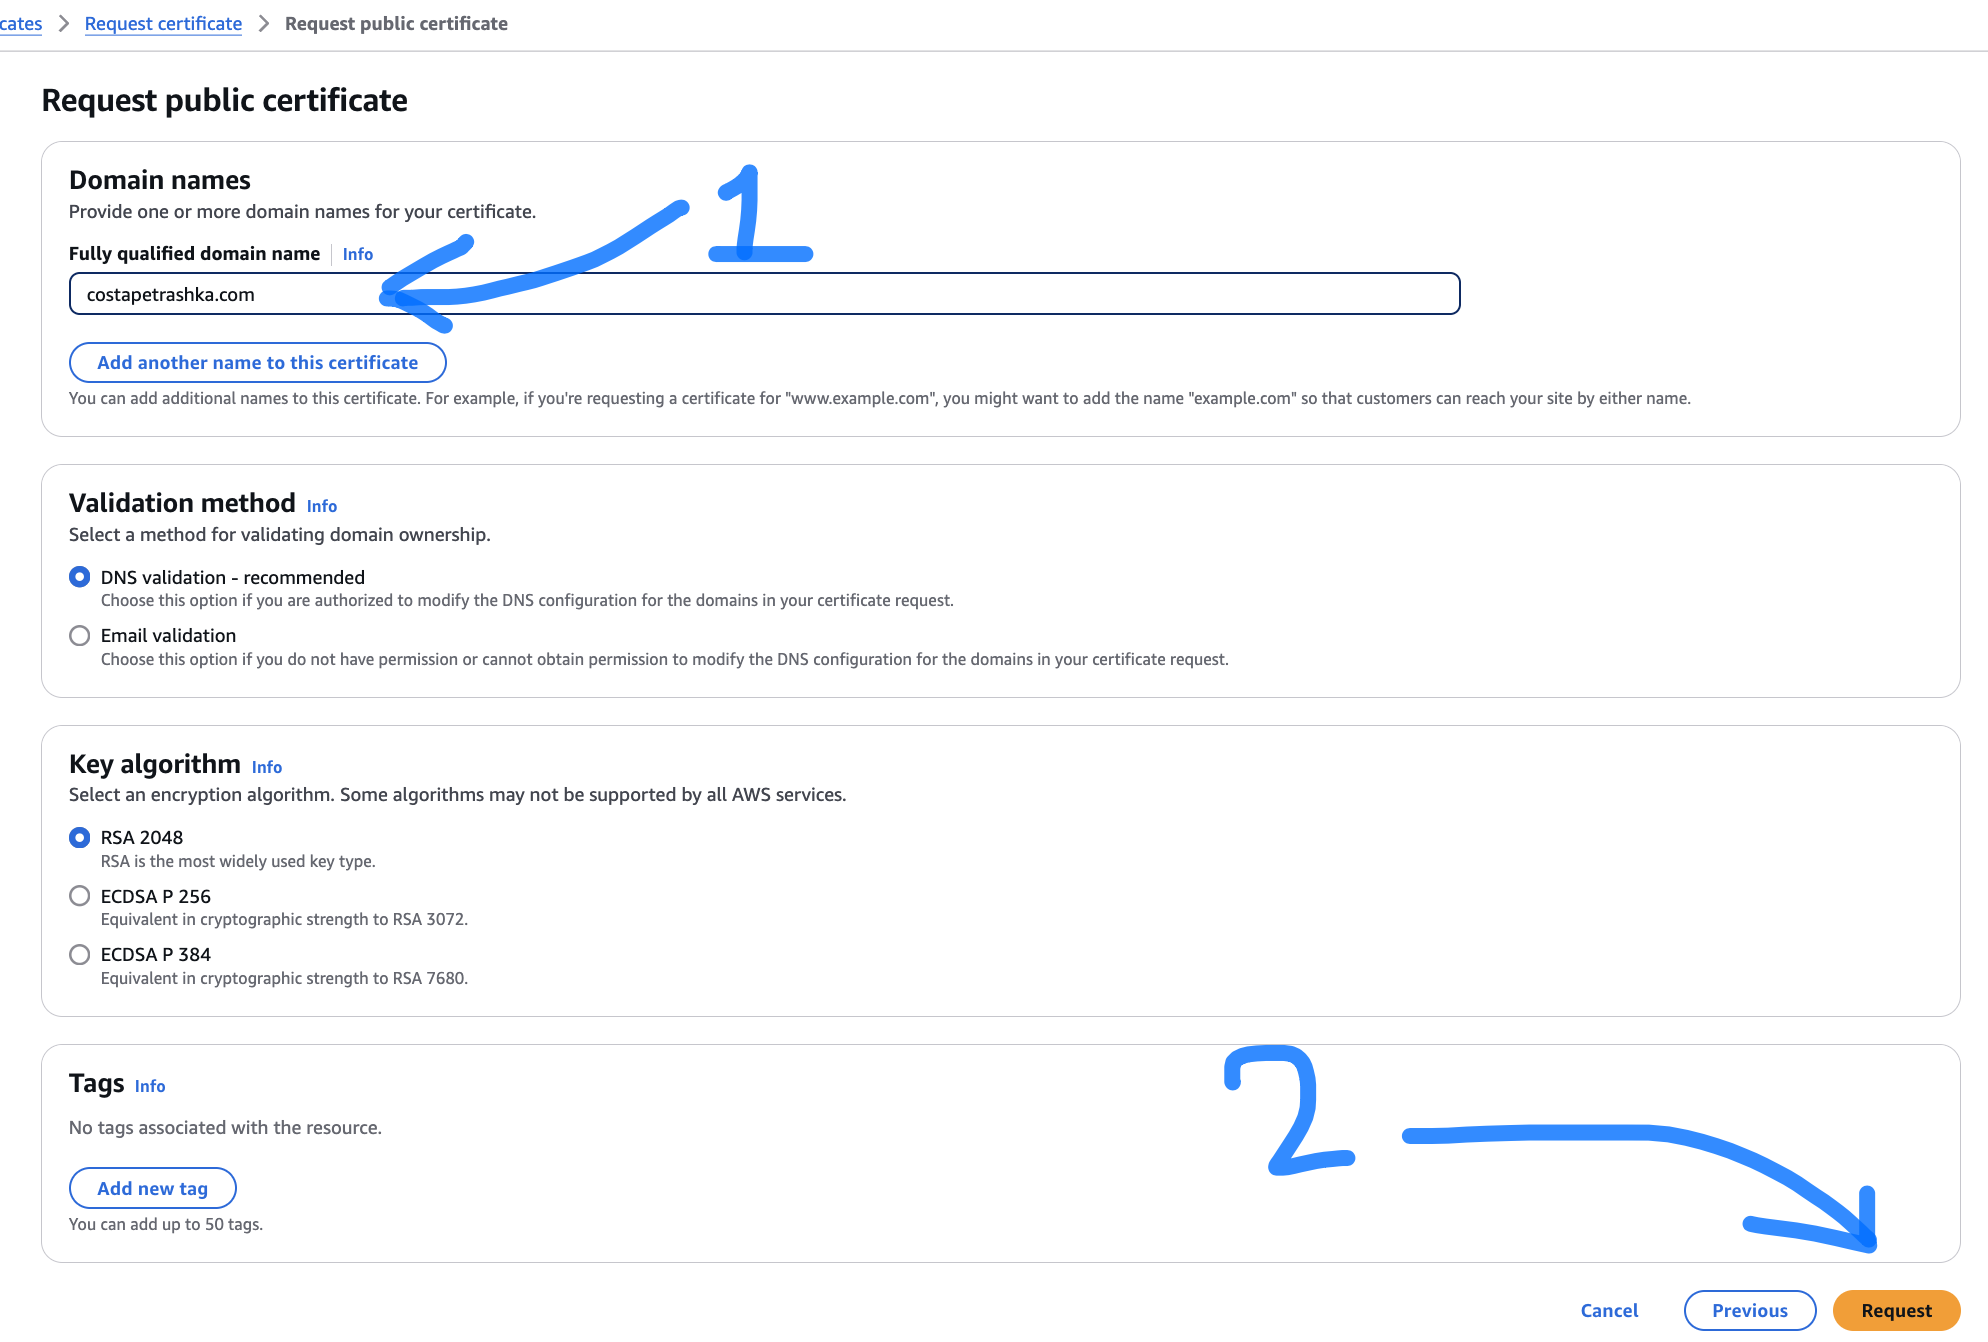
Click Request
- Next
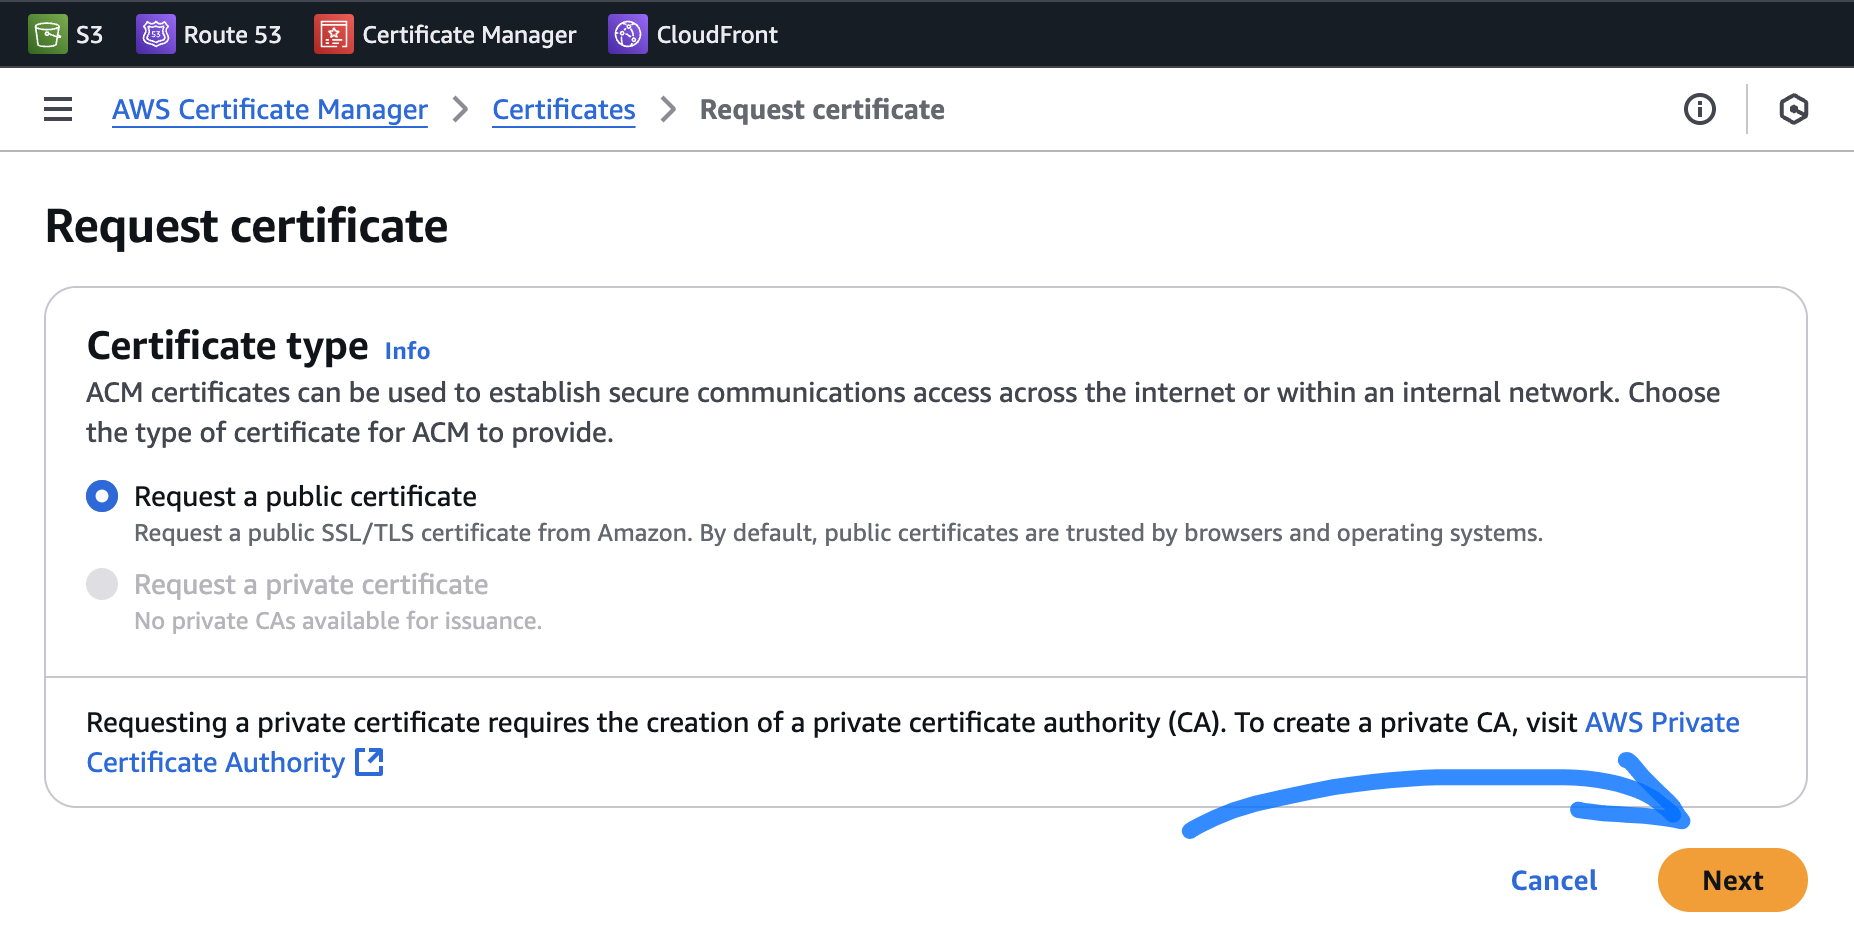
- Put name of your domain and click Request
- Wait, in some minutes, you will see btn "Create records in Route 53" click it.
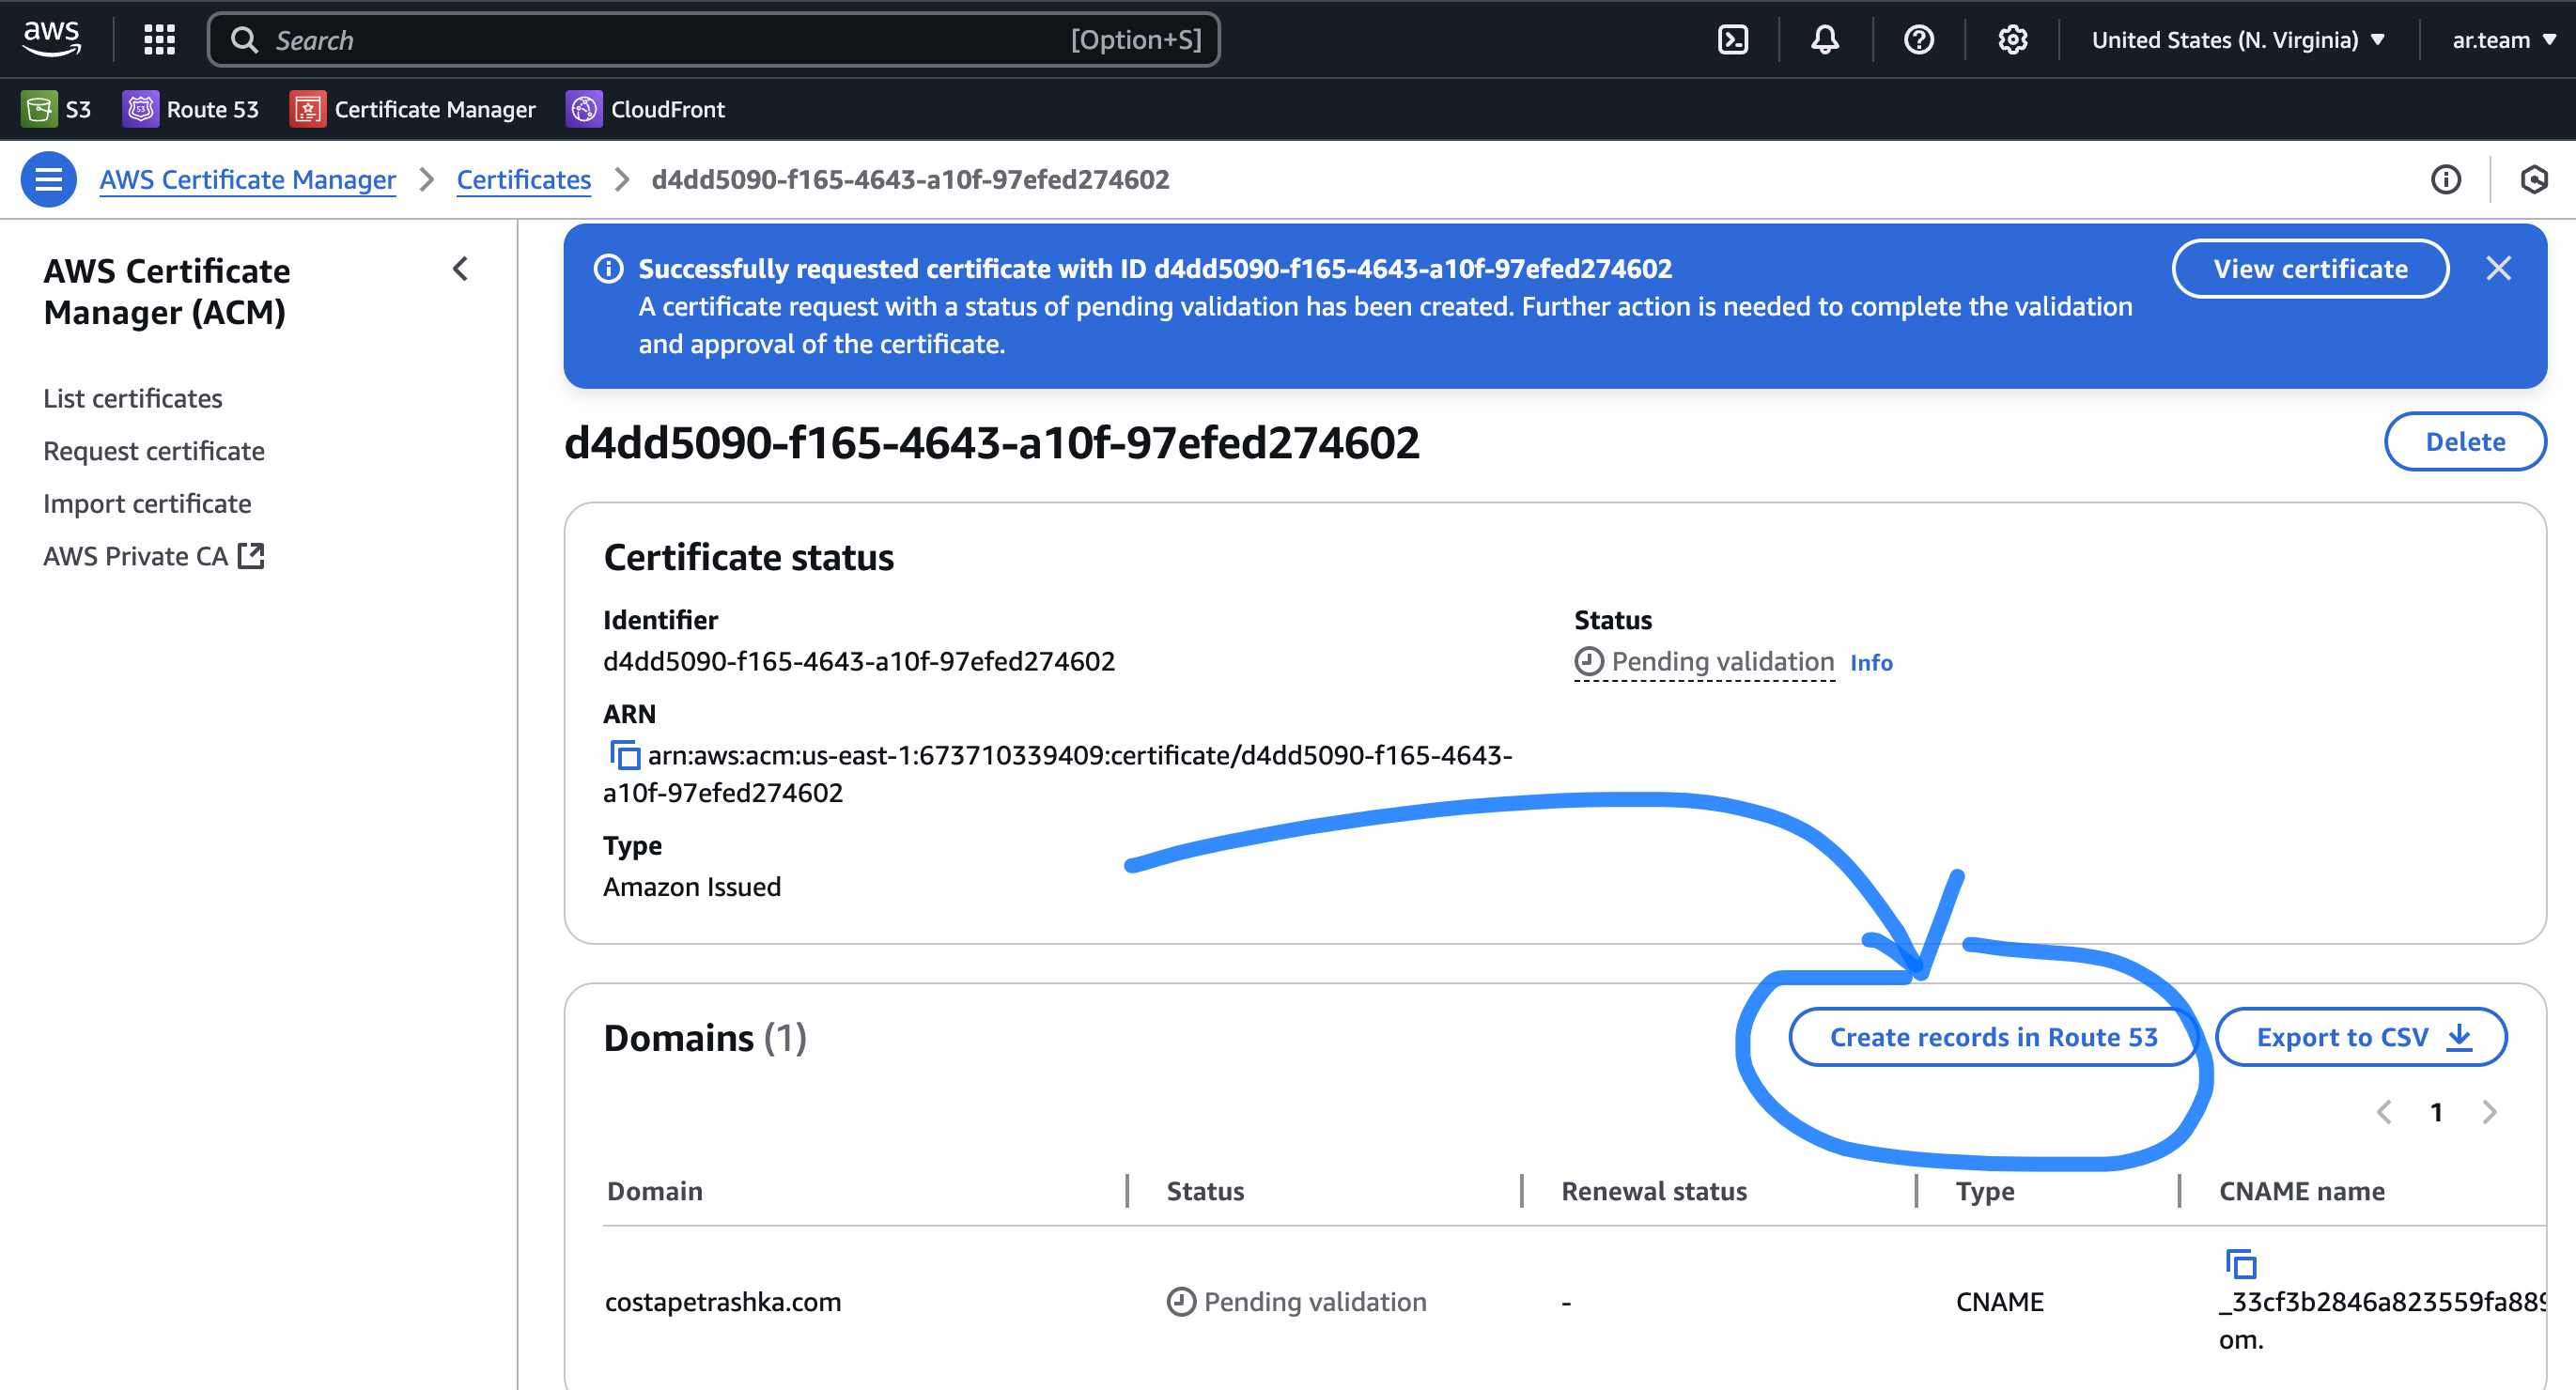
-
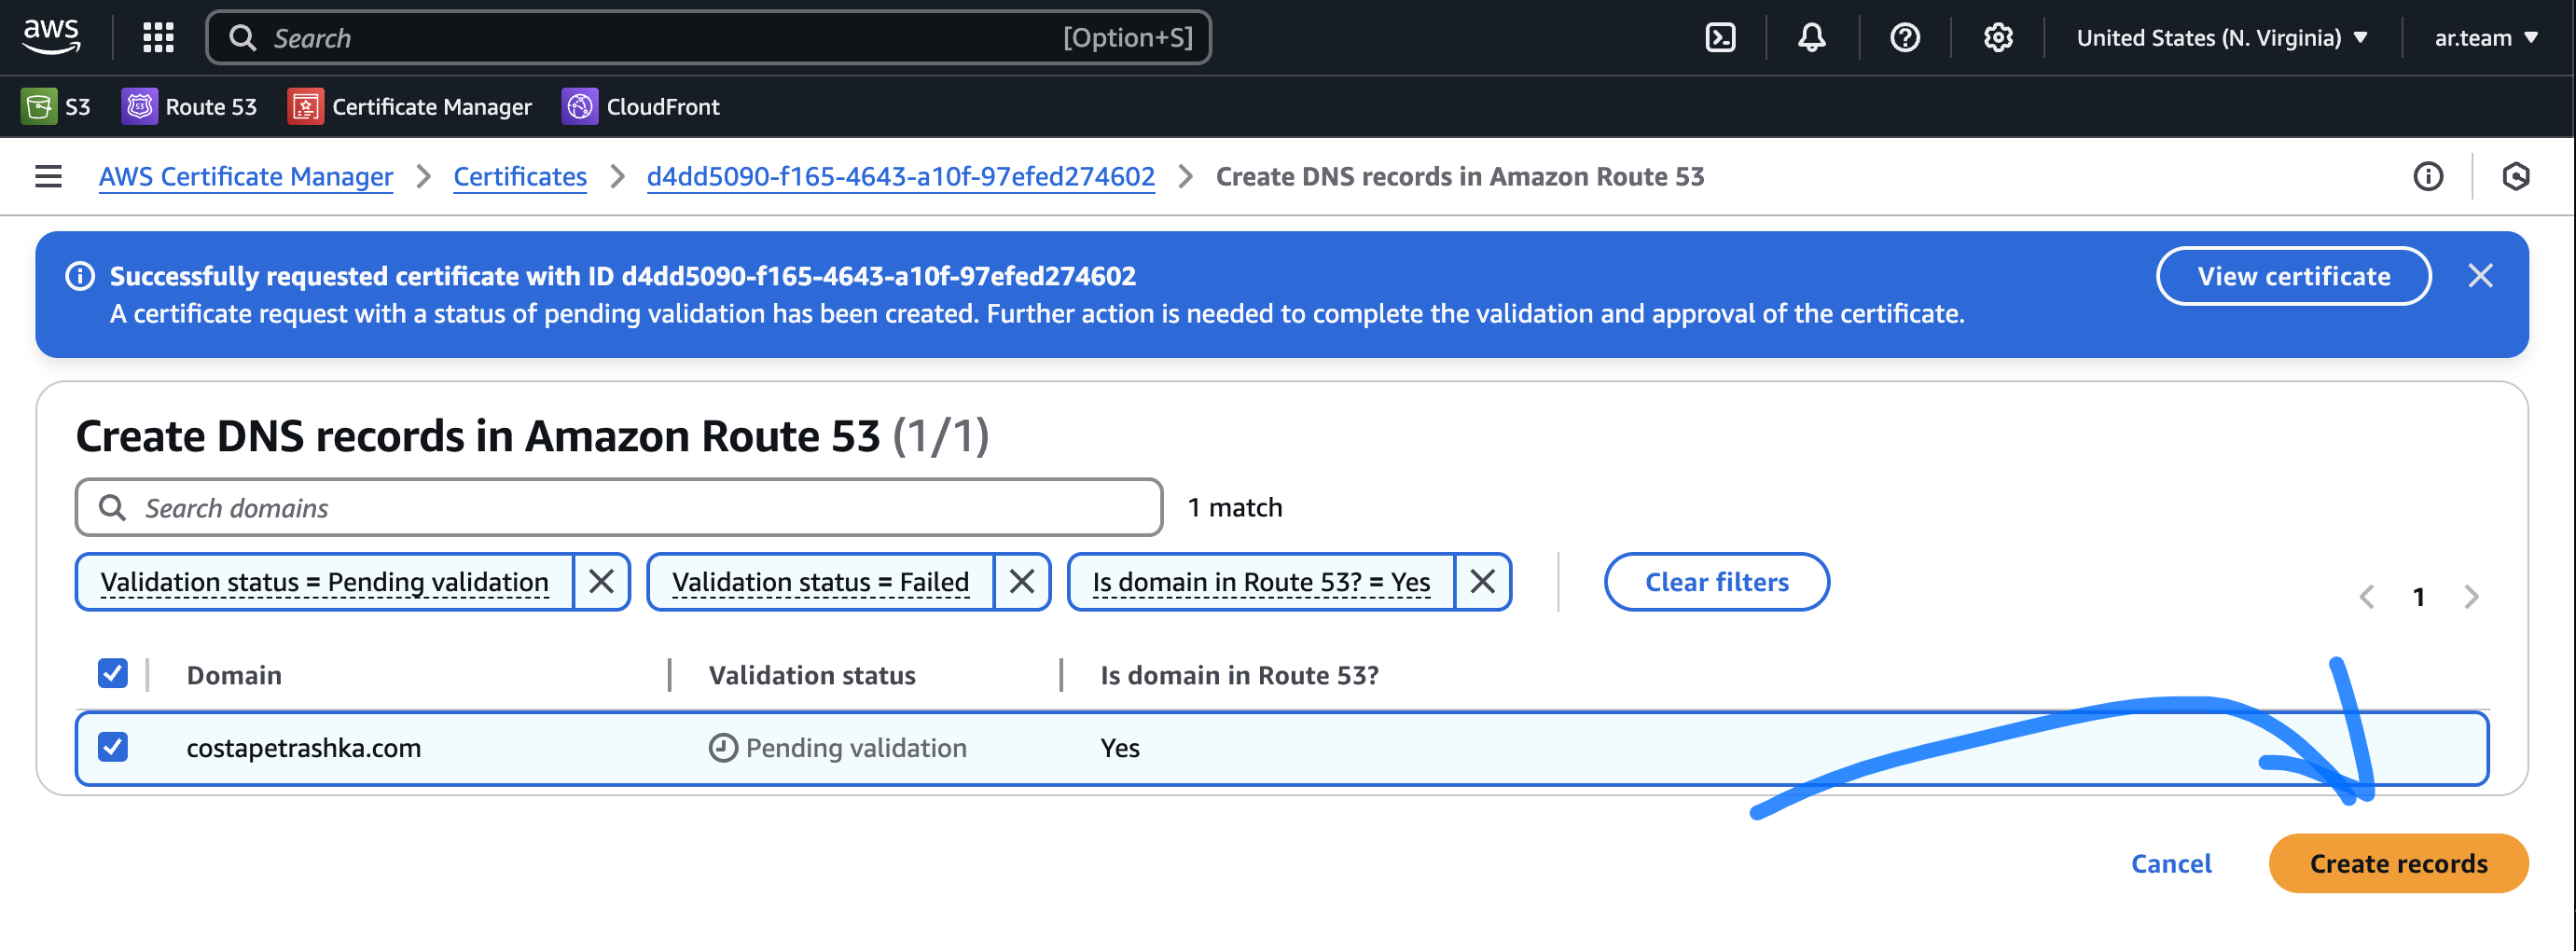
And after that click Create records
-
Go to List certificates

- Wait 10 min -> Your domain status need to be Issued (green color).

5. Cloud Front Distribution
Create Cloud Front Distribution
-
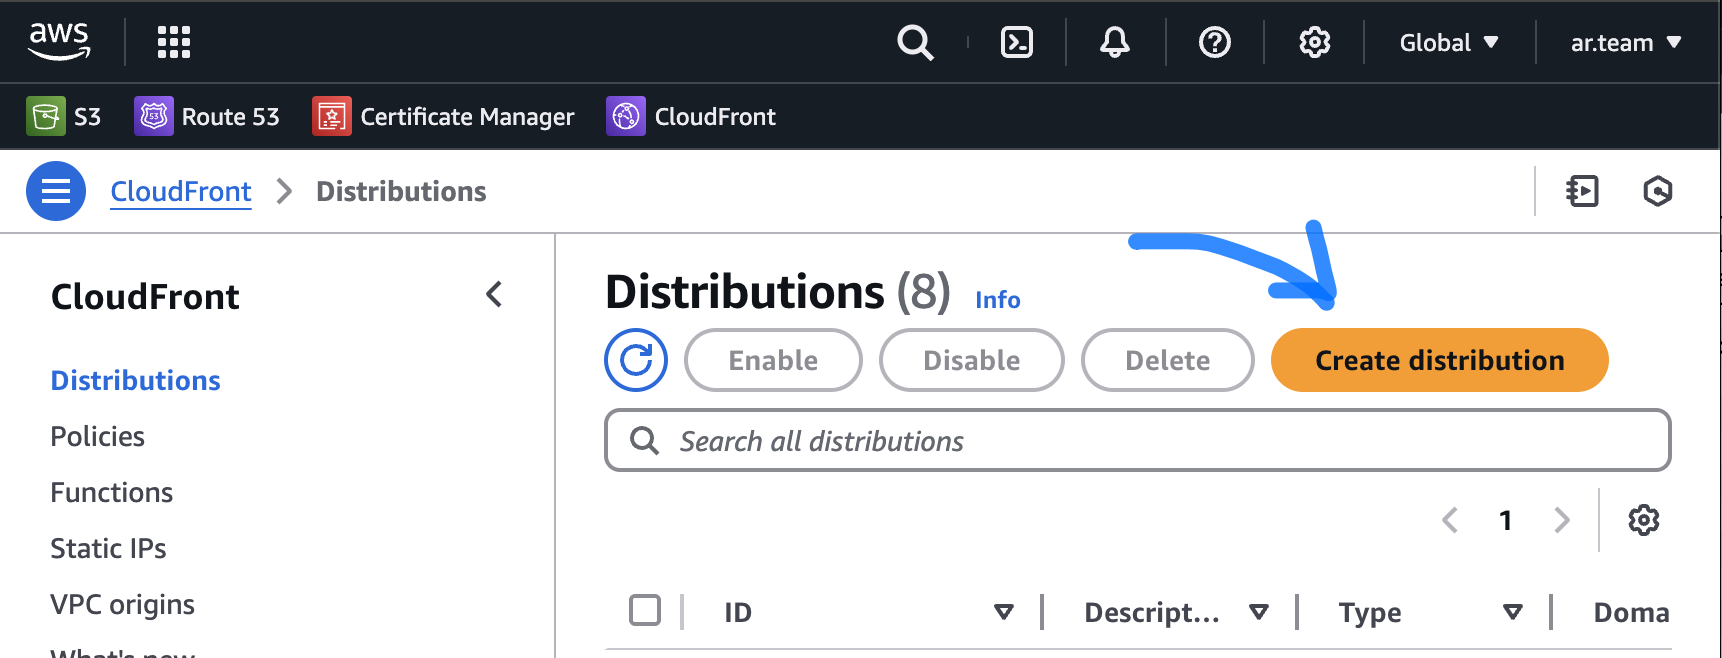
Go to AWS CloudFront - and press Create distribution
-
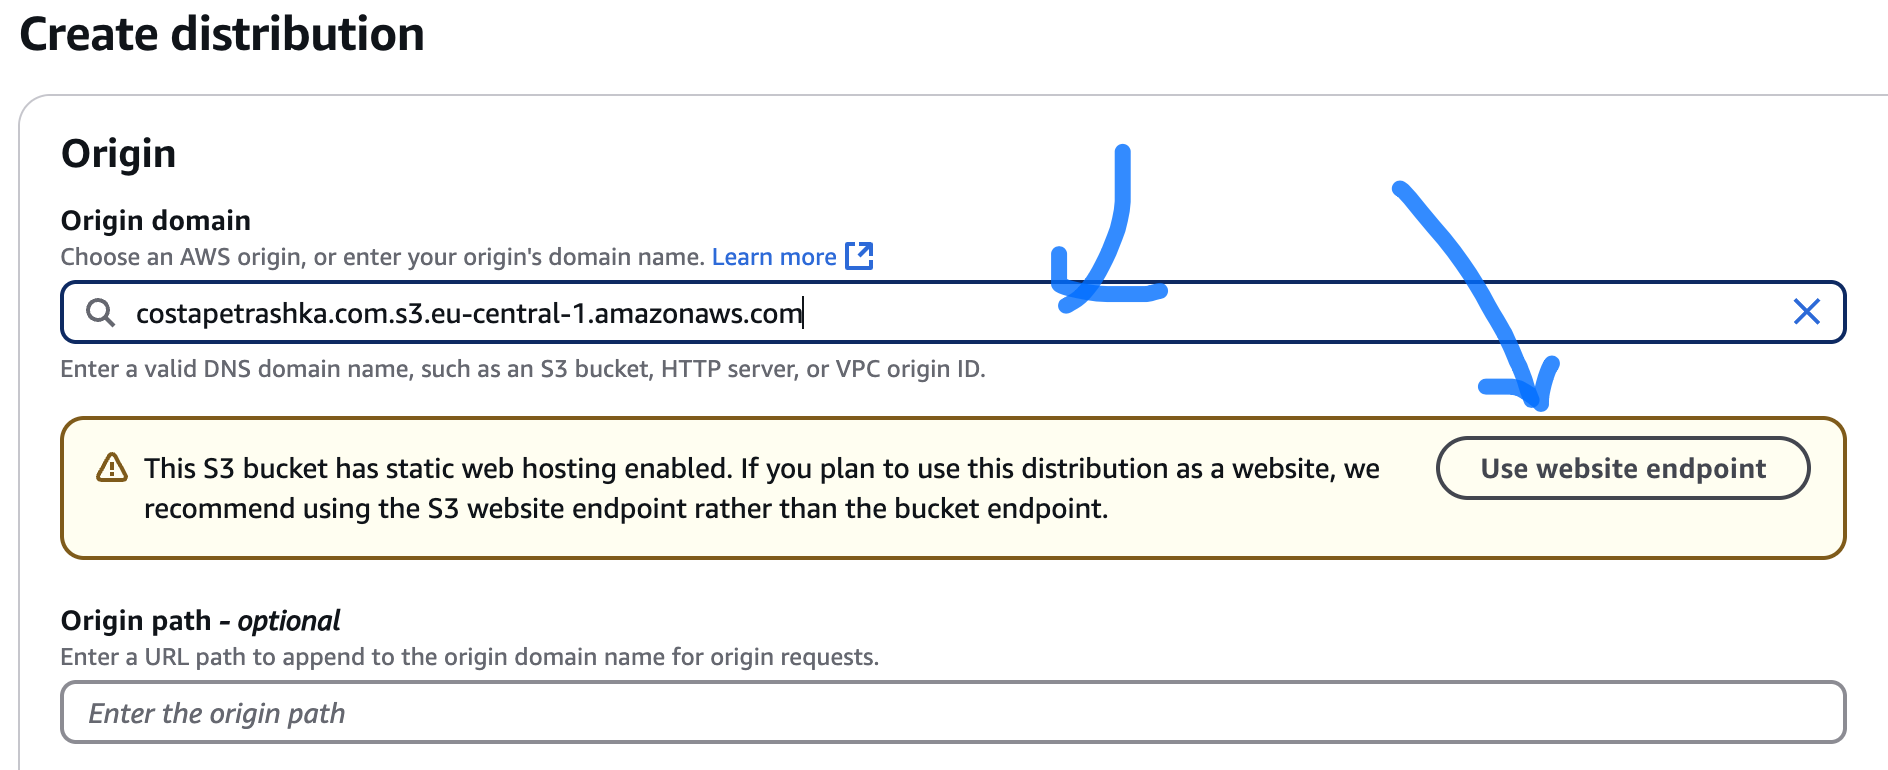
Origin domain - choose your s3 bucket and click "Use website endpoint".
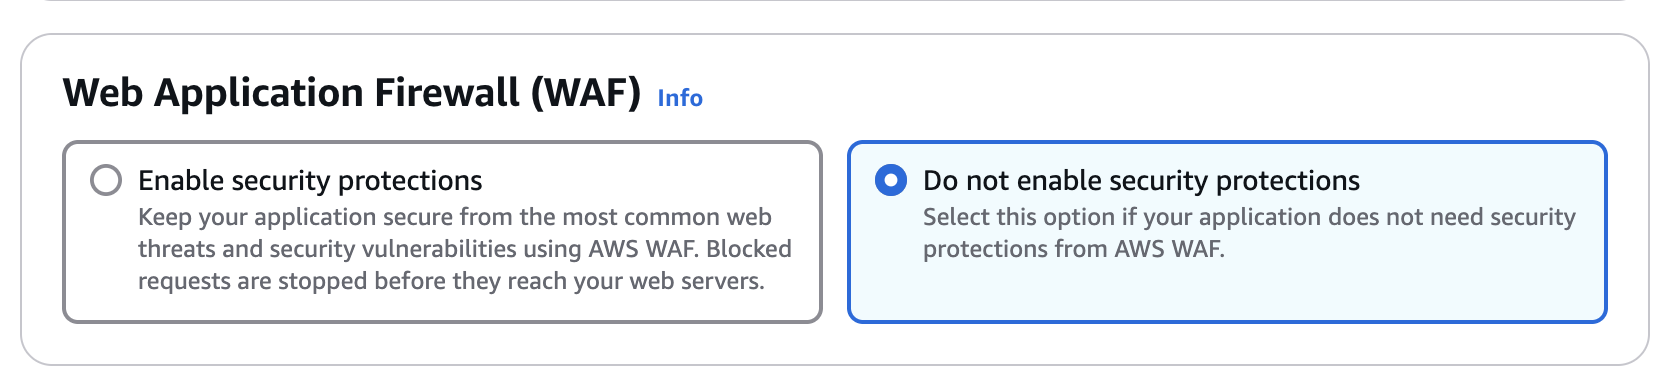
- Don't enable secure protection "Web Application Firewall"
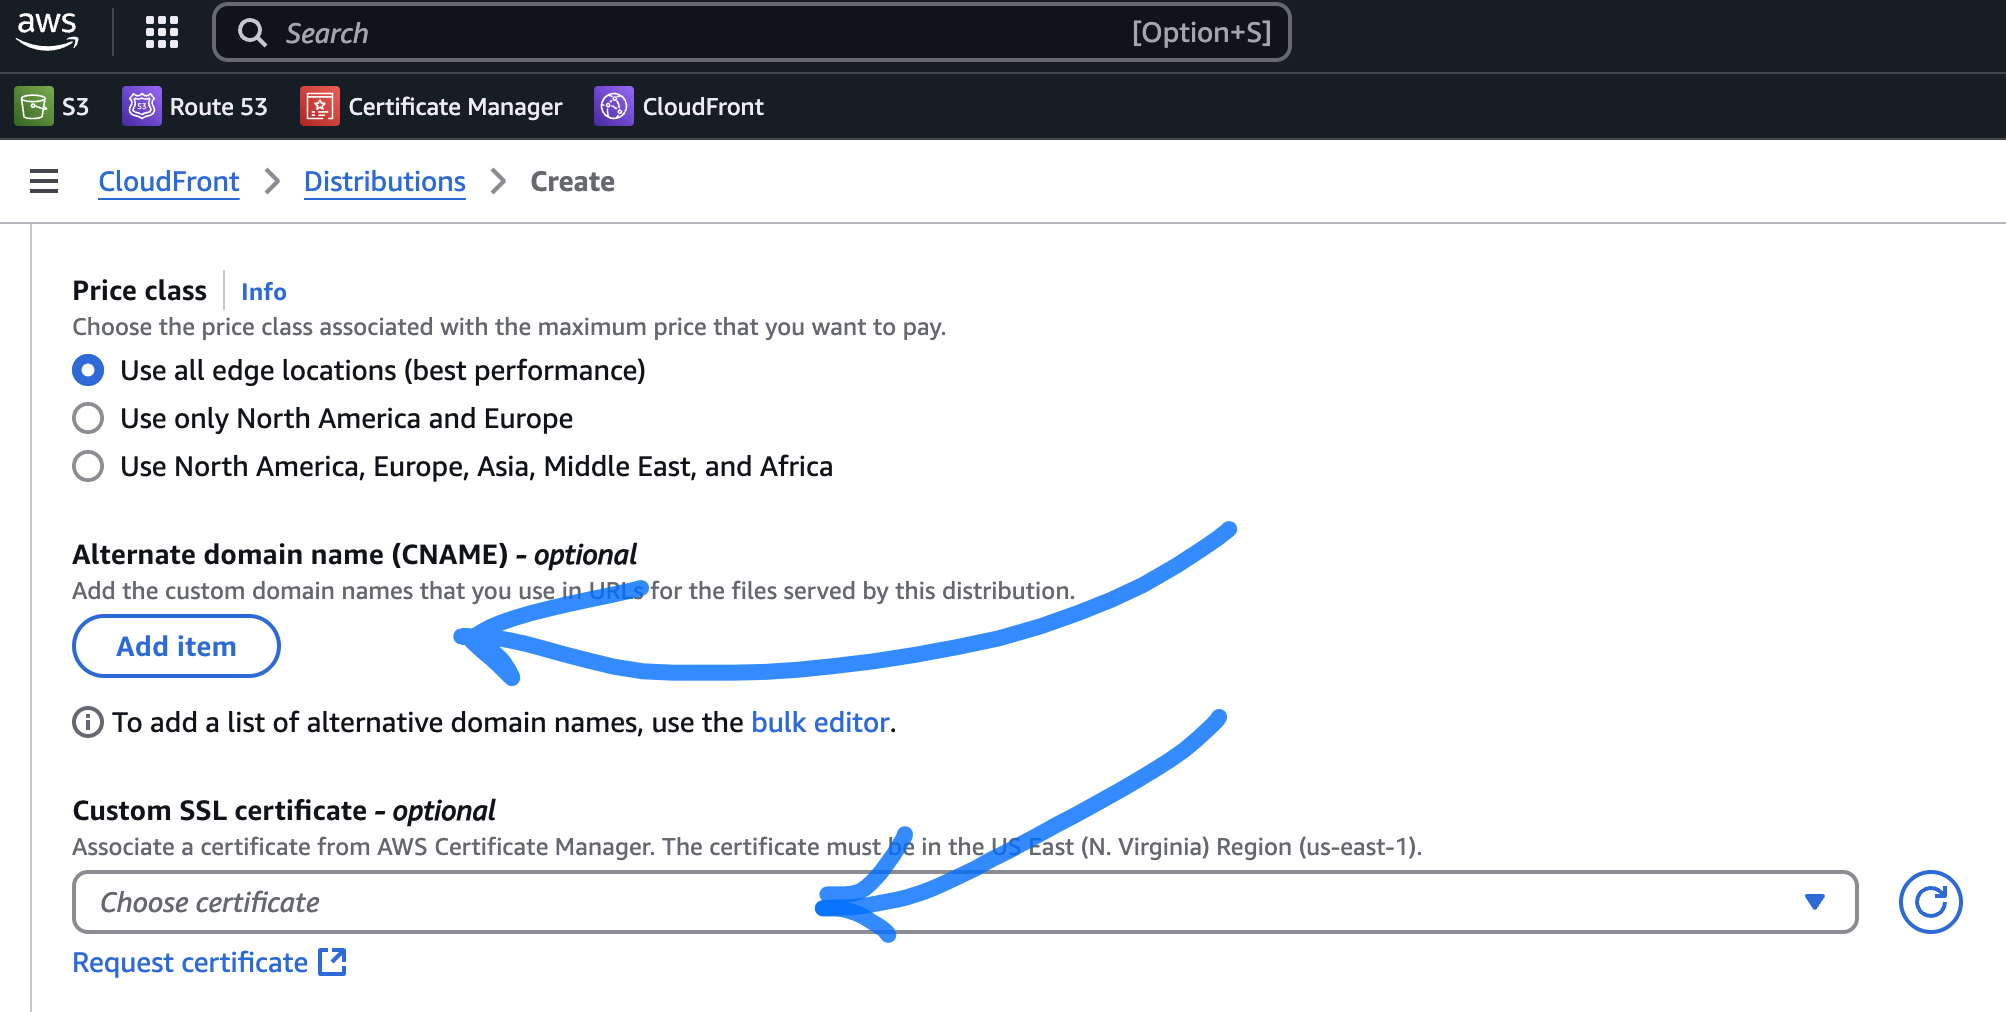
- Add your Domain name and Choose certificate
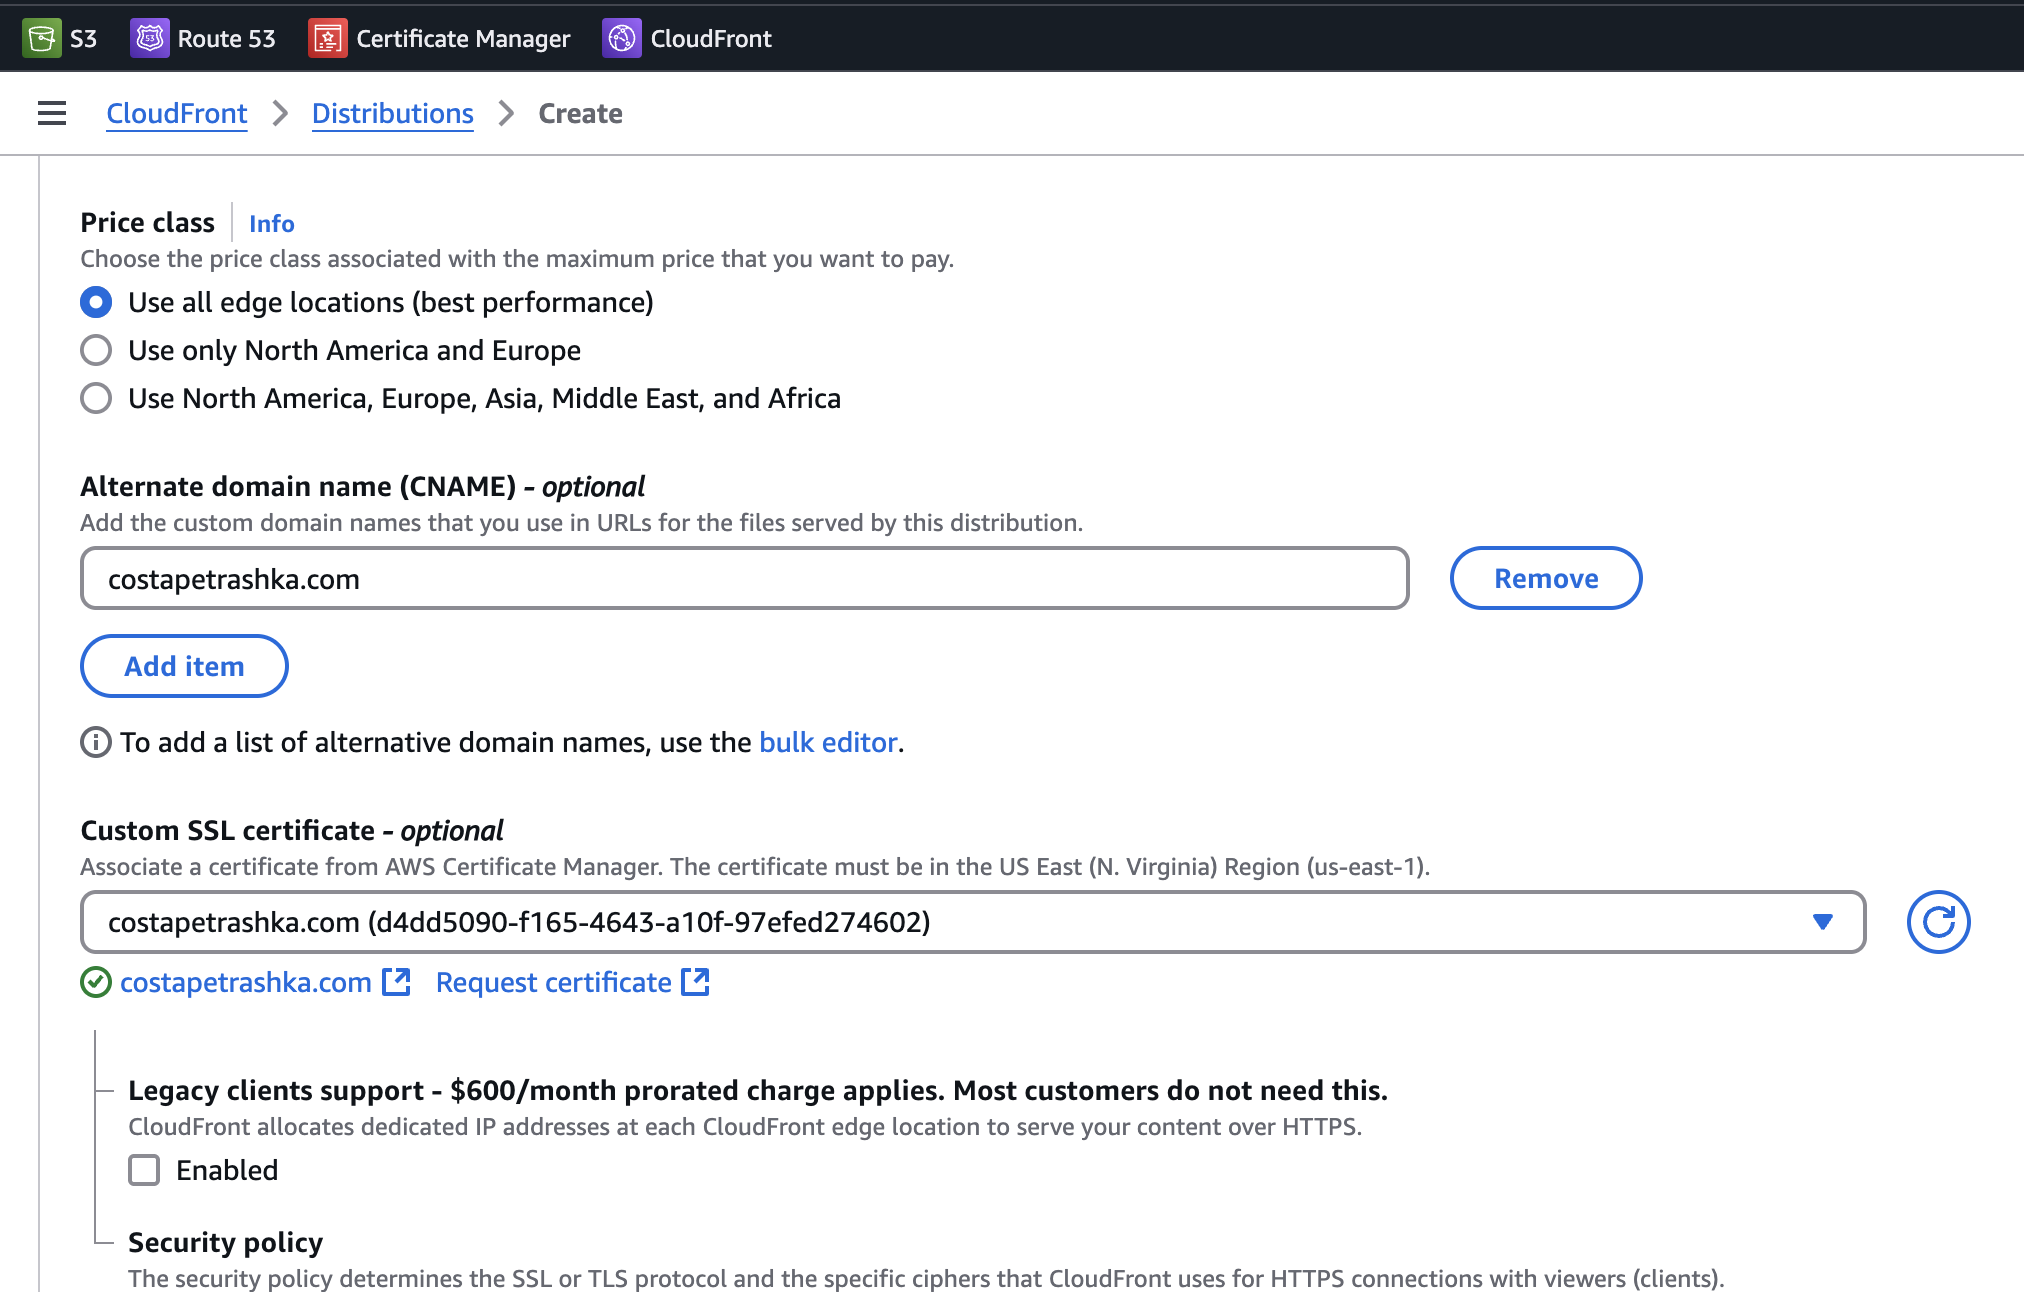
- It will be like this
- Finish creating the CloudFront distribution
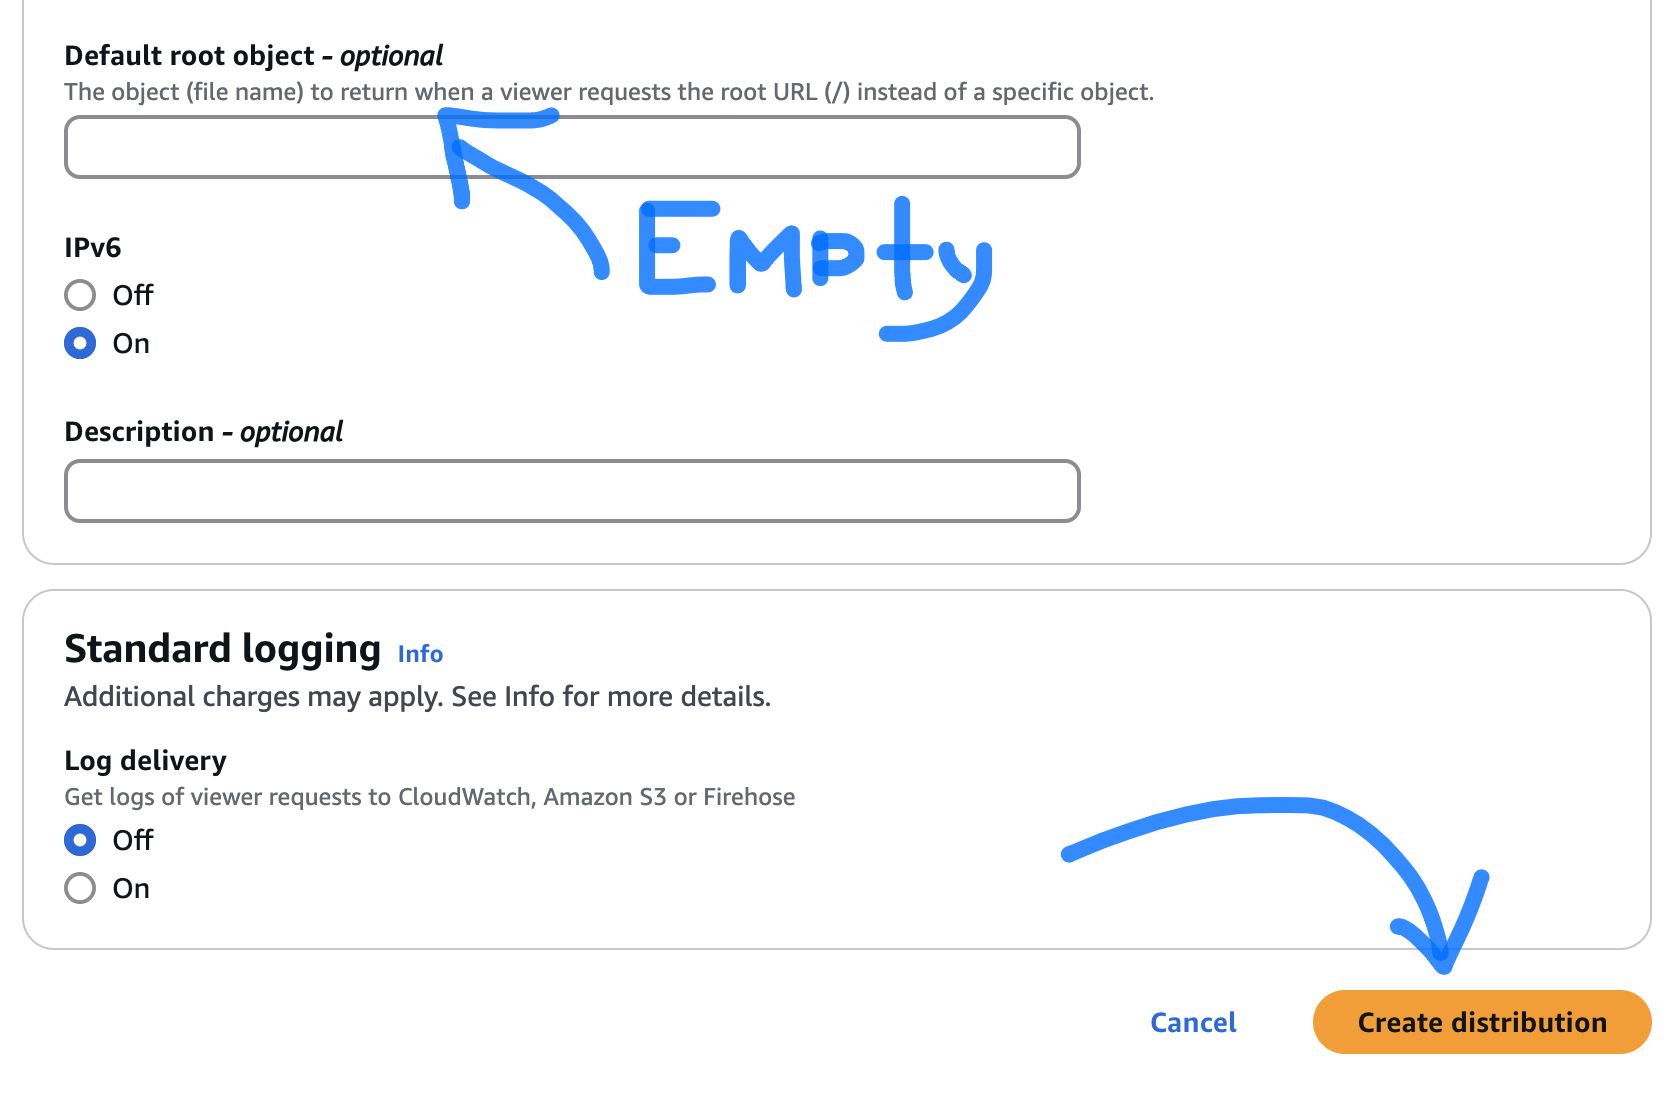
- Wait some minutes when Deploying will be finished.

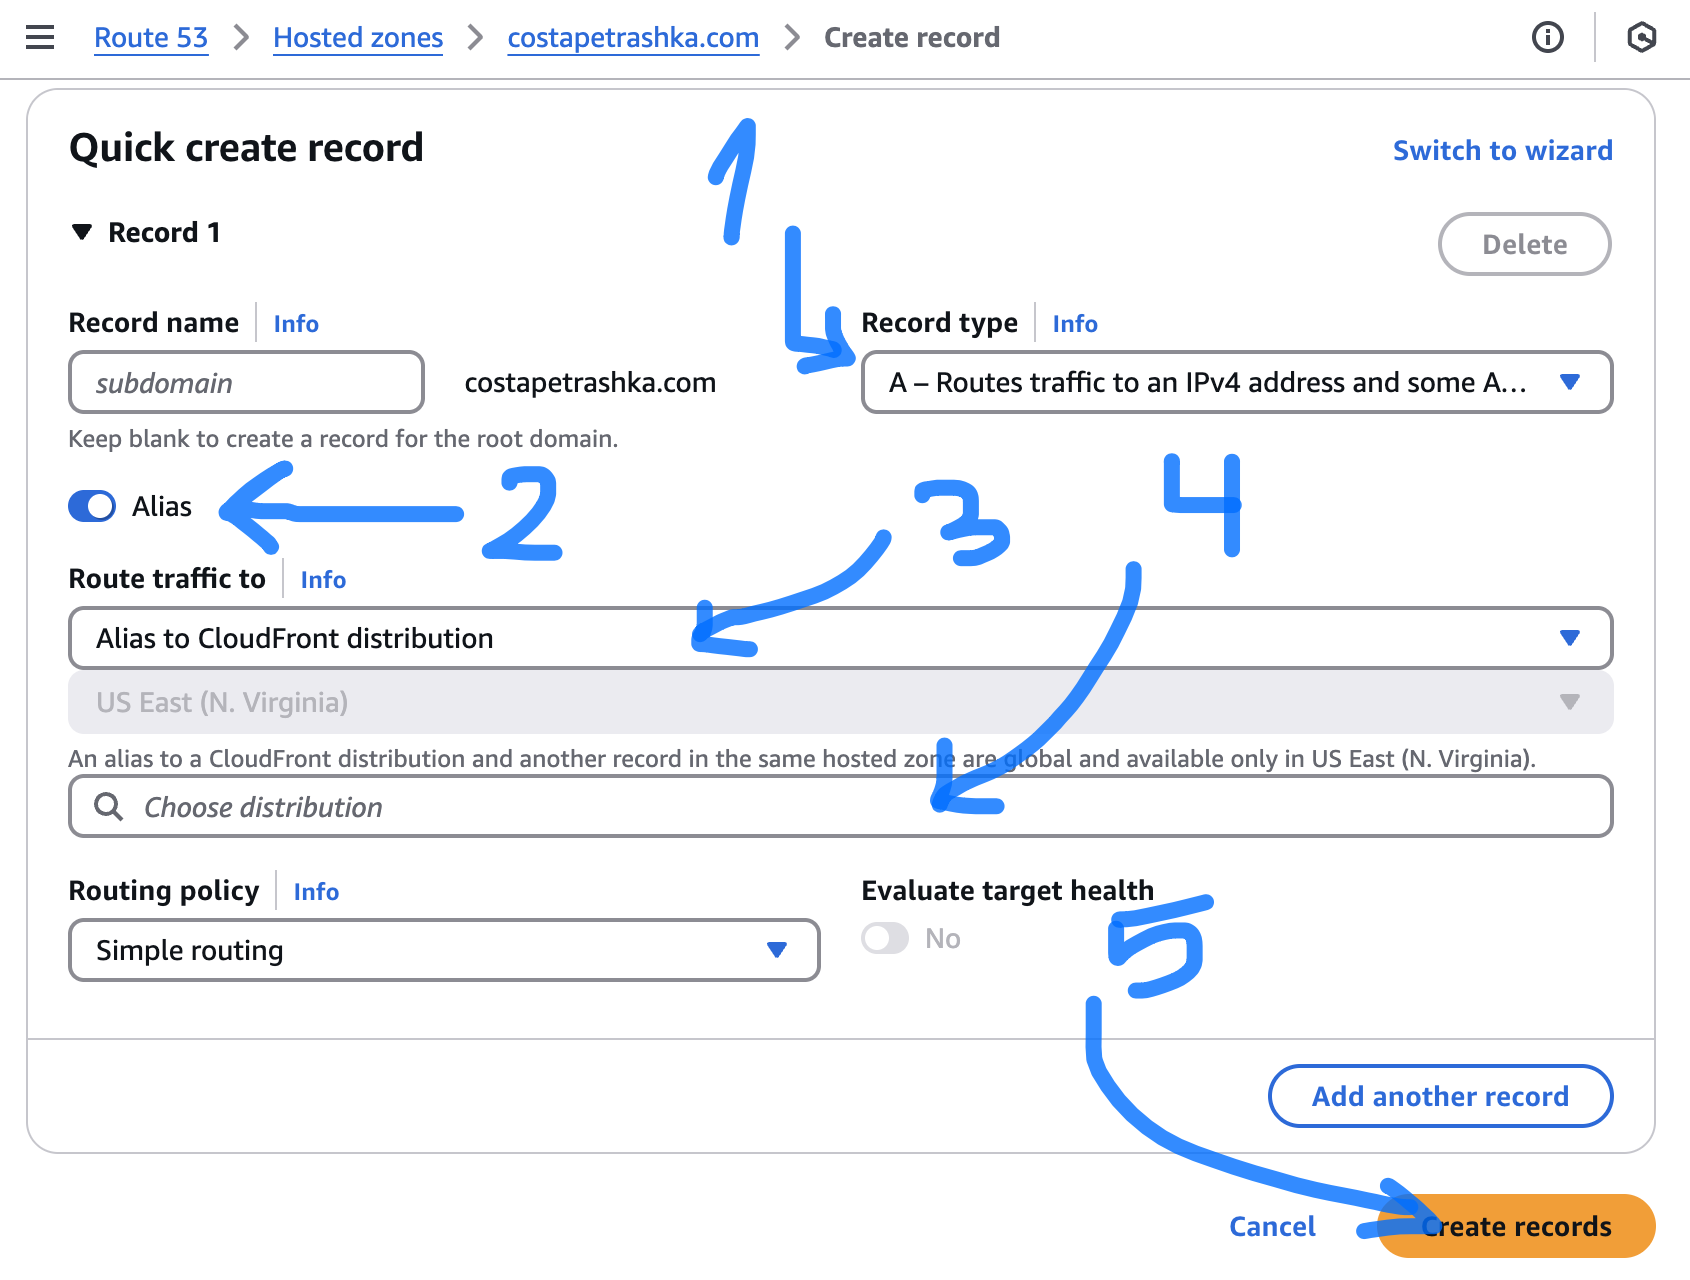
6. Connect CloudFront to Route 53
Set up the necessary DNS entries, either directly to the CloudFront distribution in Route 53 or as a CNAME in whatever DNS provider is hosting the zone for your domain.
-
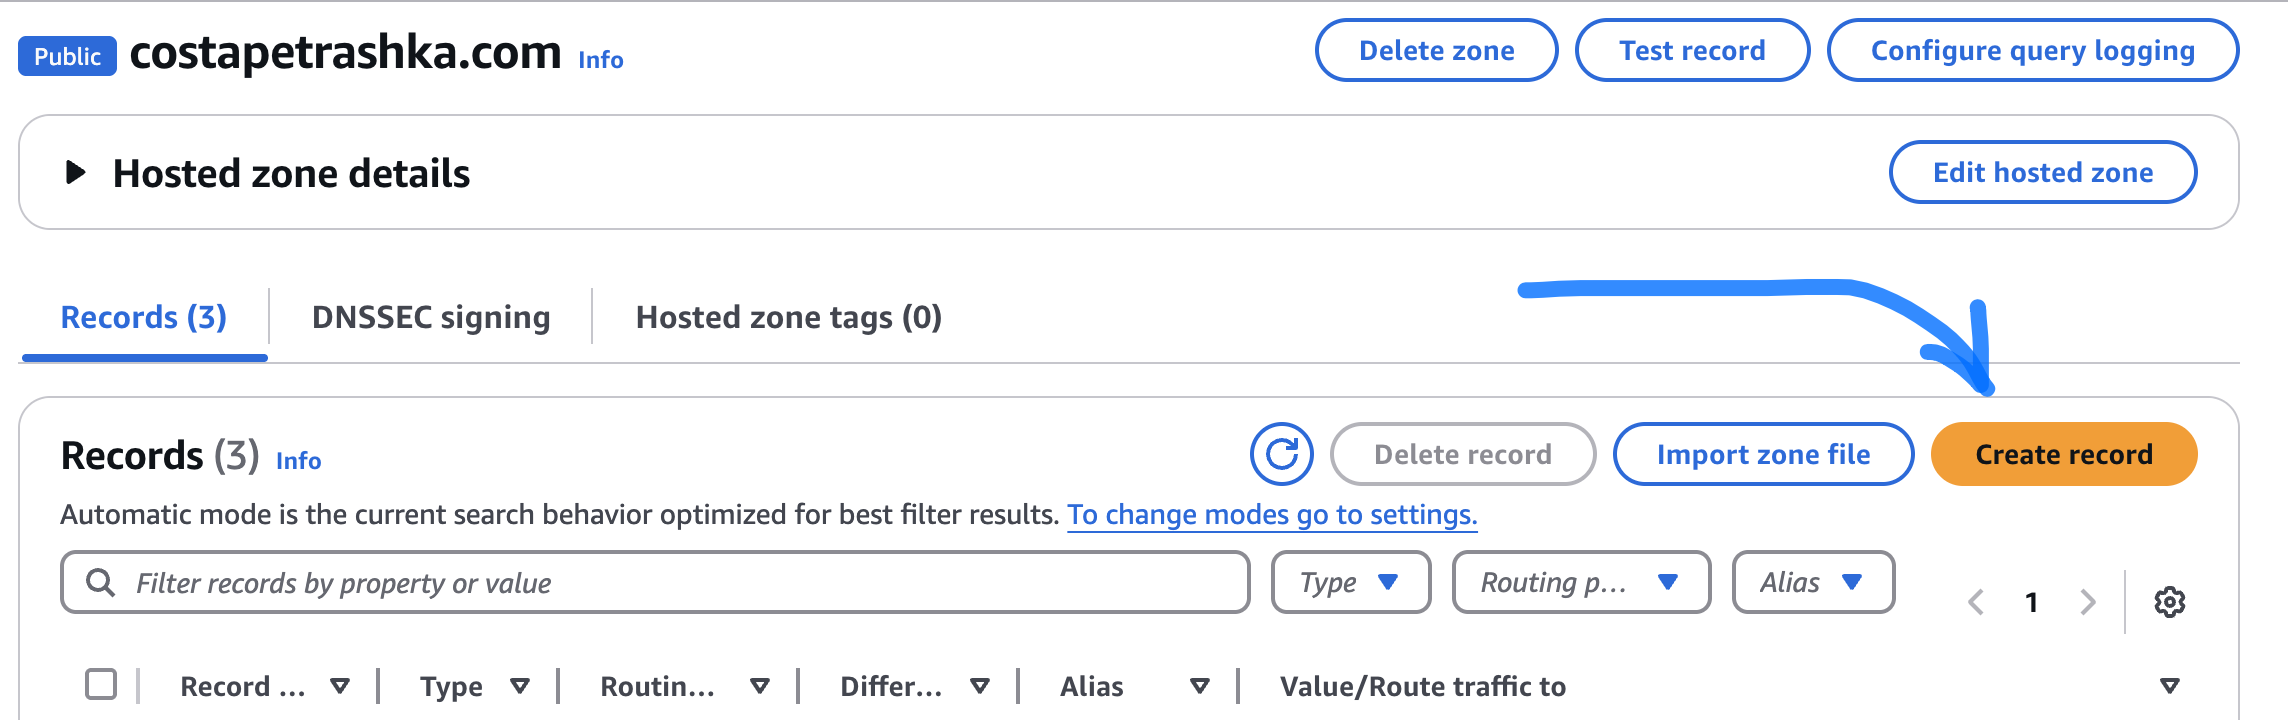
Go to Route 53 and press Create record
-
After that choose Alias - > Cloudfront -> Your distribution